Placeholder Content Image

5 time-saving laundry tricks

<p>Doing laundry seems to be a never-ending chore. These simple tricks will make your life a little easier next time you do your washing.</p> <p><strong>1. Use lingerie bag for socks</strong></p> <p>Losing and then pairing mismatched socks makes laundry a bigger task than what it already is. Make sock washing easier by washing all your socks together in a lingerie bag. Gone will be the days that you find odd socks stuck in a pair of jeans or hiding in the washing machine.</p> <p><strong>2. Make detergent yourself</strong></p> <p>If you are ever concerned with the chemicals and ingredients in laundry detergent then you can opt for a natural detergent by making it yourself. To make homemade detergent, stir together one bar shaved bar soap, 1 cup of borax and one cup of washing soda. You can put the ingredients in a food processor or blender to create a fine powder. Simply store in a sealed container.</p> <p><strong>3. Make dryer sheets yourself</strong></p> <p>To make budget-friendly dryer sheets, you will need old scraps of cloth, essential oils and white vinegar. Mix one cup of white vinegar with roughly 25 drops of essential oils. Fold the cloth scraps and place them into a jar or storage container. Moisten the cloth with vinegar mixture but do not saturate them. Then use one cloth per dryer load to freshen laundry.</p> <p><strong>4. Use chalk to remove grease stains</strong></p> <p>If you have any chalk handy it can pre-treat grease stains. The chalk powder helps absorb the grease and will leave your clothes looking clean again.</p> <p><strong>5. Use baby shampoo to unshrink clothes</strong></p> <p>If you ever accidentally shrink one of your favourite items of clothes then reach for baby shampoo. Baby shampoo can stretch clothing and restore it to its former shape and size.</p> <p><em>Image credits: Getty Images</em></p>

Home & Garden

Placeholder Content Image

Pilot praised for revealing simple trick to cope with severe turbulence

<p>A pilot has shared his simple "water bottle trick" for anxious passengers to cope with turbulence in the air. </p> <p>Sydney-sider Jimmy Nicholson and his wife Holly recently shared a video of their bumpy flight with "horrible" turbulence that went viral on TikTok, after Jimmy shared his tips on how to cope with the anxiety. </p> <p>In the video, his wife was filmed hyperventilating, and at one point even pulled out a sick bag. The couple held hands as other passengers were heard screaming during the wild turbulence. </p> <p>“So we’re at the back of the plane so it’s worse here," Jimmy, who looked more calm than most passengers, said in the clip. </p> <p>“It’s not comfortable, probably some of the worst I’ve been in. Could be widespread storms so pilots just have to pick their path of least resistance and go through it so nothing to worry about.</p> <p>“Planes are built to withstand way worse. Not fun evidently, but completely fine.</p> <p>“I’m a pilot and actually fly this aircraft type (Airbus). Here’s why you have nothing to worry about.”</p> <p>For those terrified of turbulence, Jimmy suggested looking at the water inside an upside down water bottle. </p> <p>“Water bottle trick: The water isn’t moving much, is it?” he said.</p> <p> </p> <div class="embed" style="box-sizing: inherit; margin: 0px; padding: 0px; border: 0px; font-size: 16px; vertical-align: baseline; outline: none !important;"><iframe class="embedly-embed" style="box-sizing: inherit; margin: 0px; padding: 0px; border: 0px; font-size: 16px; vertical-align: baseline; outline: none !important; width: 603px; max-width: 100%;" title="tiktok embed" src="https://cdn.embedly.com/widgets/media.html?src=https%3A%2F%2Fwww.tiktok.com%2Fembed%2Fv2%2F7272043055874723073&amp;display_name=tiktok&amp;url=https%3A%2F%2Fwww.tiktok.com%2F%40jimmy_nicholson%2Fvideo%2F7272043055874723073%3F_r%3D1%26_t%3D8fD3XY38vB4&amp;image=https%3A%2F%2Fp16-sign-sg.tiktokcdn.com%2Fobj%2Ftos-alisg-p-0037%2FoM6n8BXn3ENnHuqtQEMUDb4jUe6fkgAi0BORgF%3Fx-expires%3D1693292400%26x-signature%3DrKGHV84h94FBzJrVu4RsUV8upK0%253D&amp;key=5b465a7e134d4f09b4e6901220de11f0&amp;type=text%2Fhtml&amp;schema=tiktok" width="340" height="700" frameborder="0" scrolling="no" allowfullscreen="allowfullscreen"></iframe></div> <p>He added that if the water appears to be moving gently in the water bottle, then the turbulence feels worse than it actually is. </p> <p>“Remind yourself it’s completely normal. The plane isn’t going to fall out of the sky,” he said.</p> <p>The pilot suggested turning on the air conditioning and looking out the window to calm your nerves. </p> <p>The video ended with passengers clapping after they rode out the turbulence, and the TikTok has been viewed over 2.4 million times, with many thanking Jimmy for his tips. </p> <p>“This helps so much! We need more pilots to post about the stuff the rest of us think will be the last minutes of our lives,” one wrote.</p> <p>“Thank you for explaining this. I’m an anxious flyer and seeing you talk about it has helped," commented another. </p> <p>“Thank you for this video. I saved it and going to watch it in my flights when I am frightened," wrote a third. </p> <p><em>Images: TikTok/ Instagram</em></p>

Travel Trouble

Placeholder Content Image

Try these tricks the next time small talk becomes unbearable

<p><strong>Real talk</strong></p> <p>Bonnie Todd runs 250 food tours a year – a job that puts her in contact with hundreds of new people every week. Food-lovers come to her for an introduction to local tastes and flavours. And a large part of what keeps her guests satisfied, and willing to recommend her business to others, is the personal connection she makes with them.</p> <p>“I try to get past the small talk and general recommendations pretty quickly,” says the 42-year-old. “It’s all about finding common ground within the group, and trying to make it a unique experience. So I’m always asking questions. And when I find that spark of commonality, I dig into it.”</p> <p>The practice is key to Todd’s approach because, unlike many tours, hers require people to sit together sharing food and drinks. When groups don’t gel, or never get past the “Where are you from?” stage, what should be a stimulating experience can turn into an awkward and draining couple of hours.</p> <p>We’ve all been there: trapped in a superficial exchange that bounces aimlessly from one meaningless topic to the next. It can make you never want to step foot into another party again. But don’t despair: there are some tactics that can help you turn boring small talk into an energising conversation.</p> <p><strong>Put yourself out there </strong></p> <p>Improv performer Natalie Metcalfe’s job is to keep a scene going – to create an exchange that’s compelling for both the people involved and for a live audience.</p> <p>“In improv, it’s all about offers,” she says, referring to the act of bringing new information into the dialogue. Through these back-and-forths, the relationship between the characters is established and that kicks things off. “It’s the same thing in a regular conversation. You’re constantly making offers to see if you and the person you’re talking to can connect.”</p> <p>An offer in real life can be as simple as complimenting someone on what they’re wearing, and asking them about it. You can try sharing something you recently learned, or an interest you’ve just developed, creating an opening for the other person to ask you a question. Or, you can describe a relatable problem you’re having – a noisy neighbour, a plant that’s not thriving, a question of etiquette – as a prompt for advice, or some cooperative troubleshooting.</p> <p>One of Todd’s go-to approaches is to share a personal story of her own that relates to the other person’s experience. “If I find out someone has been to a place I’ve travelled, I’ll tell them an anecdote about what I did there, and ask them to share their own story.”</p> <p>Of course, putting yourself out there can sometimes feel scary, even when you’re not on stage. But Misha Glouberman, who runs a course called How to Talk to People About Things, says taking that leap pays off.  “A lot of the time in conversations, there’s something we’re interested in, but there’s a part of us that doesn’t want to take the risk of revealing it because we think it might be boring or inappropriate.” But the result of following those internal cues of fascination has the opposite effect, he says. “People like learning about other people’s interests. So be more open about yours, and a little more curious about theirs as well.”</p> <p><strong>Be inquisitive and listen </strong></p> <p>Radio interviewer Terry Gross once said, that the only icebreaker you’ll ever need is, “Tell me about yourself.” Instead of asking a pointed question like “What do you do?”, this type of open question gives someone a chance to offer up a topic they might be more excited to discuss.</p> <p>“Talking about yourself is really pleasurable. It activates the exact same hormone in your brain as sex,” says Celeste Headlee, the author of We Need to Talk: How to Have Conversations That Matter. “Another tip you can take from neuroscience is that if you start a conversation by allowing someone to feel good about themselves, then they’ll be more open to new ideas and new thoughts for the rest of the conversation.”</p> <p>Of course, upping your curiosity quotient needs to be paired with actually paying attention to the answer. “Listening is hard for homo sapiens. It’s not something our species does easily,” says Headlee.</p> <p>Indeed, people often start crafting their response before the person they’re talking to has finished speaking. Or they’ll get distracted, thinking about an email they forgot to answer. Since a great conversation is by definition a two-way street, these habits have the effect of ending one before it can even begin. Intentional listening, on the other hand, is a key to an empathetic, engaging dialogue.</p> <p><strong>Use disagreement wisely </strong></p> <p>According to Headlee, one of the other things that gets in the way of a meaningful conversation is the all-too-human need to be right. “A really common mistake is the ‘well, actually’ response,” she says, referring to that deflating moment when a person lets their need to correct you about a small detail you’ve just mentioned get in the way of continuing a story. “Google has made this worse,” she adds. “You’ll say, I went to the hotel with the largest patio in the entire world, and while you’re still talking, the person is already on their phone looking to see if that’s actually true.”</p> <p>But while trivial arguments can be an obstacle to a good conversation, Glouberman points out that differences of opinion can also help propel a chat into richer territory. “We assume that the world is just as we see it, that we see it directly,” he says. “But of course all of psychology and neuroscience tells us that’s not the case.”</p> <p>A respectful disagreement, if the other party is open to it, is a great opportunity to enrich your view of the world by understanding someone else’s.</p> <p><em>Image credits: Getty Images</em></p> <p><em>This article originally appeared on <a href="https://www.readersdigest.co.nz/uncategorized/try-these-tricks-the-next-time-small-talk-becomes-unbearable" target="_blank" rel="noopener">Reader's Digest</a>. </em></p>

Relationships

Placeholder Content Image

6 essential tips and tricks for your kitchen

<p>Whether you’re friends with a professional chef, watch every cooking show on which you can lay your eyeballs, or your mum was some kind of wise, kitchen magician, it seems that everyone has their very own secret cooking tips to make life easier, or at least less stressful, in the kitchen. We’ve gathered a few of our own just in case no one’s ever shared them with you until now.</p> <p><strong>1. Where there’s smoke…</strong></p> <p>People often think that setting off the smoke detectors is a sign of an unskilled cook, but, as long as you’re not burning anything, don’t be afraid of a little smoke or vapour. Some foods just need that extra heat to reach their flavourful best, and that’s okay. Just make sure you’re safe.</p> <p><strong>2. Dressing in a jar</strong></p> <p>If you’re not a fan of off-the-shelf salad dressings, the natural solution to lifeless salads is making your own dressing. The annoying part of that is mixing such small quantities of ingredients in a bowl can be ridiculously fiddly. Next time, pop those ingredients into an old (clean) jam jar and give it a good shake. Not only will it be easier, you’re guaranteed to combine everything much better than you could with any whisk.</p> <p><strong>3. When life gives you lemons</strong></p> <p>If you’re using lemons or limes when you’re cooking, save the leftover skins once you’ve juiced them. You can use them to disinfect your chopping board without any chemicals. Plus, the smell is pretty fantastic.</p> <p><strong>4. Perfect pasta</strong></p> <p>When cooking pasta, the best tip we can offer is to remove the noodles from their water just before they’re completely cooked. Then, with just a little bit of the starchy water, pour them into the same saucepan in which you’re cooking your sauce. Cooking the pasta with the sauce for at least a minute or two will help infuse the flavours. If you’re not already cooking your pasta this way, you soon will be.</p> <p><strong>5. You crack me up</strong></p> <p>If you find that you’re constantly picking tiny shards of eggshell out of your dishes before you cook, you might want to adjust the way you crack your eggs. Rapping the eggs onto a sharp/thin edge of a bowl of counter causes these small fractures. If you crack the egg onto a flat surface, you’ll avoid a lot of the fuss. Plus, it’s really easy to do that cool one-handed egg crack this way. Bonus!</p> <p><strong>6. No-stick cheese</strong></p> <p>There’s a reason buying pre-grated cheese is so ridiculously expensive – grating cheese yourself is one of the most loathed kitchen tasks around. But if you spray your grater with a little cooking spray before you start, it will help the cheese glide over a little easier. Plus it’s going to make cleaning a dream.</p> <p><span style="font-family: -apple-system, BlinkMacSystemFont, 'Segoe UI', Roboto, Oxygen, Ubuntu, Cantarell, 'Open Sans', 'Helvetica Neue', sans-serif;"><em>Images: Getty</em>                                                                </span></p>

Home Hints & Tips

Placeholder Content Image

6 amazing things you didn’t know your phone could do

<p>Nobody ever bought a shiny brand new smartphone and then studiously read the manual! Maybe it’s just us but unfortunately it means we’ve missed out on the secret but amazing things your smartphone can do. You don't even need to download any apps to do these nifty tricks. Here are some of our favourite ones that we’re sure will impress next time you need them.</p> <p><strong>Taking a screenshot</strong></p> <p>A great trick if you want to share a hilarious text, picture or Facebook post with friends or family.</p> <p><span style="text-decoration: underline;">iPhones</span> – SImultaneously press (but not hold) the Home button and the Sleep/Wake button (top right of phone). You should hear a shutter click as well as see a white flash. The screenshot will be located on your Camera Roll in photos.</p> <p><span style="text-decoration: underline;">Androids</span> - Hold down the Power button and Volume -down button at the same time for a couple of seconds. Or hold down power button and home icon at the same time. If this doesn’t work, you can hold down the power button until the option to take a screen shot appears.</p> <p><strong>Taking multiple photos at once</strong></p> <p>A life-saver if you are taking pictures of wriggling kids or people who blink exactly when you take the picture (there’s always someone in the group isn’t there?). This little trick lets you take multiple pictures with a single click.</p> <p><span style="text-decoration: underline;">iPhones</span> – In the camera app, rather than tapping capture button to take photos, hold it down. Your camera will automatically take multiple picture (around 10 pictures a second) until you release the button.</p> <p><span style="text-decoration: underline;">Androids</span> - In the camera app, tap the gear icon and turn on “Burst Shot” settings. Return to your camera app and hold onto the capture button. Or go to camera, select mode, auto and click on burst shots.</p> <p><strong>Change text size</strong></p> <p>If the tiny text on the smartphone is giving you a headache, there’s an easily solution. You can change the settings so all text on your phone is large.</p> <p><span style="text-decoration: underline;">iPhones</span> - Go to Settings > General > Accessibility and turn on “Larger Text.”</p> <p><span style="text-decoration: underline;">Androids</span> - Go to Settings > Accessibility > Vision and tap font size and set it to Large.</p> <p><strong>Read to you</strong></p> <p>It really seems like technology can do anything, including programming your smartphone to read to you.</p> <p><span style="text-decoration: underline;">iPhones</span> - Go to Settings > General > Accessibility and turn on “Speak Selection.” You can even customise the voice that speaks to you choosing from a wide range of accent including Australian. To get your phone to speak to you, highlight text (double-tapping or tapping and holding on to it) and then tap Speak button in the pop-up menu.</p> <p><strong>Turn off music automatically</strong></p> <p>If you are one to listen to music or audiobooks as you drift off to sleep, you can use a timer to turn it off so it doesn’t drain your battery life.  </p> <p><span style="text-decoration: underline;">iPhones</span> - Go to the Clock app and tap on "Timer," then "When Timer Ends." From here, scroll all the way down to the bottom of the screen and select "Stop Playing."</p> <p><span style="text-decoration: underline;">Androids</span> - Open the music player and go to Settings. Look for "Music auto off" and set it to however long you want the music to play.</p> <p><strong>Search text messages</strong></p> <p>Searching for messages is handy if you are looking for a specific text containing details like addresses, emails or dates.</p> <p><span style="text-decoration: underline;">iPhones</span> – When you open your Message app, scroll up and a search bar should pop up at the top of all your messages. Type in the phrase you are looking for.</p> <p><span style="text-decoration: underline;">Androids</span> – Open the Message app and then tap on the Menu. A few options will appear and click search. </p> <p><em>Image: Shutterstock</em></p>

Technology

Placeholder Content Image

8 hair washing tips to transform your tresses this winter

<p dir="ltr">One curly-haired influencer has shared her secrets to happy and healthy hair with the world, promising small changes that “make a big impact” over all. </p> <p dir="ltr">In a video posted to her social media accounts, Jennie - who goes by ‘The Curly Carr’ online - stressed the importance of learning to properly cleanse hair, and the benefits it can have on the likes of “hair health, definition, shine, volume, and growth”.</p> <p dir="ltr">As she explained, she too used to be guilty of just hopping in the shower, quickly slathering her hair in shampoo, and rinsing to get the job done. </p> <p dir="ltr">“I had no clue what I was doing!” she confessed. “Seems like such a small thing, but makes a big impact.”</p> <p dir="ltr">But luckily for Jennie - and anyone else fortunate enough to hear her top tips - she did learn what she should be doing, working her way towards the luscious locks many dream of, before setting out on her mission to help others on their hair journey.</p> <p dir="ltr">And in just eight simple steps, that won’t cost you a fortune in new products, Jennie has shared her findings, as well as some helpful advice to help with the transition from quickfire wash to thorough and effective hair care. </p> <p dir="ltr">Step one was straightforward enough, with Jennie noting that it’s important to “make sure your hair is thoroughly wet all the way through”. According to some experts, a good wetting with warm water helps hair to open up, allowing for a better conditioning process later on. </p> <p dir="ltr">Step two called for emulsifying shampoo in your hands before it goes anywhere near your head. Essentially, rub it between your hands until it froths up - once you’ve got the suds, it’s time to move on to the hair. </p> <p dir="ltr">Step three instructed hair hopefuls to massage their heads. But, as Jennie advised, do it “with the pads of your fingers, don’t use your nails”. Be gentle up there, just like you would be to your face. </p> <p dir="ltr">Step four followed directly on from three, with the instruction to message “all around your head” and to make sure everything got a good clean. Jennie noted that it may take anywhere from 3-5 minutes, but it would all be worth it to have your scalp cleansed. </p> <p dir="ltr">Step five had Jennie calling for the lengths of hair to be remembered, as “it’s not just your scalp getting buildup with products, dirt, and oil”.</p> <p dir="ltr">Step six was to use a <a href="https://www.priceline.com.au/product/189080/lady-jayne-restorative-scalp-brush-silicon-bristles-1ea">shampoo brush/scalp brush</a>, particularly for those who - like Jennie herself - tended to go a few days between washes, or did a pre-shampoo process. </p> <p dir="ltr">Step seven was another one many would be familiar with, as Jennie noted the importance of making sure all shampoo had been thoroughly washed out “before moving on to conditioner!” </p> <p dir="ltr">And last but not least, step eight instructed viewers to listen to their scalps, as they’d know best when it was time for the next all-important wash. </p> <p dir="ltr">“Your hair can always be refreshed,” Jennie explained, “but if your scalp is dry, itchy, and you can see buildup, it’s time to wash!”</p> <blockquote class="instagram-media" style="background: #FFF; border: 0; border-radius: 3px; box-shadow: 0 0 1px 0 rgba(0,0,0,0.5),0 1px 10px 0 rgba(0,0,0,0.15); margin: 1px; max-width: 540px; min-width: 326px; padding: 0; width: calc(100% - 2px);" data-instgrm-captioned="" data-instgrm-permalink="https://www.instagram.com/reel/CnmLyOjKDC1/?utm_source=ig_embed&amp;utm_campaign=loading" data-instgrm-version="14"> <div style="padding: 16px;"> <div style="display: flex; flex-direction: row; align-items: center;"> <div style="background-color: #f4f4f4; border-radius: 50%; flex-grow: 0; height: 40px; margin-right: 14px; width: 40px;"> </div> <div style="display: flex; flex-direction: column; flex-grow: 1; justify-content: center;"> <div style="background-color: #f4f4f4; border-radius: 4px; flex-grow: 0; height: 14px; margin-bottom: 6px; width: 100px;"> </div> <div style="background-color: #f4f4f4; border-radius: 4px; flex-grow: 0; height: 14px; width: 60px;"> </div> </div> </div> <div style="padding: 19% 0;"> </div> <div style="display: block; height: 50px; margin: 0 auto 12px; width: 50px;"> </div> <div style="padding-top: 8px;"> <div style="color: #3897f0; font-family: Arial,sans-serif; font-size: 14px; font-style: normal; font-weight: 550; line-height: 18px;">View this post on Instagram</div> </div> <div style="padding: 12.5% 0;"> </div> <div style="display: flex; flex-direction: row; margin-bottom: 14px; align-items: center;"> <div> <div style="background-color: #f4f4f4; border-radius: 50%; height: 12.5px; width: 12.5px; transform: translateX(0px) translateY(7px);"> </div> <div style="background-color: #f4f4f4; height: 12.5px; transform: rotate(-45deg) translateX(3px) translateY(1px); width: 12.5px; flex-grow: 0; margin-right: 14px; margin-left: 2px;"> </div> <div style="background-color: #f4f4f4; border-radius: 50%; height: 12.5px; width: 12.5px; transform: translateX(9px) translateY(-18px);"> </div> </div> <div style="margin-left: 8px;"> <div style="background-color: #f4f4f4; border-radius: 50%; flex-grow: 0; height: 20px; width: 20px;"> </div> <div style="width: 0; height: 0; border-top: 2px solid transparent; border-left: 6px solid #f4f4f4; border-bottom: 2px solid transparent; transform: translateX(16px) translateY(-4px) rotate(30deg);"> </div> </div> <div style="margin-left: auto;"> <div style="width: 0px; border-top: 8px solid #F4F4F4; border-right: 8px solid transparent; transform: translateY(16px);"> </div> <div style="background-color: #f4f4f4; flex-grow: 0; height: 12px; width: 16px; transform: translateY(-4px);"> </div> <div style="width: 0; height: 0; border-top: 8px solid #F4F4F4; border-left: 8px solid transparent; transform: translateY(-4px) translateX(8px);"> </div> </div> </div> <div style="display: flex; flex-direction: column; flex-grow: 1; justify-content: center; margin-bottom: 24px;"> <div style="background-color: #f4f4f4; border-radius: 4px; flex-grow: 0; height: 14px; margin-bottom: 6px; width: 224px;"> </div> <div style="background-color: #f4f4f4; border-radius: 4px; flex-grow: 0; height: 14px; width: 144px;"> </div> </div> <p style="color: #c9c8cd; font-family: Arial,sans-serif; font-size: 14px; line-height: 17px; margin-bottom: 0; margin-top: 8px; overflow: hidden; padding: 8px 0 7px; text-align: center; text-overflow: ellipsis; white-space: nowrap;"><a style="color: #c9c8cd; font-family: Arial,sans-serif; font-size: 14px; font-style: normal; font-weight: normal; line-height: 17px; text-decoration: none;" href="https://www.instagram.com/reel/CnmLyOjKDC1/?utm_source=ig_embed&amp;utm_campaign=loading" target="_blank" rel="noopener">A post shared by Jennie 🌷 | Curly Hair Care and Simple Hairstyle Tutorials (@the.curly.carr)</a></p> </div> </blockquote> <p dir="ltr"><em>Images: TikTok</em></p>

Beauty & Style

Placeholder Content Image

7 tricks to get more out of your next cruise

<p>There’s nothing quite as relaxing as a luxury cruise, and while there’s probably no way to have that bad a time on a cruise (unless you’re prone to sea sickness or afraid of deck chairs) there are ways in which you can considerably enhance your experience.</p> <p>We’ve put together a list containing seven tips and tricks for getting more out of your cruise so you truly have a cruising experience to write home about.</p> <p><strong>1. Get to your port of departure a night before</strong></p> <p>Did you know hundreds of cruisers actually miss the boat entirely because of delayed flights, traffic and bad weather? And many more get their cruise off to a bad start as a result of the fact that they’ve only managed to board by the skin of their teeth.</p> <p>Do yourself a pre-cruise favour and arrive at your port of departure a day early.</p> <p><strong>2. Don't be afraid to splurge and say Bon Voyage in style</strong></p> <p>A luxury cruise is no time to be a frugal Fred Flintstone. Get your cruise off to a great start (and look like a real hero in front of your spouse) by splashing out on champagne and roses. There's no better moment to make a toast to new adventures!</p> <p><strong>3. Avoid the pool area during busy times</strong></p> <p>This might seem strange, but when have mega cruise ships ever had enough poolside chairs to accommodate everyone? You’d be much better served by scoping around to find a place to call your own and avoiding the mass of humanity who are sitting around the pool sun-burning in tandem.</p> <p><strong>4. Eat on your own terms</strong></p> <p>Sure, it’s nice to meet and greet strangers at group dining times, but sometimes it’s also equally as nice to break up the routine. So don’t be afraid to order room service breakfast and have a picnic on your balcony or pay an extra little bit to dine at your cruise’s speciality restaurant.</p> <p><strong>5. Stay on the ship</strong></p> <p>Of course this doesn’t apply to all port calls (if you’re visiting Venice you have to see Venice) but these forced events are generally rushed, contrived and not all they’re hyped up to be. And by staying aboard the ship you have all the ships facilities (with the exception of maybe the ship throttle and steering wheel) to yourself!</p> <p><strong>6. Get a spa pass</strong></p> <p>A lot of cruises are offering these nowadays and for something as simple as $25 a day you can soak, steam and be massaged in luxury. There’s nothing like getting a luxury massage as you cruise through the pacific ocean, relieving your aches and pains.</p> <p><strong>7. Go to the disco</strong></p> <p>Even if dancing isn’t your thing, you owe it to yourself to bust a move at the ships disco. You’ll definitely meet some interesting characters there and chances are you’ll be more than willing to return to the floor the next night. It’s a vicious, funky cycle!</p> <p><em>Images: Getty</em></p>

Cruising

Placeholder Content Image

16 ways to kill garden weeds

<h2>How to kill garden weeds with ease</h2> <p>Looking for a safe way to keep weeds and grass from growing in the cracks of your paved patios, driveways and footpaths? Here are a few tricks that will keep weeds at bay.</p> <h2>Baking soda</h2> <p>Sprinkle handfuls of baking soda onto the concrete and simply sweep it into the cracks. The added sodium will make it much less hospitable to dandelions and their friends.</p> <h2>Bleach</h2> <p>Pour a bit of undiluted bleach over them. After a day or two, you can simply pull them out and the bleach will keep them from coming back. Just be careful not to get bleach on the grass or plants bordering the path.</p> <h2>Boiling water</h2> <p>Put on the kettle and pour boiling water over cracks where weeds grow. This will kill the stubborn weeds.</p> <h2>Vinegar</h2> <p>Are dandelions a problem? Make them disappear for good by spraying them with full-strength white or apple cider vinegar. Early in the season, give each plant a single spritz of vinegar in its midsection or in the middle of the flower before the plants go to seed. Aim another shot near the stem at ground level so the vinegar can soak down to the roots. Keep an eye on the weather, though; if it rains the next day, you’ll need to give the weeds another spraying.</p> <h2>Borax</h2> <p>Sprinkle borax in the crevices where you’ve seen weeds grow in the past. It will kill them off before they have a chance to take root. When applied around the foundation of your home, it will also keep ants and other six-legged intruders from entering your house. But be very careful when applying borax – it is toxic to plants.</p> <h2>Bottles</h2> <p>When using herbicides to kill weeds in your garden, you have to be careful not to also spray and kill surrounding plants. To isolate the weed you want to kill, cut a 2-litre soft drink bottle in half and place the top half over the weed you want to spray. Then direct your pump’s spraying wand through the regular opening in the top of the bottle and blast away. After the spray settles down, pick up the bottle and move on to your next target. Always wear goggles and gloves when spraying chemicals in the garden.</p> <h2>Corn gluten meal</h2> <p>This non-toxic herbicide kills weed seedlings within just a few days of application. An organic byproduct of the corn milling process, corn gluten meal is made up of 10 per cent nitrogen. It works by inhibiting weed roots from forming, according to <a href="https://www.thespruce.com/corn-gluten-herbicide-careful-timing-2152947">TheSpruce.com</a>. But the timing is important: You have to apply corn gluten meal to soil before weeds emerge.</p> <h2>Landscape fabric</h2> <p>This all-natural method takes longer to decompose than mulch. But don’t buy just any type. “Hold the fabric up to the light and make sure the pores in the fabric are small enough to prevent weeds from growing through the barrier,” recommends the Family Handyman. “Also, a good-quality landscape fabric is one you can’t tear or stretch easily. It should feel stiff, not flimsy and limp.</p> <h2>Carpet scraps</h2> <p>Alternatively, if you have scraps of carpet lying around, us these to suppress weeds in you garden. Place upside down in your garden or along your garden path and cover with bark mulch or straw. Use also around your vegetable garden.</p> <h2>Newspaper</h2> <p>Like carpet, laying down newspaper will block sunlight, prevent oxygen from reaching the soil and smother weeds that are already growing. Put down 10 layers of newspapers on the soil, wet it with water to hold it in place and then cover with mulch.</p> <h2>Salt</h2> <p>Bring a solution of about 1 cup salt in 2 cups water to a boil. Pour directly on the weeds in the cracks of your path to kill them. Another equally effective method is to spread salt directly onto the weeds or unwanted grass that come up between bricks. Wait for rain to rinse it off.</p> <h2>Shower curtains</h2> <p>Those old shower curtains will also come in handy next time you do any landscaping with gravel or bark chips. Just place the shower curtain under the mulching material to prevent annoying weeds from poking through. While weeds can be pests, bugs can be beneficial.</p> <h2>Spray bottles</h2> <p>Fill a spray bottle with undiluted white vinegar to get rid of the weeds and grass poking out of the cracks in your concrete, as well as ants and other insects. Be careful not to spray it on your plants though, as the high acidity could kill them.</p> <h2>Vodka</h2> <p>For a quick and easy weed killer, mix 30mL of vodka, a few drops of dishwashing liquid and 2 cups water in a spray bottle. Spray it on the weed leaves until the mixture runs off. Apply it at midday on a sunny day to weeds growing in direct sunlight, because the alcohol breaks down the waxy cuticle covering on leaves, leaving them susceptible to dehydration in sunlight. It won’t work in shade.</p> <h2>Trowel</h2> <div id="page6"> <div id="test"> <p>Looking for an extremely hands-on approach to how to kill weeds? A trowel is an easy way to dig them up, particularly if they’re big weeds.</p> <h2>WD-40</h2> <p>Don’t let pesky prickly weeds ruin your garden. Just spray some WD-40 on them and they’ll wither and die.</p> </div> </div> <p><em>Image credit: Shutterstock</em></p> <p><em>This article originally appeared on <a href="https://www.readersdigest.co.nz/gardeningtips/16-ways-to-kill-garden-weeds" target="_blank" rel="noopener">Reader's Digest</a>. </em></p>

Home & Garden

Placeholder Content Image

The trick to removing a stain from any surface

<p>When it comes to household tasks there’s one in particular that makes everyone shudder. I’m referring, of course, to cleaning. No one likes to clean and no matter how often you clean your home it’s never fun.</p> <p>But that doesn’t mean it has to be difficult. The following guide will teach you the best way to tackle stains on any household surface.</p> <p><strong>Carpet stains</strong></p> <p>While some people may opt to hire a carpet cleaner, there are actually very few carpet stains you can’t clean yourself. Add a splash of vinegar to the stain and dampen a cleaning cloth. Gently pat at the stain and rinse the cloth at regular intervals. Repeat this process until the stain lifts.</p> <p>Then sprinkle bi-carb on the damp area and work it into the carpet a little. Once the bi-carb dries, use a vacuum to clean it up.</p> <p>If you like, sprinkle some lemon juice to freshen things up. If you’ve done everything right you’ll be left with clean, fresh smelling carpets.</p> <p><strong>Tile and hardwood flooring</strong></p> <p>Add vinegar to a bucket of water and use it to mop up as much of the stain as possible. Apply more vinegar directly to the stain. Combine with bi-carb and wait a few minutes for a chemical reaction. You will notice some bubbling and frothing.</p> <p>Gently scrub at any marks with a brush until clean. Finally, use clean water to either wipe or mop the area again to finish things off.</p> <p><strong>Bathroom surfaces</strong></p> <p>Bathrooms are tough to clean but this mixture makes mould and mildew a thing of the past. Combine 1½ cups bi-carb soda, one cup of liquid soap, ½ cup of water and ¼ cup of vinegar together in a bucket.</p> <p>Use this to clean shower screens, remove mildew and scrub tile grout. For maximum effect use a coarse sponge or hard bristled brush.</p> <p><strong>Kitchen benchtops</strong></p> <p>Most modern kitchen benchtops will not stain due to the materials they are made from. However, anyone with a kitchen knows they still require constant cleaning in order to stay hygienic.</p> <p>Use a cleaning cloth and vinegar to keep benchtops sanitised. You can use bi-carb anytime if something more abrasive is needed. This could be useful for things like dried cereal or food stains. If the vinegar smell becomes too much, deodorise with lemon juice.</p> <p><strong>Concrete and garage floors</strong></p> <p>The same ingredients can be used to make a powerful degreaser. This will clean any oil or scuff stains from concrete and other robust surfaces. Simply add one cup of vinegar to a few teaspoons of bi-carb, along with a drop or two of liquid soap. Add this to a spray bottle and fill to the top with warm water. Shake to combine the ingredients.</p> <p>Use the spray bottle to apply the mixture to any stubborn stain you wish to remove. For the best results, apply liberally and wait several minutes before scrubbing with a hard bristled brush. If you have one available you might also wish to use a pressure washer.</p> <p><em>Written by Michael Brooke. Republished with permission of <a href="http://www.domain.com.au" target="_blank" rel="noopener"><strong><span style="text-decoration: underline;">Domain.com.au</span></strong></a>.</em></p> <p><em>Image credits: Getty Images</em></p>

Home Hints & Tips

Placeholder Content Image

How to clean your glasses the right way

<p dir="ltr">Is there anything worse than dirty glasses? We already can’t see properly without them! Many people believe glass cleaner is the best way to clean your eyeglasses, but we’re here to tell you it’s not.</p> <p dir="ltr"><strong>Clean your eyeglasses with soap:</strong></p> <p dir="ltr">Cleaning glasses with soap is scratch-free, cheap and easy. You need to wash them gently, but it’s a method that will not harm your eyewear.</p> <ol> <li dir="ltr" role="presentation">Rinse your glasses in warm water</li> <li dir="ltr" role="presentation">Add a drop of gentle dish soap to the lenses</li> <li dir="ltr" role="presentation">Smear the soap on both sides, including the earpieces</li> <li dir="ltr" role="presentation">Rinse off the soap</li> <li dir="ltr" role="presentation">Dry them with a lint-free or microfibre cloth</li> </ol> <p dir="ltr" role="presentation"><strong>Things to avoid:</strong></p> <ol> <li dir="ltr" role="presentation">Paper towels</li> <li dir="ltr" role="presentation">Tissues</li> <li dir="ltr" role="presentation">Shirttails</li> <li dir="ltr" role="presentation">Acetone</li> <li dir="ltr" role="presentation">Windex</li> </ol> <p dir="ltr">Although Windex and other glass cleaners may seem like the best way, the chemicals in these formulas have the potential to remove coatings you’ve paid to put on your lenses. The safest, best way to give your glasses that brand-spanking-new shine is to use basic dish soap!</p> <p dir="ltr"><em>Image credit: Shutterstock</em></p>

Home Hints & Tips

Placeholder Content Image

Time to focus: The accidental photographer’s guide to taking great travel shots

<p><em>Interested in photography? Travelling overseas? Freelance travel writer, photographer and content queen Carolyne Jasinski shares some of the best tips to get great shots wherever you are.</em></p> <p>What makes the perfect photograph? Is it a complicated combination of aperture settings to determine depth of field or shutter priority to choose between blurred movement or keeping everything in focus?</p> <p>No. It’s much simpler than that.</p> <p>The perfect photo is the one you like best. But there is a knack to getting those pics.</p> <p>I am a travel journalist, so words are my main focus. But most stories need good photos to get published, so I have had to learn how to take photos for publication.</p> <p>I am the accidental photographer.</p> <p>I have taken courses, sat in on workshops and even been on a photography-based expedition to the Arctic.</p> <p>I have travelled with landscape photographers, wildlife snappers, photojournalists who cover war zones, news “togs” and those who shoot food and fashion. Each has taught me something different.</p> <p>So how do we get those great shots? Here are some simple tips to help budding photographers – and you might be surprised at how many of these you are already doing.</p> <p dir="ltr"><strong>1. Don't knock the automatic setting</strong></p> <p dir="ltr">Digital cameras have made life easy. If you’re happy with what your camera produces on automatic, stick to it. That’s what you’ve paid for.</p> <p dir="ltr">But, if you want to learn the “how and why” of photography, play with all those extra dials. </p> <p dir="ltr">Take a course or better still, go on a photography weekend and learn from the professionals. It’s really interesting knowing how to be in control.</p> <p dir="ltr"><strong>2. Horizontal and vertical</strong></p> <p dir="ltr">Take horizontal and vertical shots of the same subject — you’ll be surprised at how different the photos turn out.</p> <p dir="ltr">It’s especially important if you are going to try and sell them to a magazine or online site. More than once I’ve heard designers despair because they have the perfect image to go alongside a story, but it’s oriented the wrong way. Give them both and double your chances of getting published.</p> <p dir="ltr">If you want to make it to the cover of a magazine, take a vertical (portrait) photo.</p> <p dir="ltr">Horizontal (wide) shots are best for inside pages, especially a spread. </p> <p dir="ltr"><strong>3. Rule of thirds</strong></p> <p dir="ltr">Divide your frame into thirds — both horizontally and vertically.</p> <p dir="ltr">Place the focus of your pic on one of those third lines rather than in the middle of your frame.</p> <p dir="ltr"><strong>4. Change your angle... Move</strong></p> <p dir="ltr">A photo that looks ordinary from front-on can be much more interesting from a different angle. The trick is to move. Get in closer — unless it’s a wild animal. If there are big teeth or horns involved, just zoom in with your camera.</p> <p dir="ltr">Try getting down on the ground or taking the shot from a high point</p> <p dir="ltr"><strong>5. People</strong></p> <p dir="ltr">For me, travel is all about people.  Photos always look better with people in them as they add perspective and “life”. </p> <p dir="ltr">Take snapshots to help remember the people you meet.</p> <p dir="ltr">But be kind. Lift chins and cover cleavages. Be aware of what shooting from down low does to your friends — no-one will thank you for highlighting their double chin or looking up their nostrils. </p> <p dir="ltr"><strong>6. Zoom in</strong></p> <p dir="ltr">Get up close and personal with your zoom lens. It can be a powerful tool for capturing the nitty gritty.</p> <p dir="ltr"><strong>7. Shapes & patterns</strong></p> <p dir="ltr">Look for interesting shapes. Natural patterns make naturally great shots.</p> <p dir="ltr"><strong>8. Diagonals and leading lines</strong></p> <p dir="ltr">Diagonals create visual flow and add the illusion of movement and dimension to photos.</p> <p dir="ltr">No matter where they start in a frame, they can pull you in and act as a leading line to where you want the focal point to be.</p> <p dir="ltr">Not all leading lines have to be diagonals … a curving river, for example can lead you to a spectacular backdrop.</p> <p dir="ltr"><strong>9. Work with the light</strong></p> <p dir="ltr">The general rule when it comes to working with light is: Don’t shoot into the light. Unless it works. Sunsets are a great example.</p> <p dir="ltr">But when shooting sunsets, always turn around and look at what the light is doing behind you. Sometimes it’s even prettier than what’s in front.</p> <p dir="ltr">Bright sunny days will often give the most ordinary pics. Early morning, shadows and evening light offer the best contrasts.</p> <p dir="ltr"><strong>10. Contrast</strong></p> <p dir="ltr">If you see contrast, capture it — look for light and dark, colour and mono. It might be a bright green shoot coming out of a blackened tree trunk, or a pop of colour in a sea of grey. They always make for interesting shots.</p> <p dir="ltr"><strong>11. Framing</strong></p> <p dir="ltr">Use natural elements to frame your shot. Same goes for man-made structures — they often make perfect boundaries for your pics.</p> <p dir="ltr">Natural props make your job easy.</p> <p><strong>12. Location markers</strong></p> <p dir="ltr">Signs or souvenirs (with names) can help you remember where you are.</p> <p dir="ltr">Pics of information boards are great memory joggers and the best notes when trying to write your journal or travel story later.</p> <p><strong>13. Aim for something different</strong></p> <p dir="ltr">Shoot the obvious but aim for more and shoot that, too.</p> <p dir="ltr"><strong>14. Ask permission when shooting people</strong></p> <p dir="ltr">Cultural cringe — if you are in a foreign country, always ask for permission to take a photo. It’s common courtesy. And before including children, always ask their parents and explain what you are doing. If you want to publish those photos, you’ll need written permission.</p> <p dir="ltr"><strong>15. Surprise element</strong></p> <p dir="ltr">Try to capture people (you know) when they are unaware that you are there. Candid shots are often the best.</p> <p dir="ltr"><strong>16. Capture the moment</strong></p> <p dir="ltr">It’s all about being in the right place at the right time. If you see a great photo opportunity, don’t think, “I’ll come back and get that later.” Later might be too late.</p> <p dir="ltr"><strong>17. Reflections</strong></p> <p dir="ltr">Use reflections to reflect on the moment.</p> <p dir="ltr"><strong>18. Mood</strong></p> <p dir="ltr">Let photos reflect how you feel.</p> <p dir="ltr"><strong>19. Aperture and shutter priority</strong></p> <p dir="ltr">It had to get technical somewhere.</p> <p dir="ltr">As you increase the size of your aperture (increasing the hole you shoot through) you let more light into your image sensor.  That means you need a shorter shutter speed. </p> <p dir="ltr">If you increase the length of time your shutter is open, you decrease the aperture needed to get a well exposed shot.</p> <p dir="ltr">Aperture and Shutter Priority modes are semi-automatic on most cameras. If you set one, your camera will set the other. Or it will have a dial or meter to show where the perfect setting is.</p> <p dir="ltr"><strong>20. Depth of field</strong></p> <p dir="ltr">Aperture Priority — ‘A’ or ‘AV’ on your camera program dial.</p> <p dir="ltr">When would you use it? To get “depth of field”.</p> <p dir="ltr">If you want a shallow depth of field — an object in front in focus but the background blurred — choose a large aperture (f/1.4) and let the camera choose an appropriate shutter speed.</p> <p dir="ltr">If you want an image with everything in focus, choose a smaller aperture (f/22) and let the camera choose an appropriate shutter speed (generally a longer one).</p> <p dir="ltr">Or you can use Portrait mode on your iPhone.</p> <p dir="ltr"><strong>21. Movement</strong></p> <p dir="ltr">Shutter Priority — ‘TV’ or ‘S’ on your camera dial.</p> <p dir="ltr">When would you use it? To capture movement.</p> <p dir="ltr">If you want to photograph a moving object but want to freeze it so there is no motion blur, choose a fast shutter speed (1/2000) and let the camera decide how much light there is available and set an appropriate aperture. </p> <p dir="ltr">If you want to photograph the object but include some motion blur, choose a slower shutter speed (1/125) and let the camera choose a smaller aperture as a result.</p> <p dir="ltr">The slower the shutter speed, the more need for a tripod.</p> <p><strong>22. High resolution photos</strong></p> <p dir="ltr">What does high resolution mean? It means a photo with a lot of information — showing a lot of detail. For publication in magazines, you need a photo with at least 300 dpi (dots per inch) that means your photos need to be at least 2MB in size (but the more, the better).</p> <p><em>All images: Carolyne Jasinski</em></p>

Travel Tips

Placeholder Content Image

Cheap tricks for the cruise enthused

<p>Anyone who's been on a cruise has some advice to share - from how to <a href="https://www.oversixty.co.nz/travel/cruising/9-ways-to-stay-safe-on-a-cruise-ship" target="_blank" rel="noopener">stay safe</a> on board, which <a href="https://www.oversixty.co.nz/travel/cruising/words-you-need-to-know-before-going-on-a-cruise" target="_blank" rel="noopener">terms</a> to listen out for, and how to <a href="https://www.oversixty.co.nz/travel/cruising/7-things-making-you-sick-on-your-cruise" target="_blank" rel="noopener">avoid coming down</a> with anything that might throw a spanner - or in this case, a paddle - in the holiday works. </p> <p>But if there’s one thing most people can agree on, it’s that they’d like to save a few cents wherever they can when planning to embark on their luxury cruise getaway. Whether it be accommodation, transport, entertainment, or food causing the concern, experts have advice prepped and ready for all prospective travellers.</p> <ul> <li><strong>Booking </strong></li> </ul> <p>Typically, people approach booking their holiday in one of two ways: planning as far as possible in advance, or leaving it to ‘the last minute’. </p> <p>As <em>Cruise Guru</em>’s Andrew Zhang claims, cruises can be sold out up to one year before the ship sets sail. And while many will offer customers “early-bird” promotions, those who prefer to wait a little while longer don’t have to fear missing out, with late-minute deals regularly available. The only downside being that options will be limited, with their speedy counterparts already having snagged the spots. </p> <p>Research is important, so if it’s possible, try to be flexible with your travel times, and shop around until you find the best deal for your needs. </p> <ul> <li><strong>Companions </strong></li> </ul> <p>Just like with renting - where more bedrooms typically means more ‘value’ for your money - it can be cheaper to travel with a larger party. Always check for potential discounts when travelling with more than two people, be that friends or family, as many cruise liners will offer money off for each guest above three staying in the same stateroom, or some sort of similarly enticing deal.  </p> <ul> <li><strong>Cabins </strong></li> </ul> <p>Cruise ships are not immune to the ‘class’ system that plagues airline travel, boasting the same first, business, and economy agenda. </p> <p>Although prices and deals will vary depending on the company, generally a ship’s inside cabins come out cheapest, and considered an excellent option if your only need for the room is to get some shut eye, and to be gentle on the budget. </p> <p>However, for those with their eyes on a more lavish experience in a balcony room or an entire suite, <em>My Cruise</em>’s Michael Middleton has some words of advice. </p> <p>“Some cruise lines are now offering an upgrade bid system,” he says for those dreaming of an upgrade, but urges customers to remember that like most things, the best items on offer will be snatched up first.  </p> <p>Other experts suggest looking out for loyalty programs, as they often come with benefits - from spa treatments to general freebies - and savings, even if they won’t necessarily provide an upgrade. </p> <ul> <li><strong>The Loop </strong></li> </ul> <p>On a similar note to loyalty rewards, the experts suggest signing up to a variety of cruising newsletters. This way, you’ll be alerted and first in line when a deal is announced, and a number of cruise companies even offer exclusive deals to eager subscribers. </p> <p><em>Images: Getty </em></p>

Cruising

Placeholder Content Image

12 tricks to save every last drop of beauty products

<p>It’s easy to end up spending a fortune on beauty products. All too often you can find yourself caught short when your favourite product runs out just when you need it. So to save some of your hard-earned cash, try some of our tips to make your products go the extra mile.</p> <p>1. If you have a favourite foundation that’s only got a bit left in the bottle, add some Sorbolene cream, shake well, and turn it into a tinted moisturiser.</p> <p>2. Don’t throw away plastic tubes of product such as eye cream, foundation or lip balm. Cut off the ends and scrape out the remaining product to get a couple more uses out of it.</p> <p>3. Remove the hard top layer of your powder compact (caused by the oils in your skin) by placing a strip of sticky tape over it. When you lift it off, the top layer will come off too leaving you with a like-new compact.</p> <p>4. Dropped and broken an eye shadow, blush or powder foundation? You can fix this by pouring a small amount of rubbing alcohol into the container until the product becomes a paste. Use your finger to press the product back together. Once the alcohol evaporates you will have a solid product once again.</p> <p>5. Bring your dried out mascara back to life with a few drops of saline solution. Pop the lid back on, shake well, and use again.</p> <p>6. Another mascara tip for when you’re running low is to place the container in a cup of warm water before use. This will loosen the product from the insides of the tube. Remember though that mascara should only be kept for about three months, so toss it if it is past its best.</p> <p>7. Broken your favourite lipstick? You can melt it with a lighter and join it back together. Wind up the lipstick that is still in the tube and use the flame from a lighter to gently melt it a little. Then do the same with the matching end of the broken piece. Push the two pieces together and smooth out the sides with your finger. Allow it to dry and it should be as good as new.</p> <p>8. If your powder blush has crumbled, turn it into a lip colour by adding a blob of Vaseline. Mix with a spoon and store in a small tub with a lid.</p> <p>9. Use a crumbled eye shadow to make your own nail polish. Simply add the fine powder to a clear nail polish, shake well and use. Works well with glitter-based eye shadow too for a sparkly look.</p> <p>10. If you have old nail polish that you can’t get open, place the handle in a mug of warm water. This should loosen it enough to be able to open.</p> <p>11. Turn your last few drops of perfume into a scented moisturiser by adding it to a tub of lotion.</p> <p>12. Keep your make-up brushes in good condition by wetting with warm water and then rubbing in some olive oil. Rinse under warm water to remove excess product, and then rub in some shampoo to get the last of the make-up out. Leave to dry before storing. </p> <p><em>Image credits: Getty Images</em></p>

Beauty & Style

Placeholder Content Image

13 budget beauty tricks

<p>There are plenty of beauty tips that are not worth listening to. Who actually throws out their mascara after three months? Do you really need to buy enough make-up brushes to rival an artist's palette? And will putting strawberries all over your teeth really give you a smile to rival Lucille Ball’s? It’s all a bit too hard.</p> <p>Use these simple, DIY tricks to save your time, money and effort.</p> <ol> <li>To avoid lipstick on your teeth, after applying your lippie stick your finger in your mouth and pull it out. This way your finger will take the excess product, not your teeth. </li> <li>Concoct your own plumping lip venom (and save yourself $30) by adding a drop of cinnamon or peppermint oil to your lip colour.</li> <li>Vaseline costs you pocket change and has to be the most hard-working beauty products out there. Apply to lashes before bed to make them grow longer and thicker over time, use it to tame unruly eyebrows, apply to pulse points before spritzing your perfume to make the scent last longer, combine with sea salt to make a scrub and mix with lipstick to make a subtle cream blush.</li> <li>Don't have a curler? Give yourself groovy, long-lasting waves by flat-ironing your braids with your hair straightener. Avoid making the braids too tight lest you like the crimped look.</li> <li>Don't listen to Sally Hansen when she says you need to buy cuticle cream. Eye cream applied to your nail beds serves the same purpose.</li> <li>While towels cause static and friction, drying your hair with a cotton T-shirt eliminates the frizz factor completely.</li> <li>A light dusting of baby powder between coats of mascara creates fullness you have not dared to even dream of.</li> <li>There's nothing worse than blotches of dry shampoo that could be mistaken for dandruff. Always apply it the night before, not the morning of, to prevent product build-up.</li> <li>Want to give your lipstick long-wear power? After applying, hold a tissue over your lips and lightly dust with translucent powder to set the colour.</li> <li>Got a spot of foundation on your white shirt? A touch of shaving cream on a damp cloth should clear it right up.</li> <li>You can reduce hair static and fly-aways by slicking it with a dryer sheet.</li> <li>There's no tougher wait than the time it takes your conditioner to work or your manicure to dry. Cut that drying time in half by dunking your nails in a bowl of cold water for two minutes shortly after painting.</li> <li>Had a messy experience with leaky products in your suitcase? Hasn't everyone? Just unscrew the caps, place a layer of cling film over the top and screw them back to prevent any liquid from ruining your trip.</li> </ol> <p><em>Written by Kathleen Lee Joe. First appeared on <a href="http://Stuff.co.nz" target="_blank" rel="noopener">Stuff.co.nz.</a></em></p> <p><em>Image credits: Getty Images</em></p>

Beauty & Style

Placeholder Content Image

13 stylist-approved tricks for having the shiniest hair ever

<p><strong>Rinse with cold water</strong></p> <p>Perhaps you’ve heard that cold water helps constrict pores. Well, it has a similar effect on your hair. According to stylist, Stefani Padilla, cold water seals and smooths the hair cuticle, locking in moisture and adding shine. After using shampoo and conditioner, finish with a blast of cold water.</p> <p><strong>Give gloss a try (at the salon)</strong></p> <p>At your salon appointment, ask your stylist for a gloss treatment. “A clear gloss, with a little gold colour in it, delivers the ultimate shine,” says colourist, Will Francis. “I like to leave it on for at least ten minutes.” The way the light reflects off hair post-gloss makes it look super lustrous.</p> <p><strong>Minimise heat styling</strong></p> <p>Heat styling can wear away hair’s cuticles, so it becomes dry, frizzy and breakage-prone. Padilla advises giving your hairdryer and flat iron a rest in favour of air-drying, at least a day or two a week.</p> <p><strong>Invest in an ionic hairdryer</strong></p> <p>Of course, there will be occasions when you want a bouncy blow-dry. So it’s important to invest in the right type of tool – specifically an ionic blow-dryer, which dries the hair faster than alternatives and helps reduce static. One major blow-dry mistake that may be sabotaging your style? Ignoring the nozzle attachment. It’s there for a reason and that’s namely to smooth strands and enhance shine.</p> <p><strong>Blow-dry like a pro</strong></p> <p>Remember, it’s not just about the tool, but how you use it. Be sure to hold the hairdryer a few centimetres away from your head to moderate heat damage. “Always blow dry from root to end – in the direction of the cuticle,” says celebrity colourist, Michael Canalé. “Keep the brush moving while doing so. The continuous, fluid motion smooths and flattens the cuticle, resulting in shiny hair.”</p> <p><strong>Opt for protective products</strong></p> <p>When it comes to heat-styling, you already know that protecting your tresses is a must. But what you might not realise is that pollution and UV rays also damage hair. The right formula can shield against heat and environmental damage.  A nourishing oil “is great because it protects hair from thermal stress, UV, colour fade and environmental aggressors. I always use it on my clients,” says Francis.</p> <p><strong>Slather on some oil</strong></p> <p>Restore radiance with a nourishing oil. Use it as a weekly treatment (massage into scalp and strands) or smooth a few drops daily on the ends to enhance hydration and sheen. Padilla recommends using a lightweight oil, like a nutrient-rich jojoba oil infused with shine-boosting rosemary, protective Ayahuasca plant essence, and moisturising vitamin E.</p> <p><strong>Up your omega intake</strong></p> <p>Certain nutrients are shown to improve hair health – chief among them omega-3 and omega-6 fatty acids. “Your body needs these to produce lustrous locks, from the inside out,” says Padilla. Load up on fish, like mackerel and sardines. Don’t love seafood? Consider a fish oil capsule. Other omega-rich foods include walnuts, flaxseeds (and oil), avocado and tofu.</p> <p><strong>Shampoo less frequently </strong></p> <p>You’ve certainly heard this before, but it bears repeating… stylists are begging you to stop shampooing your hair every day. Washing less actually preserves shine by allowing natural oils to do their job, according to Francis. Try to limit cleansing to two or three times a week, and make sure you know how to properly wash your hair.</p> <p><strong>Use a clarifying shampoo - in moderation</strong></p> <p>Clarifying hair is important to avoid build up, which can deplete the shine. Want squeaky clean strands? Consider adding a clarifying shampoo into your rotation once a month (but not weekly as it can dry out your tresses). When it comes to picking the right formula, Padilla recommends steering clear of chemicals and sulphates, which can strip the hair as well as open the cuticle. “The key to shine is to keep cuticle closed and protected,” she says.</p> <p><strong>DIY an apple cider vinegar rinse</strong></p> <p>Another in-shower, shine-booster is a weekly apple cider vinegar rinse – it’s basically a DIY version of a clarifying shampoo. Combine two tablespoons apple cider vinegar with one cup water. After shampooing, saturate strands. Rinse thoroughly, and follow with conditioner on the ends only. “The citric acid in the apple cider vinegar dissolves root build up and any other follicle-clogging bacteria that dulls the hair,” explains Canalé.</p> <p><strong>Try a weekly treatment</strong></p> <p>Topical hydration is so important to maintain hair’s natural gleam. “I suggest my clients use a treatment or mask once a week, as a self-care ritual to heal and preserve hair health,” says Padilla. To use, simply massage into the scalp and pull through dry hair. For maximum hydration, keep it on overnight and wash out in the morning. The natural oils in these formulas lock in moisture and make hair shiny.</p> <p><strong>Brush daily</strong></p> <p>Channel your inner Marcia Brady. Well, not quite. While you don’t need to brush your strands 100 times, Padilla does suggest daily brushing. “Brushing pulls natural oils from the scalp down into the hair, which acts as a natural moisturiser,” she says. Be sure to choose a brush with natural or boar bristles, which are a gentler and less damaging alternative to metal and synthetic.</p> <p><em>Image credits: Getty Images</em></p> <p><em>This article originally appeared on <a href="https://www.readersdigest.co.nz/healthsmart/beauty/13-stylist-approved-tricks-for-having-the-shiniest-hair-ever?pages=1" target="_blank" rel="noopener">Reader's Digest</a>. </em></p>

Beauty & Style

Placeholder Content Image

Six tricks to combat air travel sickness

<p dir="ltr">If there’s one thing that's guaranteed to ruin a travel experience, it’s unexpected motion sickness, as there's nothing worse than feeling ill and not being able to escape until you land.</p> <p dir="ltr">Experts at Travel Lens have shared their holy grail tips for people to do before and during their flights to help reduce air sickness travel symptoms. </p> <p dir="ltr">Airsickness, otherwise known as motion sickness, is caused when the body receives conflicting information from the eyes, ears and muscles in regards to movement.</p> <p dir="ltr">This confuses the brain, which can cause nausea, fatigue and dizziness.</p> <p dir="ltr">"Air sickness is very common and with plenty of holidays still to come this year, it's important that people can enjoy them fully without the added stress of feeling ill on the plane," a spokesperson told <a href="https://travel.nine.com.au/latest/travel-advice-tricks-to-combat-airsickness-on-flights-expert/91e42ab8-ae9b-4b5a-a0f2-88525ee38886#1">9Honey</a>.</p> <p dir="ltr">"For some people, sickness may be a persistent problem when travelling, but there are certain things that can be implemented to help ease any symptoms.”</p> <p dir="ltr">"Whilst on the plane it's important to stay as calm as possible and by making small adjustments you can reduce the effects of airsickness."</p> <p dir="ltr"><strong>Select your seat mindfully</strong></p> <p dir="ltr">Your position on a plane has a drastic effect on how much movement you can expect throughout your journey. </p> <p dir="ltr">Typically the middle, the wing and closer to the front of the plane are the best places to sit as this is where the journey feels most stable. </p> <p dir="ltr">Try to avoid the back of the plane as seats further back can be subject to more turbulence.</p> <p dir="ltr"><strong>Put the book and screens down</strong></p> <p dir="ltr">While reading or watching is a great way to pass the time on a flight, focusing on these forms of entertainment can only exacerbate the feeling of motion sickness. </p> <p dir="ltr">The best thing to do instead of reading or watching something is to try to relax and focus on breathing.</p> <p dir="ltr"><strong>Avoid alcohol</strong></p> <p dir="ltr">Many people are inclined to indulge in an alcoholic drink on a plane, however the effects of drinking while travelling are often less than desirable. </p> <p dir="ltr">Alcohol can dehydrate the body quickly and this can exacerbate symptoms, so it may be best to opt for a soda. </p> <p dir="ltr">Wait until symptoms have completely subsided before you consider having a drink or until you land.</p> <p dir="ltr"><strong>Use mint and ginger</strong></p> <p dir="ltr">Some studies have suggested consuming ginger before heading off on a flight can help to stop feelings of nausea. </p> <p dir="ltr">Whether it's taken as a supplement, in raw form or even as a can of ginger beer, it's definitely worth a try.</p> <p dir="ltr">The same can be said for peppermint, so taking a packet of breath mints in your carry-on is a must. </p> <p dir="ltr"><strong>Choose your food wisely</strong></p> <p dir="ltr">While plane food is always a bit of a gamble, it's a good idea to eat before boarding. </p> <p dir="ltr">Steer clear of greasy and spicy foods as these can unsettle an already nervous stomach.</p> <p dir="ltr">And make sure you stay hydrated!</p> <p dir="ltr"><strong>Get comfortable</strong></p> <p dir="ltr">Instead of staying upright for your whole flight, take advantage of a slight recline in your seats (just don’t forget to talk to the person sitting behind you first!)</p> <p dir="ltr">Consider taking a travel pillow to ease the strain on the neck throughout the flight and put any unnecessary items in the overhead storage to ensure the most comfortable environment for dealing with any sickness symptoms.</p> <p dir="ltr">Use the blankets provided and tune out any noise, and focus on deep breathing until you arrive safely at your destination. </p> <p dir="ltr"><em>Image credits: Getty Images</em></p>

Travel Tips

Placeholder Content Image

7 tricks to use less phone data – and lower your phone bill

<p><strong>Turn off background app refresh</strong></p> <p><img src="https://oversixtydev.blob.core.windows.net/media/2022/10/01-background-simple-ways-use-less-data-770.jpg" alt="" width="770" height="514" /></p> <p>When this feature is enabled, your apps are constantly refreshing so that they can show you the most recent content when opened. This includes email synching, weather widgets updating, and feeds refreshing. For the iPhone: Turn off the background app refresh by going to Settings &gt; General &gt; Background App Refresh. For Android: Go to Settings &gt; Data Usage &gt; Restrict app background data. This will allow you to turn the feature off for all apps or you can pick and choose which ones you want to turn off.</p> <p><strong>Disable apps that use a lot of data</strong></p> <p><strong><img src="https://oversixtydev.blob.core.windows.net/media/2022/10/02-disable-simple-ways-use-less-data-770.jpg" alt="" width="770" height="514" /></strong></p> <p>There are certain apps that use more data than others, whether you use them frequently or not. For ones that you don’t use often, turn off cellular data. For the iPhone: Go to Settings &gt; Cellular &gt; then under “Use Cellular Data For” switch certain apps to off.</p> <p><strong>Turn off app updates</strong></p> <p><img src="https://oversixtydev.blob.core.windows.net/media/2022/10/03-updates-simple-ways-use-less-data-770.jpg" alt="" width="770" height="514" /></p> <p>If your apps update automatically your phone will start the download whether you are connected to Wi-Fi or not. To turn this off on an iPhone, go to Settings &gt; iTunes &amp; App Stores &gt; turn off Use Cellular Data. For an Android, go to Settings &gt; under General click Auto-update apps &gt; Auto-update apps over Wi-Fi only. Then, your apps will only update when you are connected to Wi-Fi.</p> <p><strong>Turn off Wi-Fi assist</strong></p> <p><img src="https://oversixtydev.blob.core.windows.net/media/2022/10/04-wifi-simple-ways-use-less-data-770.jpg" alt="" width="770" height="514" /></p> <p>Wi-Fi assist automatically uses your cellular data when the Wi-Fi signal is poor. To disable Wi-Fi assist for an iPhone go to Settings &gt; Cellular &gt; turn off Wi-Fi Assist.</p> <p><strong>Turn off iCloud drive</strong></p> <p><strong><img src="https://oversixtydev.blob.core.windows.net/media/2022/10/05-icloud-simple-ways-use-less-data-770.jpg" alt="" width="770" height="514" /></strong></p> <p>When iCloud is enabled it is constantly moving documents in and out of the cloud. Use less cell phone data by turning iCloud off. To do this on the iPhone got to Settings &gt; iCloud &gt; turn off iCloud Drive.</p> <p><strong>Download music</strong></p> <p><img src="https://oversixtydev.blob.core.windows.net/media/2022/10/06-download-simple-ways-use-less-data-770.jpg" alt="" width="770" height="514" /></p> <p>When you are on the go, streaming music, podcasts, or videos can really eat away at your data. Both the iPhone and Android phones let you restrict these apps to Wi-Fi only. Turning this setting on will force you to download them when connected to a Wi-Fi network and then allow for data free listening on the move.</p> <p><strong>Turn off cellular data completely</strong></p> <p><strong><img src="https://oversixtydev.blob.core.windows.net/media/2022/10/07-turn-simple-ways-use-less-data-770.jpg" alt="" width="770" height="514" /></strong></p> <p>If you know that you are about to reach you data limit or are saving it for the road trip you have coming up, you can simply turn off cellular data. This way, no data will be used, and certain apps will only work if you are connected to a Wi-Fi network.</p> <p><em>Written by M</em><em>organ Cutolo</em><em>. This article first appeared in <a href="https://www.readersdigest.co.nz/culture/7-tricks-to-use-less-phone-data-and-lower-your-phone-bill" target="_blank" rel="noopener">Reader’s Digest</a>. For more of what you love from the world’s best-loved magazine, <a href="http://readersdigest.innovations.co.nz/c/readersdigestemailsubscribe?utm_source=over60&amp;utm_medium=articles&amp;utm_campaign=RDSUB&amp;keycode=WRA87V" target="_blank" rel="noopener">here’s our best subscription offer.</a></em></p> <p><em>Images: </em><em>NICOLE FORNABAIO/RD.COM</em></p>

Technology

Placeholder Content Image

13 tricks to make your makeup last all day, according to pros

<p><strong>Start with a good base</strong></p> <p>Prepping your skin before you apply makeup is key, says makeup artist Lucy Halperin. Start by washing your face so it’s sparkling clean, then apply a quick face mask – Halperin loves REN Flash Rinse 1 Minute Facial, which does its job in a mere 60 seconds – before applying moisturiser. “The skin is plump, it’s moisturised, and it’s even-toned,” she says. “I end up putting on less foundation on than I would.”</p> 
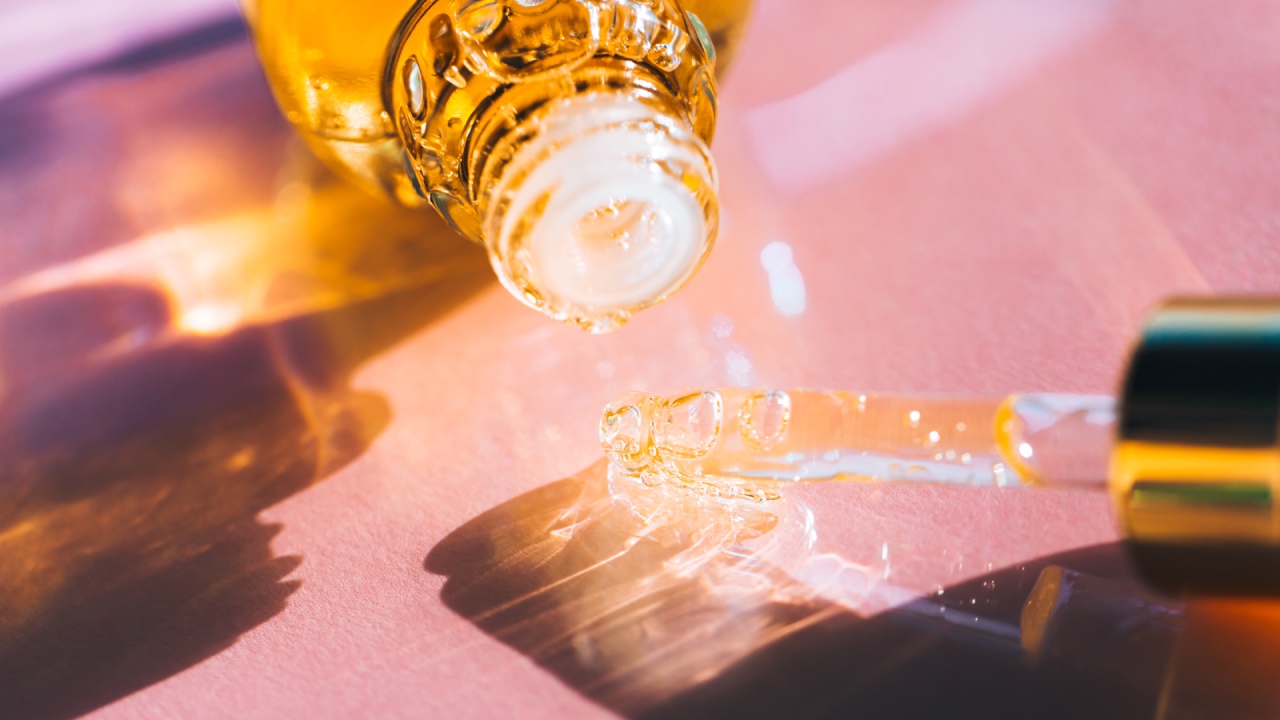
<p><strong>Prime your face</strong></p> <p>Even if you’re using a product with built-in primer like BB cream or tinted moisturiser, starting with a primer will even out the texture of your skin and keep your makeup in place, says Jessica Mae, founder, creative director and makeup artist of WarPaint International Beauty Agency. “Putting primer down first gives an additional layer of something to hold on to,” she says. Pick one to match your skin type: a smoothing one for large pores or fine lines, a mattifying one for oily faces, or a hydrating one for dry skin.</p> <p><strong>Apply with a brush </strong></p> <p>No matter how tempted you are to ignore your brushes and apply foundation with your fingers, this has to be a hands-off process if you want your look to stay. Otherwise the oil from your fingers could transfer to your face, and you’ll use more product than you need, Mae says. “Brushes apply the product evenly, which is the key to longevity of it,” she says. “You aren’t having a thicker layer on one side vs thinner on the other. You’ll have consistency with how the natural oils of your face mix with the product.”</p> <p><strong>Apply in layers</strong></p> <p>Use a light hand to apply powder blushes and bronzers. “Sweep it lightly and layer it on,” Halperin says. “Really blend it in.” Smudging away any harsh lines will make it less obvious if your makeup does start to melt away, she says.</p> <p><strong>Prep your eyes</strong></p> <p>An eye cream will help get rid of dark circles and leave you ready for concealer. Halperin suggests Clinique Even Better Eyes, which has a metal applicator that cools the skin while you apply it. “It really smooths out the skin,” she says. But only apply under your eye – if you put it on your eyelids, the moisture will cause your eyeshadow to slip into your creases, Mae says.</p> <p><strong>Pick the right eye primer</strong></p> <p>You may have heard concealer is a good substitute for eye primer, but Mae says she’s found that isn’t the case. “Concealer is usually creamy in consistency, which is more emollient,” she says. “If you’re using it on the eyelid, it can cause creasing and cause eye shadow to not blend as well.” She says the best results come from a product specifically designed to prime eyes.</p> <p><strong>Choose waterproof eyeliner</strong></p> <p>For a long-lasting liner, opt for a waterproof formula, or use a regular one and go over it with a powder of the same colour to set it, Halperin says. If your eyes start to get moist, put a bit of powder underneath to keep a runny mess from forming, she recommends.</p> <p><strong>Or skip the eyeliner</strong></p> <p>If you’re notorious for runny eyeliner, sometimes the best strategy is to stop working against nature. “If someone’s eye is waterlogged, just skip it,” Halperin says. “Just use waterproof mascara to accentuate the lashes.”</p> <p><strong>Find the right mascara</strong></p> <p>Mascaras tend to be personal, and finding the right formula for you will help you get a lasting wear. People with watery eyes should opt for waterproof, but other than that, it’s trial and error, Mae says. “Get samples sizes from your favourite makeup counter and try a few to find the perfect one that works for you,” she says. To avoid ruining your makeup before you’re even done applying, avoid getting mascara transfer on your eyelids. Mae recommends starting with bottom lashes and let them dry before adding product to the top.</p> 
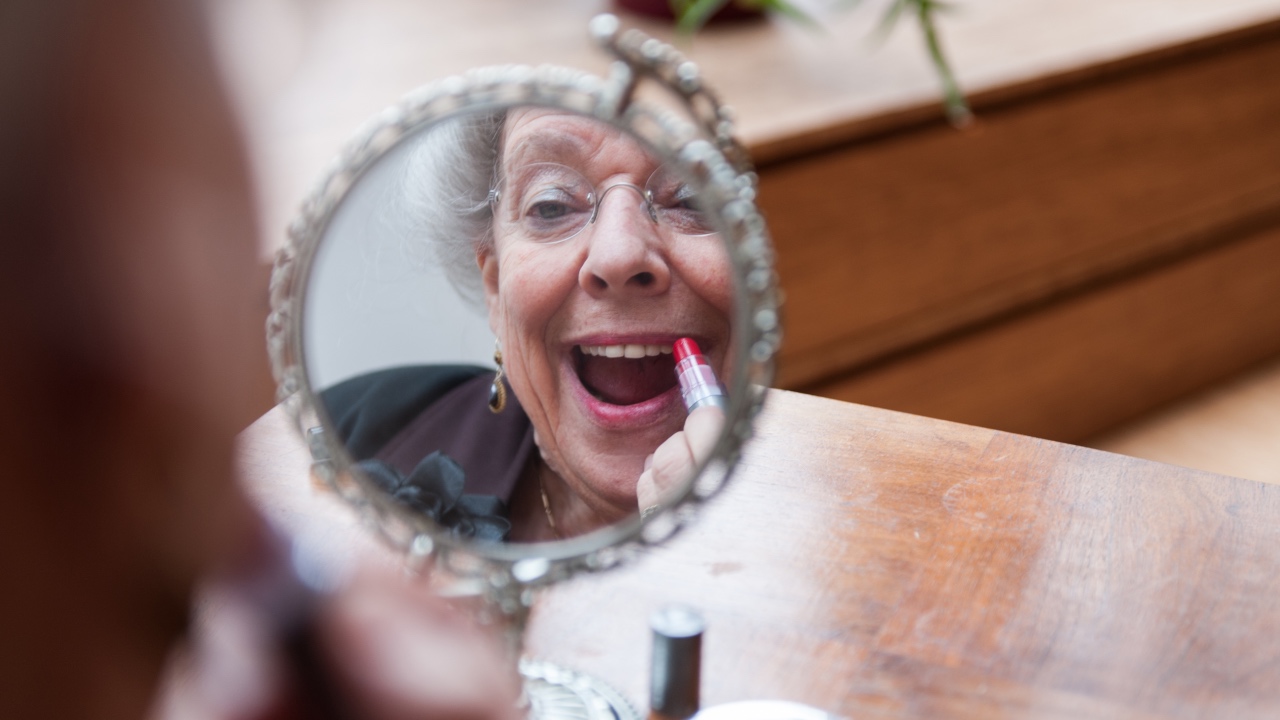
<p><strong>Use lip liner as a base</strong></p> <p>A lot of lipsticks marketed as long-lasting can be drying, Halperin says. Start by filling in your lips with lip liner before applying your lipstick, which will give a waxiness that the lipstick can grip on. “It gives it a longevity because the lips have already been based with that colour,” Halperin says.</p> <p><strong>Lock in your lip colour</strong></p> <p>After applying lipstick, Mae suggests laying a tissue on your lips, then lightly dusting translucent powder over the tissue to seal in the colour. “It acts as a setting powder for lipstick,” she says.</p> <p><strong>Set your makeup</strong></p> <p>Once you’ve finished your look, use a setting spray to lock it in place. Mae likes to use setting spray after applying foundation, then applying powder after it’s dried, finishing the rest of her makeup, and adding with one more layer of setting spray. “As you layer the products, it lasts longer,” she says. “It creates a barrier between the natural skin and the product.” Between skin cream and a moisturising primer, you’ll already have plenty of hydration, so choose a setting spray that doesn’t moisturise – any more could cause your makeup to slip, Mae says.</p> <p><strong>Keep your hands off</strong></p> <p>Don’t let the rest of your day ruin the hard work you put in to your makeup. “Avoiding touching your facing as much as you can will help keep makeup on longer,” Mae says. That means to stop resting your hand on your face and holding your phone against your cheek. If you’re acne-prone, try cleaning bacteria off your work phone and cell phone regularly to prevent breakouts, Mae says.</p> <p><em>Image credits: Getty Images</em></p> <p><em>This article originally appeared on <a href="https://www.readersdigest.co.nz/healthsmart/beauty/13-tricks-to-make-your-makeup-last-all-day-according-to-pros?pages=1" target="_blank" rel="noopener">Reader's Digest</a>. </em></p>

Beauty & Style

Placeholder Content Image

The simple trick to stop panicking about your home while on holiday

<p>Holidays are a sacred time that should be filled with plenty of rest and relaxation while you are away. Unfortunately, there can be times on your holiday when thoughts about how you left your home can creep into your mind and cause panic.</p> <p>Did you lock the doors? Did you turn off the stove? Was the fridge door closed properly?</p> <p>Although these thoughts may be irrational, they are stealing your time of rest and they may even prompt paranoid reactions like asking your family to check on your home.</p> <p>One simple trick has been discovered that will put those annoying doubts to rest while you are away.</p> <p>Nicole Dieker at Lifehacker recommends taking photos of various things around the house before leaving the house for your holiday.</p> <p>This trick works because it not only forces you to carefully check everything around the house but you also have hard evidence on your phone or camera if you are ever having doubts.</p> <p>“I take photos before I go on long trips to give myself proof that the oven dials are in the right place and the thermostats are turned off,” she wrote.</p> <p>“The funny thing is that I’ve never once wanted to look at this proof after I’ve photographed it; it also turns off the part of my brain that gets anxious about accidentally leaving something on.”</p> <p><strong>Items around the house to take photos of:</strong></p> <ul> <li>Switches and dials on air-conditioning units, heaters, thermostats, radiators and fans.</li> <li>Small appliances that are fire risks (E.g. hair straighteners, clothing irons). Make sure the photo shows them unplugged and in a safe location.</li> <li>Dangerous items in the kitchen that show the switches and dials set to “off” (E.g. stovetop, oven, kettle, coffee machine, toaster).</li> <li>The fridge and freezer doors to prove they are correctly closed.</li> <li>Windows and doors including the garage door to prove they are closed and locked.</li> <li>Candles to prove they have been snuffed out.</li> </ul> <p><em>Image: Getty</em></p>

Travel Tips