Placeholder Content Image

Artist keeps craft alive with beautifully bound books

<p>In a world taken over by digitised forms of just about everything, book artist Liz Constable says her beautifully bound bohemian journals, handmade envelopes and painstakingly stitched self-help books still inspire the biggest shrieks of delight from total strangers.</p> <p>Journaling in cafés, Constable often feels eyes shrouding over her diary. "They say, oh that looks like a very old book," Constable says. "Oh yes, it's two weeks old," she laughs. </p> <p>Type 'book art' into online creative depository, Pinterest, and it will come up with 636 ways of turning old, clunky books into works of art. Likewise, Google images paints a pretty picture of the ways you can up-cycle unwanted novels.</p> <p>But unlike the art we relegate to a shelf or a picture hook, Constable's creations are usable. They're designed to be drawn on, hauled around in a tote and pulled out to illustrate ideas, and are made with any material she can get her hands on.  </p> <p>"It's that old worldy style," she says. "Everyone wants things to look old. You see people with laptops in bags that look like they're carrying old typewriters."</p> <p>What started off as a hobby 16 years ago turned into a full time business called Book Art Studios in 2007, when Constable, then a careers counsellor, says she counselled herself out of her former job and into where her heart truly lay- making books.</p> <p>It began with dying her journal papers with tea and coffee, then a friend introduced her to coloured dye. Now the "scavenger by nature" says her books are made with paper taken from the likes of old shipping maps, cloth and other recycled materials, before being stitched and bound in her own West Auckland studio.</p> <p>The UK migrant makes books for the likes of happy couples who need something special to keep track of wedding guests, to soda giant Coca Cola who commissioned Constable to make books for staff training, and Fonterra, whose Constable-made creations went all the way to a conference in China. </p> <p>Constable believes it's the nostalgia that inspires such gushing responses from people who frequently request to hug her when they see her creations. Not so long ago she hand delivered a job application written in a handmade book, nestled in a mail art envelope.</p> <p>She despairs walking into bookstores and seeing the rows and rows of identical book spines, prompting ever more thoughts about how she can make her work stand out.</p> <p>It's a thought at the forefront of her mind as Constable prepares to undertake something she's never done- producing her first book series en masse by enlisting the help of potential publishers at the Frankfurt Book Fair in October.  After years of ensuring each of her works is unique, Constable said the decision to take hand made to mass made came after reading a theory that it takes 10,000 hours to perfect a skill.</p> <p>Constable realised she'd clocked up more than enough over time, and enjoyed 'the simple life' long enough to begin relishing the fruits of her labour.</p> <p>She wants to produce a series of semi-autobiographical self-help books, whose roots can be traced back to the death of Constable's aunt many years ago. "Oh, I see a door," were her finals words on her death bed, prompting Constable to wonder just what exactly was behind that door. </p> <p>"I was so curious," Constable says. The words kept coming and before she knew it, nine books were conceived. The Martha series, she calls it. Stories for adults grappling with bigger issues.</p> <p>In March she published and began selling another self-help book, One Small Drop, in order to help fundraise for Frankfurt. Unlike the text heavy self help books of yester-year, you can hold One Small Drop in one hand. The pages are laser cut with small drops that turn into hearts with every page turn, the colours gradually turning from dark to light.</p> <p>More than 7,000 authors and book makers at the book fair will be vying for the attention of publishers who scout the exhibits for "innovate business models".</p> <p>After attending the fair some years ago Constable walked around searching for fellow book artists, disheartened to find they were "miles away from anywhere." Her exhibit, she promises, will be like walking into one of her storybooks. </p> <p>"I came back and I said I'm not going to stand in a queue trying to get someone to read it. I said I don't care how it happens, I'm going to get someone to pick up the Martha series."</p> <p><em>Written by Kelly Dennett. First appeared on <a href="http://www.stuff.co.nz" target="_blank" rel="noopener"><strong><span>Stuff.co.nz</span></strong></a>. </em></p> <p><em>Image credit: Getty</em></p>

Books

Placeholder Content Image

The benefits of doing arts and crafts with grandkids

<p>Arts and crafts activities have a wide range of relational and health benefits for you and your grandchildren. Whether you<strong> </strong>make a craft activity, do embroidery or do painting and drawing to allow them to express their creativity, you will create special memories with your grandchildren. Here are some key benefits of doing arts and crafts together.</p> <p><strong>1. Flexible bonding</strong></p> <p>Arts and crafts is an activity that can be enjoyed one afternoon or can be continued over various visits to your grandchildren. Working together on a project and seeing it through until completion is a fun and genuine way to bond with someone. Grandchildren will also see the effort you taken to prepare something fun for them. Arts and crafts will allow you to invest in your relationship by doing an activity that will create special memories as you make your art and then at the end of your project you will have physical memorabilia of the time you spent together working on your craft.</p> <p><strong>2. Fun learning</strong></p> <p>Immersing yourself in arts and crafts have a huge range of health benefits for both you and your grandchildren.  Arts and crafts can hone fine mother skills due to the repetition of various small movements and concentration. It can also improve coordination as hand movements have to be direct and precise. Arts and crafts can also improve concentration levels and visual processing abilities. Visual processing is a skill that is key in a child’s early years as they learn names and identification of primary colours and objects.</p> <p><strong>3. Improves self-esteem</strong></p> <p>Once a child has finished creating a craft activity they will have a sense of accomplishment because they created something. While you are doing the arts and crafts with your grandchild, you will have plenty of opportunity to observe their skills and encourage them along the way.</p> <p><strong>4. Teaches them to express themselves</strong></p> <p>Arts and crafts allow children to express what is on their minds as they tend to be very visual with the emotions and thoughts they are experiencing. Activities such as painting and drawing is particularly great for children who are shy as it will give insight to what is on their mind.</p> <p><em>Images: Getty</em></p>

Family & Pets

Placeholder Content Image

How Bob Dylan used the ancient practice of ‘imitatio’ to craft some of the most original songs of his time

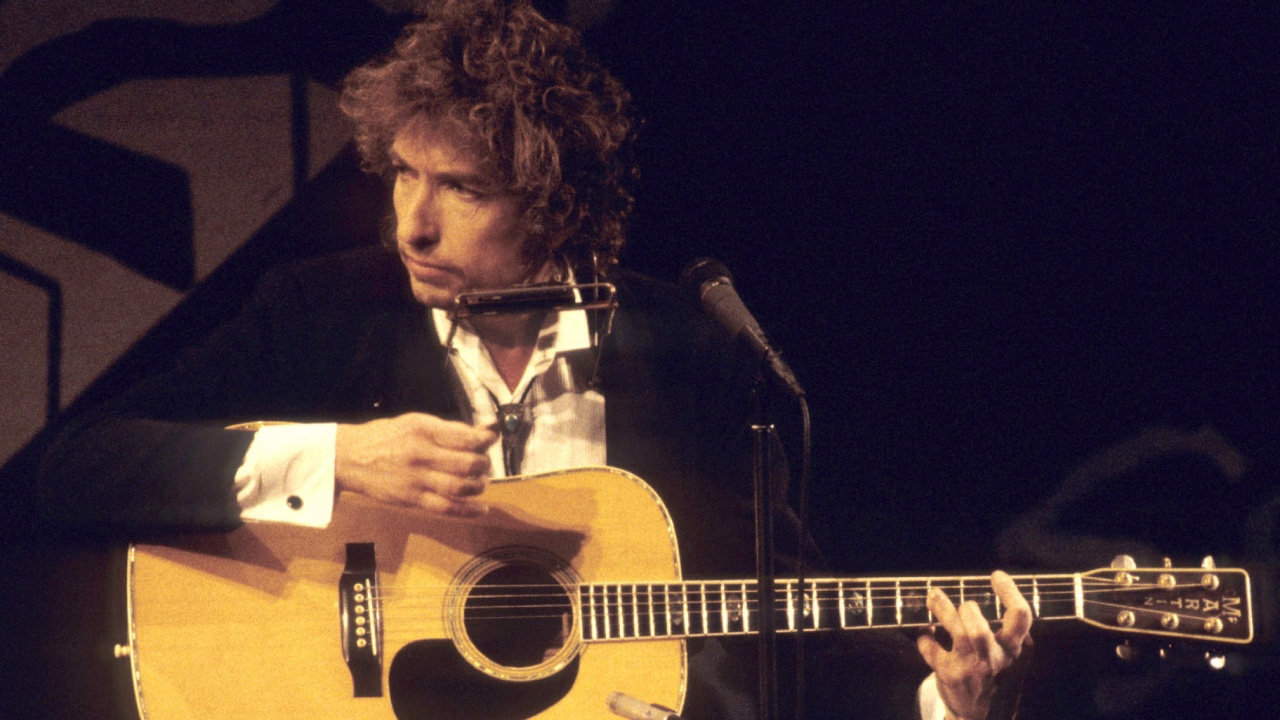
<p>Over the course of six decades, Bob Dylan steadily brought together popular music and poetic excellence. Yet the guardians of literary culture have only rarely accepted Dylan’s legitimacy.</p> <p>His <a href="https://www.nytimes.com/2016/10/14/arts/music/bob-dylan-nobel-prize-literature.html">2016 Nobel Prize in Literature</a> undermined his outsider status, challenging scholars, fans and critics to think of Dylan as an integral part of international literary heritage. My new book, “<a href="https://www.amazon.com/No-One-Meet-Imitation-Originality/dp/0817321411">No One to Meet: Imitation and Originality in the Songs of Bob Dylan</a>,” takes this challenge seriously and places Dylan within a literary tradition that extends all the way back to the ancients.</p> <p><a href="https://english.umbc.edu/core-faculty/raphael-falco/">I am a professor of early modern literature</a>, with a special interest in the Renaissance. But I am also a longtime Dylan enthusiast and the co-editor of the open-access <a href="https://thedylanreview.org/">Dylan Review</a>, the only scholarly journal on Bob Dylan. </p> <p>After teaching and <a href="https://www.researchgate.net/profile/Raphael-Falco">writing about</a> early modern poetry for 30 years, I couldn’t help but recognize a similarity between the way Dylan composes his songs and the ancient practice known as “<a href="http://www.artandpopularculture.com/Dionysian_imitatio">imitatio</a>.”</p> <h2>Poetic honey-making</h2> <p>Although the Latin word imitatio would translate to “imitation” in English, it doesn’t mean simply producing a mirror image of something. The term instead describes a practice or a methodology of composing poetry.</p> 
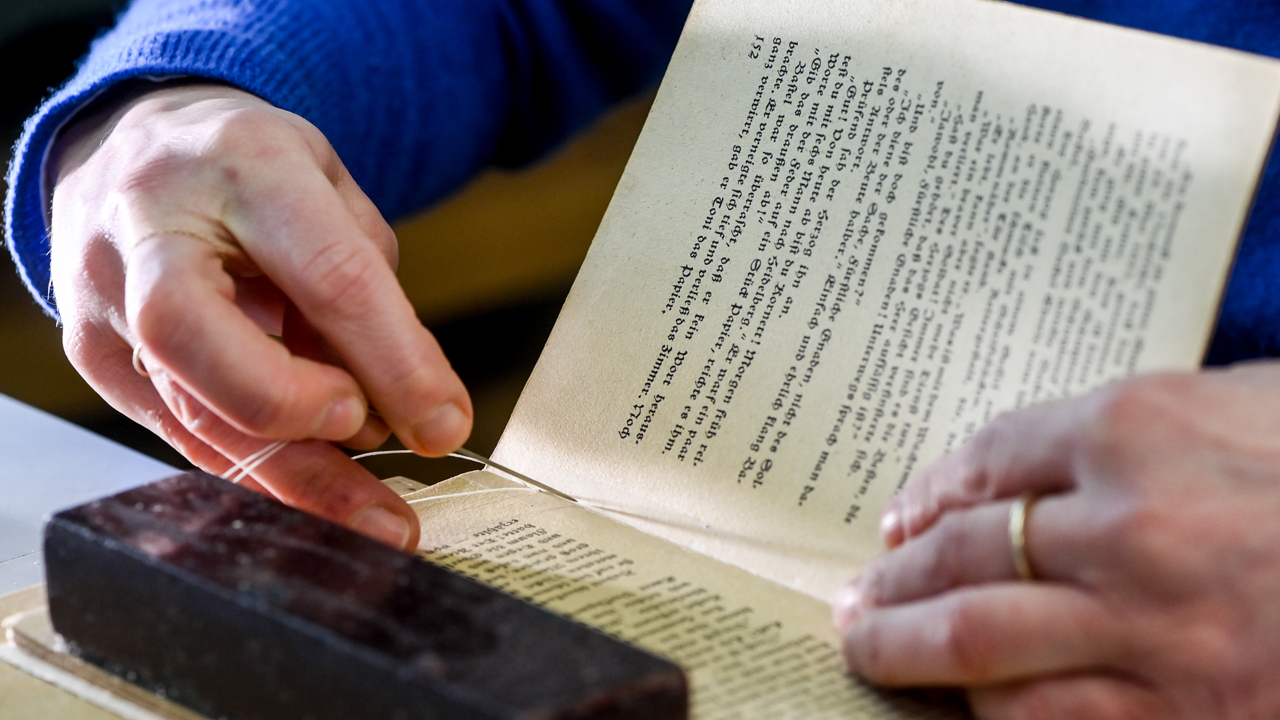
<p>The classical author Seneca <a href="https://en.wikisource.org/wiki/Moral_letters_to_Lucilius/Letter_84">used bees</a> as a metaphor for writing poetry using imitatio. Just as a bee samples and digests the nectar from a whole field of flowers to produce a new kind of honey – which is part flower and part bee – a poet produces a poem by sampling and digesting the best authors of the past.</p> <p>Dylan’s imitations follow this pattern: His best work is always part flower, part Dylan. </p> <p>Consider a song like “<a href="https://www.bobdylan.com/songs/hard-rains-gonna-fall/">A Hard Rain’s A-Gonna Fall</a>.” To write it, Dylan repurposed the familiar Old English ballad “<a href="https://www.poetrybyheart.org.uk/poems/lord-randall/">Lord Randal</a>,” retaining the call-and-response framework. In the original, a worried mother asks, “O where ha’ you been, Lord Randal, my son? / And where ha’ you been, my handsome young man?” and her son tells of being poisoned by his true love. </p> <p>In Dylan’s version, the nominal son responds to the same questions with a brilliant mixture of public and private experiences, conjuring violent images such as a newborn baby surrounded by wolves, black branches dripping blood, the broken tongues of a thousand talkers and pellets poisoning the water. At the end, a young girl hands the speaker – a son in name only – a rainbow, and he promises to know his song well before he’ll stand on the mountain to sing it.</p> <p>“A Hard Rain’s A-Gonna Fall” resounds with the original Old English ballad, which would have been very familiar to Dylan’s original audiences of Greenwich Village folk singers. He first sang the song in 1962 at <a href="https://bedfordandbowery.com/2016/12/the-story-of-the-gaslight-cafe-where-dylan-premiered-a-hard-rains-a-gonna-fall/">the Gaslight Cafe</a> on MacDougal Street, a hangout of folk revival stalwarts. To their ears, Dylan’s indictment of American culture – its racism, militarism and reckless destruction of the environment – would have echoed that poisoning in the earlier poem and added force to the repurposed lyrics.</p> <h2>Drawing from the source</h2> <p>Because Dylan “samples and digests” songs from the past, <a href="https://thedylanreview.org/2022/08/04/interview-with-scott-warmuth/">he has been accused of plagiarism</a>. </p> <p>This charge underestimates Dylan’s complex creative process, which closely resembles that of early modern poets who had a different concept of originality – a concept Dylan intuitively understands. For Renaissance authors, “originality” meant not creating something out of nothing, but <a href="https://www.google.com/books/edition/Origin_and_Originality_in_Renaissance_Li/1OmCQgAACAAJ?hl=en">going back to what had come before</a>. They literally returned to the “origin.” Writers first searched outside themselves to find models to imitate, and then they transformed what they imitated – that is, what they found, sampled and digested – into something new. Achieving originality depended on the successful imitation and repurposing of an admired author from a much earlier era. They did not imitate each other, or contemporary authors from a different national tradition. Instead, they found their models among authors and works from earlier centuries.</p> <p>In his book “<a href="https://archive.org/details/lightintroyimita0000gree/page/n5/mode/2up">The Light in Troy</a>,” literary scholar Thomas Greene points to a 1513 letter written by poet Pietro Bembo to Giovanfrancesco Pico della Mirandola.</p> <p>“Imitation,” Bembo writes, “since it is wholly concerned with a model, must be drawn from the model … the activity of imitating is nothing other than translating the likeness of some other’s style into one’s own writings.” The act of translation was largely stylistic and involved a transformation of the model.</p> <h2>Romantics devise a new definition of originality</h2> <p>However, the Romantics of the late 18th century wished to change, and supersede, that understanding of poetic originality. For them, and the writers who came after them, creative originality meant going inside oneself to find a connection to nature. </p> <p><a href="https://www.google.com/books/edition/Natural_Supernaturalism/-ygCZmrJ2E4C?hl=en&amp;gbpv=1&amp;dq=natural+supernaturalism&amp;printsec=frontcover">As scholar of Romantic literature M.H. Abrams explains</a> in his renowned study “Natural Supernaturalism,” “the poet will proclaim how exquisitely an individual mind … is fitted to the external world, and the external world to the mind, and how the two in union are able to beget a new world.” </p> <p>Instead of the world wrought by imitating the ancients, the new Romantic theories envisioned the union of nature and the mind as the ideal creative process. Abrams quotes the 18th-century German Romantic <a href="https://plato.stanford.edu/entries/novalis/">Novalis</a>: “The higher philosophy is concerned with the marriage of Nature and Mind.”</p> <p>The Romantics believed that through this connection of nature and mind, poets would discover something new and produce an original creation. To borrow from past “original” models, rather than producing a supposedly new work or “new world,” could seem like theft, despite the fact, obvious to anyone paging through an anthology, that poets have always responded to one another and to earlier works.</p> <p>Unfortunately – as Dylan’s critics too often demonstrate – this bias favoring supposedly “natural” originality over imitation continues to color views of the creative process today. </p> <p>For six decades now, Dylan has turned that Romantic idea of originality on its head. With his own idiosyncratic method of composing songs and his creative reinvention of the Renaissance practice of imitatio, he has written and performed – yes, imitation functions in performance too – <a href="https://en.wikipedia.org/wiki/List_of_songs_written_by_Bob_Dylan">over 600 songs</a>, many of which are the most significant and most significantly original songs of his time.</p> <p>To me, there is a firm historical and theoretical rationale for what these audiences have long known – and the Nobel Prize committee made official in 2016 – that Bob Dylan is both a modern voice entirely unique and, at the same time, the product of ancient, time-honoured ways of practicing and thinking about creativity.</p> <p><em>Image credits: Getty Images</em></p> <p><em>This article originally appeared on <a href="https://theconversation.com/how-bob-dylan-used-the-ancient-practice-of-imitatio-to-craft-some-of-the-most-original-songs-of-his-time-187052" target="_blank" rel="noopener">The Conversation</a>. </em></p>

Music

Placeholder Content Image

6 easy and fun adult crafting ideas to get you inspired

<p><strong>1. Canned Vase</strong></p><p>Woven materials, like cane webbing, are neutral in color, giving bold florals the space to shine. Cut a piece to fit around any ol' vase, then stitch a line or cross pattern along the edges in a contrasting color of your choice. Wrap the webbing around the vase and adhere with hot glue.</p><p><strong>2. Dip Dye Candles</strong></p><p>Cast a custom glow with these color-blocked candles. Take plain taper candles and dip them in a mixture of colored crayon shavings and melted candle wax. Use painter's tape for a more even dye job or embrace the unexpected and dip as you please.</p><p><strong>3. Paper flowers</strong></p><p>Make these flowers now, so you can enjoy 'em all season long. To make, fold dyed cupcake liners in half and cut out petal and fringe shapes. Then fold a piece of floral wire in half and twist around the faux flower stamen. Poke the wire through the center of three to four paper liners. Finish it off by wrapping floral tape around the base of the liners and bringing it all the way down the stem.</p><p><strong>4. Hand-Dyed napkins</strong></p><p>Bring color to any table with watercolor napkins. Once you soak napkins in water and wring out the excess, brush fabric paint in small strokes from bottom to top, diluting the paint with water as you work your way up. Hang and let dry completely before adding them to your place settings.</p><p><strong>5. Entryway organiser </strong></p><p>Breathe new life into a dumpster-bound window frame by coating it in a striking pastel hue. Then come up with clever ways to make it functional for your everyday — adding a chalkboard for grocery lists, small hooks to hang keys and more.</p><p><strong>6. Wallpapered Vessels</strong></p><p>Quite literally a trash-to-treasure craft, pretty wallpaper or wrapping paper turns empty cans into statement vessels, which can be used as vases, pencil holders or candle holders. Just be sure to rinse out the cans and file down sharp edges first.</p>

Art

Placeholder Content Image

5 clever uses for Christmas wrapping paper and cards

<p><span style="font-weight: 400;">After opening presents and reading cards from our loved ones and friends, we’re often left with piles of wrapping paper that need to be dealt with.</span></p> <p><span style="font-weight: 400;">Rather than throwing it straight into the bin, some can be recycled or repurposed into items that have that little bit of sentimental value.</span></p> <p><span style="font-weight: 400;">Here are </span><a rel="noopener" href="https://pop.inquirer.net/117417/10-diy-tips-for-recycling-your-christmas-gift-wrappers-and-cards" target="_blank"><span style="font-weight: 400;">five</span></a><span style="font-weight: 400;"> clever and crafty uses for your wrapping paper and cards this Christmas.</span></p> <p><strong>Confetti</strong></p> <p><strong><img style="width: 500px; height: 281.25px;" src="https://oversixtydev.blob.core.windows.net/media/7846531/wrapping-paper1.jpg" alt="" data-udi="umb://media/d993d6a78ab74456ac1a7f3e6e5ad702" /></strong></p> <p><em><span style="font-weight: 400;">Image: One Good Thing by Jillee / onegoodthingbyjillee.com</span></em></p> <p><span style="font-weight: 400;">An easy and cost-effective way to recycle wrapping paper, you can make the confetti just in time for any New Year’s parties or events you’ve planned. Just run the paper through a shredder or take to it with scissors and it’s ready to be used.</span></p> <p><strong>Drawer liners</strong></p> <p><strong><img style="width: 500px; height: 281.25px;" src="https://oversixtydev.blob.core.windows.net/media/7846530/wrapping-paper2.jpg" alt="" data-udi="umb://media/aeb39c63c2ef4199af0cadba93257641" /></strong></p> <p><em><span style="font-weight: 400;">Image: Making Home Base / makinghomebase.com</span></em></p> <p><span style="font-weight: 400;">If you’re someone who meticulously unwraps your gifts or you have some spare paper lying around, this hack could be perfect for you. Simply follow </span><a rel="noopener" href="https://www.makinghomebase.com/how-to-make-drawer-liners/" target="_blank"><span style="font-weight: 400;">this tutorial</span></a><span style="font-weight: 400;"> to line your drawers with the paper and give them a bright, new look with minimal effort.</span></p> <p><strong>Book wrappers</strong></p> <p><strong><img style="width: 500px; height: 281.25px;" src="https://oversixtydev.blob.core.windows.net/media/7846529/wrapping-paper3.jpg" alt="" data-udi="umb://media/b2c873ce9d28408aa95a3aef003f5dce" /></strong></p> <p><em><span style="font-weight: 400;">Image: Eighteen25 / eighteen25.com</span></em></p> <p><span style="font-weight: 400;">In a similar vein to drawer liners, wrapping paper can also be used to brighten up your stationery. Follow this easy </span><a rel="noopener" href="https://eighteen25.com/wrapping-paper-book-covers/" target="_blank"><span style="font-weight: 400;">tutorial</span></a><span style="font-weight: 400;"> to give your planners, notebooks, and journals that extra bit of colour and personality.</span></p> <p><strong>Bookmarks</strong></p> <p><strong><img style="width: 500px; height: 281.25px;" src="https://oversixtydev.blob.core.windows.net/media/7846527/wrapping-paper4.jpg" alt="" data-udi="umb://media/b064416ccfc045b99b1769b262e9f01d" /></strong></p> <p><em><span style="font-weight: 400;">Image: The Frugal Girls / thefrugalgirls.com</span></em></p> <p><span style="font-weight: 400;">With this DIY project, you can turn your Christmas cards and discarded wrapping paper into a bookmark you can gift or keep for yourself. To make them, gather up your cards, a hole punch, and some ribbon, and follow this six-step </span><a rel="noopener" href="https://thefrugalgirls.com/2010/01/how-to-make-homemade-bookmarks-from-cards.html" target="_blank"><span style="font-weight: 400;">tutorial</span></a><span style="font-weight: 400;">. As for the wrapping paper, you can use it to add some extra decorations to your bookmarks.</span></p> <p><strong>Homemade envelopes</strong></p> <p><strong><img style="width: 500px; height: 281.25px;" src="https://oversixtydev.blob.core.windows.net/media/7846528/wrapping-paper5.jpg" alt="" data-udi="umb://media/234a72cc71a24fed8cf1701e7abe9b7e" /></strong></p> <p><em><span style="font-weight: 400;">Image: Creative Green Living / creativegreenliving.com</span></em></p> <p><span style="font-weight: 400;">Wrapping paper can also be repurposed to make envelopes. Whether you want to send friends letters or save them for birthday and Christmas cards, follow this </span><a rel="noopener" href="https://www.creativegreenliving.com/2012/12/how-to-make-envelopes-from-magazine.html" target="_blank"><span style="font-weight: 400;">tutorial</span></a><span style="font-weight: 400;"> to make envelopes that are even more personalised.</span></p> <p><em><span style="font-weight: 400;">Image: Getty Images</span></em></p>

Home Hints & Tips

Placeholder Content Image

Christmas wonderland created using thrifty crafting

<p><span style="font-weight: 400;">A Sydney mum has taken her Christmas decorating to another level, using a clever Kmart hack.</span></p> <p><a rel="noopener" href="https://www.instagram.com/toni.getscreative/?hl=en" target="_blank"><span style="font-weight: 400;">Toni Mackie</span></a><span style="font-weight: 400;"> began a collection of miniature Christmas trees in 2016, which soon grew into an extensive pair of villages covering two kitchen benchtops.</span></p> <p><span style="font-weight: 400;">She estimates that 90 percent of the villages - originally brightly coloured with red roofs and glitter - came from Kmart. </span></p> <p><span style="font-weight: 400;">Toni then spent three nights transforming them into pale pink and white homes dusted with pearl glitter (also sourced from Kmart).</span></p> <p><span style="font-weight: 400;">Five years later, Toni is still creating her Christmas villages and has expanded to above her fireplace, as well as Christmas elves donned in a variety of pastel colours.</span></p> <blockquote style="background: #FFF; border: 0; border-radius: 3px; box-shadow: 0 0 1px 0 rgba(0,0,0,0.5),0 1px 10px 0 rgba(0,0,0,0.15); margin: 1px; max-width: 540px; min-width: 326px; padding: 0; width: calc(100% - 2px);" class="instagram-media" data-instgrm-captioned="" data-instgrm-permalink="https://www.instagram.com/tv/CXOHBQ_JNZr/?utm_source=ig_embed&amp;utm_campaign=loading" data-instgrm-version="14"> <div style="padding: 16px;"> <div style="display: flex; flex-direction: row; align-items: center;"> <div style="background-color: #f4f4f4; border-radius: 50%; flex-grow: 0; height: 40px; margin-right: 14px; width: 40px;"></div> <div style="display: flex; flex-direction: column; flex-grow: 1; justify-content: center;"> <div style="background-color: #f4f4f4; border-radius: 4px; flex-grow: 0; height: 14px; margin-bottom: 6px; width: 100px;"></div> <div style="background-color: #f4f4f4; border-radius: 4px; flex-grow: 0; height: 14px; width: 60px;"></div> </div> </div> <div style="padding: 19% 0;"></div> <div style="display: block; height: 50px; margin: 0 auto 12px; width: 50px;"></div> <div style="padding-top: 8px;"> <div style="color: #3897f0; font-family: Arial,sans-serif; font-size: 14px; font-style: normal; font-weight: 550; line-height: 18px;">View this post on Instagram</div> </div> <p style="color: #c9c8cd; font-family: Arial,sans-serif; font-size: 14px; line-height: 17px; margin-bottom: 0; margin-top: 8px; overflow: hidden; padding: 8px 0 7px; text-align: center; text-overflow: ellipsis; white-space: nowrap;"><a style="color: #c9c8cd; font-family: Arial,sans-serif; font-size: 14px; font-style: normal; font-weight: normal; line-height: 17px; text-decoration: none;" rel="noopener" href="https://www.instagram.com/tv/CXOHBQ_JNZr/?utm_source=ig_embed&amp;utm_campaign=loading" target="_blank">A post shared by Toni Mackie (@toni.getscreative)</a></p> </div> </blockquote> <p><span style="font-weight: 400;">Toni also sells the elves - which are pinkified Elf on the Shelf dolls - dressed in pastel pinks and blues, reds, emerald green, and sapphire blue, complete with lacy collars and pendants.</span></p> <p><span style="font-weight: 400;">The buildings and characters in her villages now include figurines found in op-shops and incense waterfalls, “pinkified” as per usual.</span></p> <blockquote style="background: #FFF; border: 0; border-radius: 3px; box-shadow: 0 0 1px 0 rgba(0,0,0,0.5),0 1px 10px 0 rgba(0,0,0,0.15); margin: 1px; max-width: 540px; min-width: 326px; padding: 0; width: calc(100% - 2px);" class="instagram-media" data-instgrm-captioned="" data-instgrm-permalink="https://www.instagram.com/p/CHjzXBJH5om/?utm_source=ig_embed&amp;utm_campaign=loading" data-instgrm-version="14"> <div style="padding: 16px;"> <div style="display: flex; flex-direction: row; align-items: center;"> <div style="background-color: #f4f4f4; border-radius: 50%; flex-grow: 0; height: 40px; margin-right: 14px; width: 40px;"></div> <div style="display: flex; flex-direction: column; flex-grow: 1; justify-content: center;"> <div style="background-color: #f4f4f4; border-radius: 4px; flex-grow: 0; height: 14px; margin-bottom: 6px; width: 100px;"></div> <div style="background-color: #f4f4f4; border-radius: 4px; flex-grow: 0; height: 14px; width: 60px;"></div> </div> </div> <div style="padding: 19% 0;"></div> <div style="display: block; height: 50px; margin: 0 auto 12px; width: 50px;"></div> <div style="padding-top: 8px;"> <div style="color: #3897f0; font-family: Arial,sans-serif; font-size: 14px; font-style: normal; font-weight: 550; line-height: 18px;">View this post on Instagram</div> </div> <p style="color: #c9c8cd; font-family: Arial,sans-serif; font-size: 14px; line-height: 17px; margin-bottom: 0; margin-top: 8px; overflow: hidden; padding: 8px 0 7px; text-align: center; text-overflow: ellipsis; white-space: nowrap;"><a style="color: #c9c8cd; font-family: Arial,sans-serif; font-size: 14px; font-style: normal; font-weight: normal; line-height: 17px; text-decoration: none;" rel="noopener" href="https://www.instagram.com/p/CHjzXBJH5om/?utm_source=ig_embed&amp;utm_campaign=loading" target="_blank">A post shared by Toni Mackie (@toni.getscreative)</a></p> </div> </blockquote> <p><span style="font-weight: 400;">As for the mini trees, they have been either bleached or painted white and surrounded by white feather boas used to replicate snow.</span></p> <p><span style="font-weight: 400;">Toni has also shared her top tips for people looking to replicate her Christmas wonderland without spending a fortune.</span></p> <p><span style="font-weight: 400;">“Always remember if the shape [of the house] is good, and the price is right, just get it,” she told </span><em><a rel="noopener" href="https://www.bhg.com.au/christmas-village-kmart-hack?category=decorating" target="_blank"><span style="font-weight: 400;">Better Homes and Gardens</span></a></em><span style="font-weight: 400;">.</span></p> <p><span style="font-weight: 400;">“You can always paint it to make it fit your colour scheme.”</span></p> <p><span style="font-weight: 400;">“The wire lights are what brings it all together and give it that warm soft glow, especially at night. It is really magical.”</span></p> <p><em><span style="font-weight: 400;">Image: @toni.getscreative (Instagram)</span></em></p>

Home Hints & Tips

Placeholder Content Image

21 Christmas crafts for kids to get them in the holiday spirit

<p><span>There’s nothing quite like crafting for getting into the holiday spirit – it’s a fun Christmas tradition, especially when you get your kids involved! </span></p> <p><span>Christmas crafts for kids ensure hours of family fun, laughter, and creativity – and, not to mention, some pretty awesome DIY Christmas decorations to hang around your house. Remember to always supervise younger children with scissors, paint and glue.</span></p> <p><strong>Paper plate angel </strong></p> <p>Hark, the paper plate angels sing! For this Christmas decoration idea, paint a paper plate blue and cut it into three pieces to form the dress and wings.</p> <p>Attach yellow construction paper to the plastic spoon as hair and glue together. It’s just about the easiest Christmas craft for kids you can find.</p> <p><strong>Christmas cards</strong></p> <p><span>There’s no Christmas craft for kids quite as special as a handmade holiday card. Help your kids spruce up their card-making game this year by using construction paper and buttons to create fun paper card cut-outs in the shapes of Christmas trees, reindeer, wreaths, ornaments and more. </span></p> <p><span>Not sure your crew is up to the task? Try one of these free printable cards instead.</span></p> <p><strong>Orange peel garland</strong></p> <p>After peeling (and eating) an orange, lay out the skin and use Christmas-themed cookie cutters to cut out shapes.</p> <p>From there, thread a string or twine to form the garland. Oranges aren’t the only fruit fit for Christmas – did you know that it’s a Chinese tradition to eat an apple on Christmas?</p> <p><strong>Pasta Christmas trees</strong></p> <p><span>Help your kids spray paint uncooked pasta shapes in green and silver and hot glue the pasta together to form tree shapes. </span></p> <p><span>Don’t forget the bowtie noodle on top!</span></p> <p><strong>Pinecone Christmas trees</strong></p> <p><span>A Christmas craft for kids that’s both eco-friendly and adorable? Sign us up! Have your kids scavenge pinecones in the backyard. </span></p> <p><span>Then, use hot glue to attach the pinecones to corks to act as the stump. Dip in green paint to complete.</span></p> <p><strong>Pasta wreath</strong></p> <p><span>Kids will love this fun twist on the classic Christmas wreath idea. Use craft glue to adhere bowtie pasta to a foam wreath form or paper plate. </span></p> <p><span>Spray paint to apply colour and for an extra special holiday surprise, attach red bows and roses.</span></p> <p><strong>Chimney Santa Claus</strong></p> <p><span>This Christmas craft for kids transforms recycled toilet paper rolls into chimneys with red construction paper and a black marker. Use the same tools to create Santa’s hat and feet.</span></p> <p><strong>Swirly paper snowman</strong></p> <p><span>Help your child cut white paper into a spiral to form the snowman’s swirly body. From there, draw eyes, a mouth, and a carrot nose at the top. </span></p> <p><span>Don’t forget to cut out a construction paper hat to complete the craft.</span></p> <p><strong>Circle snowmen</strong></p> <p><span>What’s round, white, and absolutely adorable? This Christmas craft for kids! All your kid will need is coloured construction paper, scissors and glue, making it absolutely kid-friendly. </span></p> <p><span>And talk about creative – your child can craft and decorate these little bundles of snowy joy as they see fit.</span></p> <p><strong>Paper snowflakes</strong></p> <p><span>We’d be remiss if we didn’t include the most classic of all Christmas crafts for kids – the paper snowflake. </span></p> <p><span>No matter how simple this craft is, the magic of unfurling the paper to see the incredible patterns created will always be a Christmas miracle.</span></p> <p><strong>Tissue paper Christmas tree</strong></p> <p><span>Cut green pieces of tissue paper into squares and have your child crumple and glue them together to form the shape of a Christmas tree. </span></p> <p><span>For an extra special touch, cut up a white cotton pad and use it as snow.</span></p> <p><strong>Toilet paper toys</strong></p> <p><span>What do Frosty, Santa, and a Christmas tree all have in common? They’re made out of toilet paper rolls!</span></p> <p><span> For this craft, all your child will need is glue, construction paper, and paint.</span></p> <p><strong>Snowmen greeting cards</strong></p> <p><span>All your child will need for this Christmas craft are white buttons, blue cardstock, a white pen, and some creativity. </span></p> <p><span>Have your child glue three buttons in a row to create the shape of the snowman. Draw stick arms, hair, snow and more using the white pen.</span></p> <p><strong>Christmas tree snow globes</strong></p> <p><span>What’s the only thing better than a holiday-themed snow globe? A DIY holiday-themed snow globe, of course! To create the Christmas tree, paint a pine cone green and decorate it with sequins and glitter and attach to the bottom of a Mason jar lid. </span></p> <p><span>Then, fill the Mason jar with glitter and add glycerine (that secret snow globe ingredient!). Screw on the lid, flip over, and watch the holiday magic commence.</span></p> <p><strong>Toilet paper roll Christmas tree calendar</strong><span></span></p> <p><span>To make this fun, upcycled Christmas craft, first, tape recycled toilet paper rolls in a pyramid shape. Then, cover in green construction paper. </span></p> <p><span>Finally, decorate each of the rolls with numbers 1 to 25 to finish the advent calendar.</span></p> <p><strong>Santa puppets</strong></p> <p><span>First, cut out a triangle using red construction paper and glue to a Popsicle stick. </span></p> <p><span>Then glue half a cupcake wrapper to make Santa’s beard, a white circle to form his head, and add a small white circle on top to complete his hat.</span></p> <p><strong>Going green wrapping paper</strong></p> <p><span>To take your child’s Christmas crafting to a whole new level…have them custom DIY wrapping paper! </span></p> <p><span>Cut a Christmas tree stamp out of a sponge then stamp green paint onto a repurposed brown bag to create a pattern.</span></p> <p><strong>Wooden stick holiday characters</strong></p> <p><span>To make the paddlepop stick snowman, glue together six wooden sticks with one lying diagonally. </span></p> <p><span>Paint the top half and diagonal stick black for the hat, and the bottom half white. Draw on eyes, a carrot nose, and a smile.</span></p> <p><strong>Santa Claus lollipop package</strong></p> <p><span>This is an adorable way for kids to give their friends treats on Christmas. First, fold red cardstock into a freestanding triangle shape. Decorate one side with Santa’s face, made out of construction paper and pieces of a doily. </span></p> <p><span>Slide a lollipop face down into the triangle and staple on either side to secure. Bonus: have your child add in one of these funny Christmas quotes to complete the present.</span></p> <p><strong>Angel garland</strong></p> <p><span>Use patterned paper for a fun twist on this classic kids’ Christmas craft.</span></p> <p><strong>Christmas masks</strong></p> <p><span>Decorate your masks this year for the ultimate holiday cheer. Glue on pom-poms and cotton fluff for a bona fide Santa’s beard.</span></p> <p><em>Image credits: Getty Images</em></p> <p><em>This article originally appeared in <a rel="noopener" href="https://www.readersdigest.co.nz/food-home-garden/home-tips/21-christmas-crafts-for-kids-to-get-them-in-the-holiday-spirit?pages=1" target="_blank">Reader's Digest</a>.</em></p>

Art

Placeholder Content Image

How to 'love-craft' your relationships for health and happiness

<p>You know how to find happiness: Just meet Prince Charming (or Cinderella), overcome all obstacles, get married. The end.</p> <p>Sure, we <em>kind of</em> know real life doesn’t work like that. And yet this <a href="https://bigthink.com/aeon-ideas/how-a-hackneyed-romantic-ideal-is-used-to-stigmatise-polyamory">“romantic” story</a> remains right up there on its cultural pedestal. We measure ourselves against it when we “fail.”</p> <p>I know how that feels. I’m polyamorous — in two simultaneous loving relationships — which is a “failure” condition because if you <em>really</em> love someone, you aren’t supposed to want anybody else.</p> <p>But I’m also a philosophy professor, and I say this blinkered focus on a single story arc is making us miserable.</p> <p>Can’t we dethrone the fairy tale, and celebrate a range of stories with real people in them? Wouldn’t it be more creative — not to mention more honest — to <em>craft</em> the role of love in our lives to fit who we truly are?</p> <p>I’m not saying we’d all go around singing <em>Happy Days Are Here Again</em> if that happened, but I am saying love-crafting is conducive to living a meaningful life, which might just be the key to a deep kind of happiness.</p> <h2>The freedom to choose</h2> <p>As philosophers are wont to do, let’s start by distinguishing two concepts of “happiness.” One is about nice feelings: <em>Hedonic</em> happiness. The other is about broader well-being or flourishing — what Aristotle called <em>eudaimonia</em>. If you are <em>eudaimonic</em>, you might be deeply satisfied with your life, but that doesn’t necessarily mean you feel good all the time.</p> <p>Philosophers love to pull apart concepts like this, but we also like to mash disparate concepts together and see what happens. My conceptual recipe for <em>love-crafting</em> has three main ingredients drawn from happiness research, the world of business and management and the philosophy of love. A strange brew, sure, but hear me out.</p> <p>Let’s start with happiness. It is <a href="http://psycnet.apa.org/buy/2002-18731-012">quite</a> <a href="https://doi.org/10.1016/j.worlddev.2013.02.005">well</a> <a href="https://link.springer.com/chapter/10.1007/978-1-4020-2903-5_14">known</a> that happiness is tied to <em>agency</em> — that is, making one’s own decisions. The link can be understood partly in biological terms. As neuroscientist <a href="https://psychcentral.com/lib/the-upward-spiral-using-neuroscience-to-reverse-the-course-of-depression/">Alex Korb explains</a>, one study using functional magnetic resonance imaging (fMRI) to measure brain activity shows that:</p> <blockquote> <p>“(a)ctively choosing caused changes in attention circuits and in how the participants felt about the action, and it increased rewarding dopamine activity.”</p> </blockquote> <p>Dopamine feels good, but there’s more to it than just that. Psychiatrist and Holocaust survivor <a href="http://www.beacon.org/Mans-Search-for-Meaning-P607.aspx">Viktor Frankl’s work with suicidal prisoners in Nazi death camps</a> led him to conclude that having a sense of meaning or purpose in life is ultimately what makes it worth living. He stresses agency in this connection, noting that:</p> <blockquote> <p>“Everything can be taken from a man but one thing: the last of the human freedoms —to choose one’s attitude in any given set of circumstances, to choose one’s own way.”</p> </blockquote> <h2>Reshape the raw materials</h2> <p>OK, but what does this have to do with business and management? Here we toss <em>job-crafting</em> into the mix. This concept was <a href="https://doi.org/10.5465/amr.2001.4378011">introduced by researchers Amy Wrzesniewski and Jane Dutton in 2001</a> to “capture the actions employees take to shape, mold, and re-define their jobs.”</p> <p>Although a job description determines the “raw materials” you have to work with, job-crafters creatively reshape their work for better alignment with their strengths and values.</p> <p>Wrzesniewski <a href="https://www.youtube.com/watch?v=C_igfnctYjA">describes one of the original inspirations for their theory</a>: A hospital cleaner who switched around the pictures in the rooms of coma patients, in case something about the changing environment might encourage their healing. This wasn’t in her job description — she <em>chose</em> to make it part of her role.</p> <p>This is huge, because the connection with agency brings <em>eudaimonia</em> into view. As <a href="https://www.harpercollins.com/9780060919887/the-writing-life/">Annie Dillard powerfully reminds us in <em>The Writing Life</em></a>, “(h)ow we spend our days is, of course, how we spend our lives.”</p> <p>Now for the third ingredient: <em>Intentional love</em>. This has roots in the thought of <a href="https://www.britannica.com/biography/Erich-Fromm">social psychologist Eric Fromm</a>, <a href="https://www.goodreads.com/book/show/347852.The_Road_Less_Traveled">psychiatrist M. Scott Peck</a> and feminist cultural critic bell hooks. In <a href="https://www.goodreads.com/book/show/17607.All_About_Love"><em>All About Love</em></a>, hooks, for instance, says that: “(l)ove is an act of will, both an intention and an action,” and that “will also implies choice. We do not have to love. We choose to love.”</p> <p>Although we are taught to think of love as out of control, something we “fall” into, an “addiction,” and even a form of “madness,” that is not <em>intentional</em> love.</p> <h2>Break the rules</h2> <p>Now to combine the ingredients together:</p> <p>1) Exercising agency is tied to happiness — not just good feelings, but a deeper sense that one’s life has meaning.</p> <p>2) Job-crafting is a powerful way to exercise agency, even when your role has been externally prescribed.</p> <p>3) Love, like work, can be practised intentionally and thoughtfully.</p> <p>Conclusion? Love-crafting has <em>got</em> to be worth a try.</p> <p>So what would it look like? Better to ask what it <em>does</em> look like. Many love-crafters “break the rules” (<a href="https://www.youtube.com/watch?v=C_igfnctYjA">as do some of their job-crafting counterparts</a>).</p> <p>Some forge a network of loving friendships that (gasp!) doesn’t include a focal romantic relationship. Some craft non-monogamous marriages, non-sexual romances, queer loves and all kinds of things we don’t have labels for yet.</p> <p>Others craft “normal” relationships. The difference between a monogamous, hetero (etc.) relationship that’s “fallen” into and one that’s <em>chosen</em> is all the difference in the world.</p> <p>As <a href="http://www.beacon.org/Mans-Search-for-Meaning-P607.aspx">Frankl says in <em>Man’s Search for Meaning</em></a>, “happiness cannot be pursued; it must ensue.” <a href="https://www.goodreads.com/quotes/359472-those-only-are-happy-i-thought-who-have-their-minds">Philosophers</a> <a href="https://plato.stanford.edu/entries/hedonism/#PsyHe">have</a> tried to tell us this for centuries, and now they have <a href="https://doi.org/10.1521/jscp.2014.33.10.890">empirical evidence</a> to <a href="http://dx.doi.org/10.1037/a0022010">back them up</a>. Once the point sinks in, it’s obvious: Chasing a “happily-ever-after” that’s externally prescribed by a one-size romantic ideal is a great way to <em>ruin</em> our chances of being happy-ever-at-all.</p> <p>Intentionally crafting love to make it meaningful to you? Now that might have a shot. This does not mean a life of wall-to-wall <em>The Hills Are Alive</em> happiness — hedonic feelings <a href="https://qz.com/1046605/theres-a-biological-reason-you-feel-down-after-having-the-time-of-your-life/">tend to come and go</a>.</p> <p>Rather, my money is on this hypothesis: like job-crafting, love-crafting tends towards <em>eudaimonia</em> — the deep happiness that makes everything else possible.<!-- Below is The Conversation's page counter tag. Please DO NOT REMOVE. --><img style="border: none !important; box-shadow: none !important; margin: 0 !important; max-height: 1px !important; max-width: 1px !important; min-height: 1px !important; min-width: 1px !important; opacity: 0 !important; outline: none !important; padding: 0 !important; text-shadow: none !important;" src="https://counter.theconversation.com/content/102391/count.gif?distributor=republish-lightbox-basic" alt="The Conversation" width="1" height="1" /><em><!-- End of code. If you don't see any code above, please get new code from the Advanced tab after you click the republish button. The page counter does not collect any personal data. More info: http://theconversation.com/republishing-guidelines --></em></p> <p><em><a href="https://theconversation.com/profiles/carrie-jenkins-544980">Carrie Jenkins</a>, Professor of Philosophy and Canada Research Chair, <a href="http://theconversation.com/institutions/university-of-british-columbia-946">University of British Columbia</a></em></p> <p><em>This article is republished from <a href="http://theconversation.com">The Conversation</a> under a Creative Commons license. Read the <a href="https://theconversation.com/how-to-love-craft-your-relationships-for-health-and-happiness-102391">original article</a>.</em></p>

Relationships

Placeholder Content Image

Easy craft ideas to make with the grandkids

<p><span style="font-weight: 400;">There’s no better way to keep the grandkids entertained than with craft activities. Taking part in the fun will not only give you time to bond with the little ones, but it’s also a creative way to pass the time. </span></p> <p>Family spotlight photo</p> <p>What you need:</p> <ul> <li style="font-weight: 400;"><span style="font-weight: 400;">Burlap Ribbon </span></li> <li style="font-weight: 400;"><span style="font-weight: 400;">2 Eyelet Screws</span></li> <li style="font-weight: 400;"><span style="font-weight: 400;">Lighter</span></li> <li style="font-weight: 400;"><span style="font-weight: 400;">Hemp Twine </span></li> <li style="font-weight: 400;"><span style="font-weight: 400;">Small Clothes Pins</span></li> <li style="font-weight: 400;"><span style="font-weight: 400;">Floral Decor of your choosing</span></li> <li style="font-weight: 400;"><span style="font-weight: 400;">Staple gun</span></li> <li style="font-weight: 400;"><span style="font-weight: 400;">Hot Glue/Gun</span></li> <li style="font-weight: 400;"><span style="font-weight: 400;">Vinyl Black and White (or any colour you choose)</span></li> <li style="font-weight: 400;"><span style="font-weight: 400;">Wood Plaque </span></li> <li style="font-weight: 400;"><span style="font-weight: 400;">Paint</span></li> </ul> <p>How to make:</p> <p><span style="font-weight: 400;">1. Paint your plaque the colour of your choice and let it dry. Once your piece of wood is dry, take woody paint colours or darker colours of your paint choice and use a heavy dry brush to utilise different areas. After the plaque is coated and still wet, turn the plaque over and use the wood end to draw a pattern to give a rustic fence board look. </span></p> <p><span style="font-weight: 400;">2. You can use cardboard to do this or vinyl to make the word of your choice to go on your plaque. Stick it on your piece of wood. </span></p> <p><span style="font-weight: 400;">3. Mark the bottom left and right corners of your plaque by putting a little pressure on your eyelet screw into the wood. Once you have marked the corners, screw both of them in place.</span></p> <p><span style="font-weight: 400;">4. With your hemp twin, knot the rope on each end and pull tight (but not too tight!)</span></p> <p><span style="font-weight: 400;">5. Add ribbons, floral décor or any decoration to your sign with a hot glue gun</span></p> <p> </p> <p>Seasons tree</p> <p>What you need</p> <ul> <li style="font-weight: 400;"><span style="font-weight: 400;">Paper</span></li> <li style="font-weight: 400;"><span style="font-weight: 400;">Pencils</span></li> <li style="font-weight: 400;"><span style="font-weight: 400;">Sharpie or permanent marker</span></li> <li style="font-weight: 400;"><span style="font-weight: 400;">Paint</span></li> <li style="font-weight: 400;"><span style="font-weight: 400;">Rags, or sheets</span></li> <li style="font-weight: 400;"><span style="font-weight: 400;">Old t-shirts to use as smocks for the kids</span></li> </ul> <p>How to make:</p> <p><span style="font-weight: 400;">1. Trace a child’s arm on paper</span></p> <p><span style="font-weight: 400;">2. Trace the arm with a permanent marker</span></p> <p><span style="font-weight: 400;">3. Let the kids decorate the hand for whatever season they want </span></p> <p><span style="font-weight: 400;">4. Frame the work of art as a gift</span></p> <p><span style="font-weight: 400;">Will you be trying out these craft activities with your grandkids? Let us know in the comments below.</span></p>

Art

Placeholder Content Image

3 easy craft projects you can do with your grandkids this Easter

<p>Easter is fast approaching and there are plenty of fun and simple crafts to do with your grandkids, so they are entertained.</p> <p>Here are three easy craft projects you can do with your grandkids this Easter.</p> <p><strong>1. Fluffy pom-pom chicks</strong></p> <p><img style="width: 500px; height: 281.25px;" src="https://oversixtydev.blob.core.windows.net/media/7825635/shutterstock_1033164469.jpg" alt="" data-udi="umb://media/2e0718c0e62b4770bc39ecf66e3a4725" /></p> <p><strong>What you need:</strong></p> <ul> <li>Card</li> <li>Yellow wool</li> <li>Googly eyes</li> <li>Orange cards or felt</li> </ul> <p><strong>How to:</strong></p> <p>1. Cut two donut-shaped rings out of card and place both of the rings together</p> <p>2. Using scissors, cut a long piece of wool and wrap it around the donuts.</p> <p>3. When taking a new piece of wool, leave the ends at the top of the circle and not the centre.</p> <p>4. Once the donut is covered, cut the edges in between the two circles of card.</p> <p>5. With another piece of wool, place it between the two rings and tie the whole pom pom together. Pull the string tight and knot it.</p> <p><strong>2. Sock bunnies (no sewing required)</strong></p> <p><img style="width: 500px; height: 281.25px;" src="https://oversixtydev.blob.core.windows.net/media/7825633/shutterstock_608096375.jpg" alt="" data-udi="umb://media/ce253977e0e94760938f8126abbdfd31" /></p> <p><strong>What you need:</strong></p> <ul> <li>Socks</li> <li>Elastic bands</li> <li>Rice, barley or lentils</li> <li>Buttons</li> <li>Scissors</li> <li>Glue gun / strong glue</li> </ul> <p><strong>How to:</strong></p> <p>1. Using a sock, fill it with either rice, barley or lentils.</p> <p>2. Tie an elastic band around the sock when it is filled a third of the way – this will make the bunny’s body.</p> <p>3. Further fill the sock and tie it again with an elastic band to make another ball – which is the head of the bunny.</p> <p>4. With the left-over sock at the top of the head, use some scissors to snip down the centre and round off the edges to make the bunny ears.</p> <p>5. Using your glue gun, stick two buttons on the sock for the eyes and a larger button for the nose.</p> <p>6. Tie a ribbon around your bunny’s neck and decorate with felt-friendly markers.</p> <p><strong>3. Yarn nests </strong></p> <p><img style="width: 0px; height: 0px;" src="https://oversixtydev.blob.core.windows.net/media/7825632/shutterstock_367611647.jpg" alt="" data-udi="umb://media/bdb4553157d945f8a3b34d7a766cd0e2" /></p> <p><strong>What you need: </strong></p> <ul> <li>Bowl</li> <li>Cling film</li> <li>Wool</li> <li>PVA glue</li> <li>Feathers</li> </ul> <p><strong>How to:</strong></p> <p>1. With your bowl and cling film, cover the outside of the upside-down bowl.</p> <p>2. Cut strings of wool and dip them in PVA glue.</p> <p>3. Cover the cling film bowl with the wool and continue to build up layers until you have your desired nest shape.</p> <p>4. Optional: You can line your nest with feathers and add your chocolate eggs!</p> <p>Would you try any of these easy Easter crafts with your grandchildren? Let us know in the comments below.</p>

Art

Placeholder Content Image

Christmas craft idea to do with your grandkids

<p>For many over-60s, Christmas means more than just decorating the tree and shopping for presents – it means spending quality time with the little ones in your life. And what better way to celebrate the holidays and make memories than with some adorable Christmas craft?</p> <p>Over60 community member Warren Gray has shared with us his step-by-step guide for making reindeer ornaments out of milk bottle lids. “As it is almost Christmas, I thought I would share a craft idea for other grandparents go do with their grandkids,” he says.</p> <p style="text-align: center;"><img width="500" height="423" src="https://oversixtydev.blob.core.windows.net/media/7265825/craft-idea-in-body_500x423.jpg" alt="Craft Idea In Body"/></p> <p><strong>What you will need:</strong></p> <ul> <li>Lids off the plastic milk bottles</li> <li>Pipe cleaner cut in half and then those halves folded in half again</li> <li>Stick on eyes (at least 2 per lid)</li> <li>Permanent markers</li> <li>Small length of fishing line or wool</li> </ul> <p><strong>How to:</strong></p> <ol start="1"> <li>Drill 3 small holes in the side of the bottle top (a job for us grandparents – have a look at the photo above and you can figure out why you need 3 holes)</li> <li>The rest is up to the kids to make and design themselves.</li> </ol> <p>Good luck and happy crafting!</p> <p>Do you have any fun craft ideas you’d like to share with the Over60 community? Put them in the comments section below!</p>

Family & Pets

Placeholder Content Image

Giant knitting: the new crafting craze people can’t get enough of

<p>Hamilton woman Jacinta Stevenson doesn't like to do things on a small scale. </p> <p>With knitting needles a metre long and 45 centimetres thick, her knitting business called Plump &amp; Co is creating a new trend and proving size does matter.</p> <p>As well as selling giant knitting needles and crochet hooks for customers to create their own chunky knitted masterpieces, she also runs workshops, teaching people how to handle the large wool.</p> <p style="text-align: center;"><img width="496" height="280" src="https://oversixtydev.blob.core.windows.net/media/37480/2_496x280.jpg" alt="2 (179)"/></p> <p>The workshops help people get used to the scale, she says.</p> <p>Despite their Wonderland appearance, she says the needles are surprisingly easy to manipulate. </p> <p>Stevenson, who was taught to knit by her grandmother, says the size makes knitting accessible to everyone.</p> <p>"I'm not the world's best knitter, with this scale, everything looks beautiful. It still looks pretty when you're not following the rules. </p> <p>"Traditionally in knitting people feel they have to follow a pattern, we encourage a bit of rogue knitting. </p> <p style="text-align: center;"><img width="499" height="280" src="https://oversixtydev.blob.core.windows.net/media/37485/1_499x280.jpg" alt="1 (188)"/></p> <p>The idea for Plump &amp; Co began when Stevenson was a university student, studying textile design at Massey University. </p> <p>In her fourth year of study she created an installation piece, using ripped fabric to create an oversized "yarn".</p> <p>After graduating she worked in the corporate world for a time, but she missed being creative, and began knitting once more – at first as a hobby, then as a business. Stevenson thought there might be a market for a new kind of knitting – to tap into a global trend, especially among millennials, for all things handmade.</p> <p>Her goals for the business include managing growth, ensuring supply and strategic planning. There is potential to grow domestically and internationally, particularly in Australia and the USA.</p> <p><em>Written by Kelsey Wilkie. First appeared on <a href="http://www.stuff.co.nz/" target="_blank"><strong><span style="text-decoration: underline;">Stuff.co.nz</span></strong></a>. </em></p>

Art

Placeholder Content Image

5 affordable craft ideas to try at home

<p>Craft ideas allow you to have a creative outlet and also bond with the people you are doing the activity with. These ideas can be used with family or friends and will leave you with a fun-filled afternoon and a beautiful creation to show at the end of the day.</p> <p><strong>1. Candle painting</strong></p> <p><a href="http://www.kidspot.com.au/things-to-do/activities/candle-painting?ref=collection_view%2Cart-activities" target="_blank"><strong><span style="text-decoration: underline;">Candle painting</span></strong></a> is fascinating for children as the wax of the candle creates a “secret message” to appear through watery paint. You can write or draw something special and then have it magically revealed once the paint is on the paper. This craft is relatively cheap only requiring a white candle, watercolour paint, paper and paintbrush.</p> <p><strong>2. Origami</strong></p> <p><a href="http://www.oversixty.co.nz/health/mind/2016/12/the-art-of-mindful-origami/" target="_blank"><strong><span style="text-decoration: underline;">Origami</span></strong></a> is not only a fun craft idea but it also requires a lot of focus and thought. There are so many origami shapes available to make online so within a group everyone can still have their sense of individualism while doing this craft. This craft will definitely have you cultivating your focus and levels of patience.</p> <p><strong>3. No-sew bunting</strong></p> <p><a href="http://www.oversixty.co.nz/lifestyle/home-garden/2016/11/great-ways-to-repurpose-your-vintage-handkerchiefs/" target="_blank"><strong><span style="text-decoration: underline;">Bunting</span></strong></a> is a popular party decoration that will add to any room. It doesn’t require much time and effort but still leaves you with a beautiful decoration. For this craft activity, you will need material (bandanas and handkerchiefs are easy to use), hot glue and twine. Make sure you leave a foot of twine from either end of the bunting from hanging. Just cut out diamonds in your material and glue the twine to the top side and fold material over to cover the twine.</p> <p><strong>4. Flower crowns</strong></p> <p>Although you may think that <a href="https://www.buzzfeed.com/nataliebrown/heres-how-to-make-your-very-own-flower-crown" target="_blank"><strong><span style="text-decoration: underline;">flower crowns</span></strong></a> would be an expensive craft, instead of buying your flowers pick your blooms from your garden. You will need floral wire to tape the flowers to and then once you have your desired look, stick on your heard and wear it for all to admire.</p> <p><strong>5. Card-making</strong></p> <p>Card making is a classic craft activity where you can express your gratitude to someone they love. It now only allows you to be creative with your design but is also the perfect opportunity to express your thankfulness to someone in your life through a personalised card. This craft can be kept to a budget but it is a good idea to buy a few special decorations to make the cards look great.</p> <p>What is your favourite craft activity? Let us know in the comments below.</p>

Art

Placeholder Content Image

Craft: Hello Kitty crochet doll

<p><em><strong>Over60 community member, Cheryl O’Brien from Sydney, shares her most recent craft project, a Hello Kitty crochet doll. It will make the perfect gift for your grandchildren.</strong></em></p> <p>“I made these for my granddaughter, Sophia’s, third birthday party which was a Hello Kitty theme. We used these as place settings and take-home gift for the party guests. The children loved them.</p> <p>There are lots of patterns online for similar dolls, but to get exactly what I wanted, I combined a few elements from different patterns.</p> <p>When I found that I was not sure how to do something, YouTube was very helpful as there are lots of demo videos. For instance, I had not heard of a magic circle before and found it better to see someone do it rather than reading instructions. </p> <p>Also, <a href="http://ravelry.com/">ravelry.com</a> is a good site to use as they have a lot of free patterns but you have to be aware that some of the patterns are not good if they are translated into English. Also patterns do not say whether they are UK or USA so it takes a bit of working out.</p> <p>I have made a conversion chart for the some used stitches as follows. I hope this makes sense.”</p> <p><strong>UK                                                      USA<br /></strong>dc= double crochet                        sc = single crochet<br />tr = treble                                           hdc = half double crochet<br />dc = double crochet<br />htr = half treble                                    </p> <p><strong><span style="text-decoration: underline;">Hello Kitty crochet doll pattern:</span></strong></p> <p>TERMS USED
</p> <ul> <li>ch = chain</li> <li>inc sc = 2 sc in each st</li> <li>magic circle
sc = single crochet (USA Stitch) which is dc=double crochet (UK/Australian)</li> <li>sc2tog = sc 2 together </li> <li>sl st = slip stitch</li> <li>st(s) = stitch (es)</li> </ul> <p>MATERIALS</p> <ul> <li>Cotton 8 ply in colours: white and pink</li> <li>Black and yellow embroidery cotton for eyes, whiskers and nose</li> <li>Hooks: 3mm</li> <li>Row marker
polyester for stuffing </li> <li>Tapestry needle</li> </ul> <p>INSTRUCTIONS:</p> <p><strong>Head</strong></p> <p>With white 5ch+1ch</p> <ul> <li>Round 1: 3sc in 2nd ch from the hook, (1sc in 1ch) - 3 times, 3sc in next ch, turn the work to continue along the opposite side of the beginning ch, (1sc in 1ch) - 3 times (12)</li> <li>Round 2: (2sc in each of next 3sc, sc in each of next 3 sts) around (18)</li> <li>Round 3: [(sc in next st, 2sc in next st) - 3 times, sc in each of next 3 sts] around (24)</li> <li>Round 4: [(sc in each of next 2 sts, 2sc in next st) - 3 times, sc in each of next 3 sts] around (30)</li> <li>Round 5: [(sc in each of next 3 sts, 2sc in next st) - 3 times, sc in each of next 3 sts] around (36)</li> <li>Round 6: [(sc in each of next 4 sts, 2sc in next st) - 3 times, sc in each of next 3 sts] around (42)</li> <li>Rounds 7-13: sc in each st around (42)
</li> <li>Round 14: (sc in each of next 5 sts, sc2tog) - 6 times (36)</li> <li>Round 15: (sc in each of next 4 sts, sc2tog) - 6 times (30)</li> <li>Round 16: (sc in each of next 3 sts, sc2tog) - 6 times (24)</li> <li>Round 17: (sc in each of next 2 sts, sc2tog) - 6 times (18)</li> <li>Round 18: (sc in next st, sc2tog) - 6 times (12)
</li> <li>Round 19: (sc2tog) - 6 times (6)
Fasten off</li> <li>Fill the head with fiberfill stuffing.</li> <li>Use the black to make eyes and whiskers. And yellow to make nose.</li> </ul> <p><strong>Body</strong><br />With white 5ch+1ch</p> <ul> <li>Round 1: 3sc in 2nd ch from the hook, (1sc in 1ch) - 3 times, 3sc in next ch, turn the work to continue along the opposite side of the beginning ch, (1sc in 1ch) - 3 times (12)</li> <li>Round 2: (2sc in each of next 3sc, sc in each of next 3 sts) araund (18)</li> <li>Round 3: [(sc in next st, 2sc in next st) - 3 times, sc in each of next 3 sts] around (24)</li> <li>Round 4: sc in each of next 2 sts, 2sc in each of next 4sc, sc in each of next 8 sts, 2sc in each of next 4sc, sc in each of next 6 sts (32)</li> <li>Round 5: sc in each st around (32)</li> <li>Round 6: sc in each st around (32)</li> <li>Rounds 7-8: sc in each st around (32)
</li> <li>Round 9: (sc in each of next 6 sts, sc2tog) - 4 times (28) with yellow
</li> <li>Round 10: sc in each st around (28)
</li> <li>Round 11: (sc in each of next 5 sts, sc2tog) - 4 times (24) with black
</li> <li>Round 12: sc in each st around (24)
</li> <li>Round 13: (sc in each of next 4 sts, sc2tog) - 4 times (20)</li> <li>Round 14: sc in each st around (20)
Fill the body with fiberfill stuffing and sew it to the head.</li> </ul> <p><strong>Feet</strong><br />With white 5ch+1ch</p> <ul> <li>Round 1: 3sc in 2nd ch from the hook, (1sc in 1ch) - 3 times, 3sc in next ch, turn the work to continue along the opposite side of the beginning ch, (1sc in 1ch) - 3 times (12)</li> <li>Round 2: (2sc in each of next 3sc, sc in each of next 3 sts) around (18) –</li> <li>Rounds 3-4: sc in each st around (18)
----Round 5: (sc in each of next 7 sts, sc2tog) - 2 times (16)</li> <li>Repeat to make a second foot. Fill the feet with fiberfill stuffing and sew it to the body.</li> </ul> <p><strong>Arms</strong><br /> With white</p> <ul> <li>Round 1: Magic ring and 6 sc into it. (6)
</li> <li>Round 2: (2sc in next st, sc in each of next 2 sts) - 2 times (8)</li> <li>Round 3: (sc in each of next 2 sts, 2sc in each of next 2sc) - 2 times (12)</li> <li>Rounds 4-6: sc in each st around (12)
</li> <li>Round 7: (sc in each of next 4 sts, sc2tog) - 2 times (10)
</li> <li>Round 8: sc in each st around (10)</li> <li>Repeat to make second arm. Fill the arms with fiberfill stuffing and sew it to the body.</li> </ul> <p><strong>Ears</strong><br /> With white</p> <ul> <li>Round 1: 6 sc into magic ring (6)</li> <li>Rounds 2-3: sc around (6)</li> <li>Round 4: 2sc in each st around (12)</li> <li>Round 5: sc around (12)</li> <li>Round 6: sc in next st, 2sc in next st, around (18)</li> <li>Fasten off and slightly stuff the ears so that they kept their shape. Sew to head</li> </ul> <p><strong>Dress</strong><br />With pink 28ch</p> <ul> <li>Join with sl use row marker</li> <li>Round 1: 1ch then (6 sc in each st inc in next st) 4 times sl in beg ch (32)</li> <li>Round 2: 1ch then (7 sc in each st inc in next st) 4 times sl in beg ch (36)</li> <li>Round 3: 1ch then (8 sc in each st inc in next st) 4 times sl in beg ch (40)</li> <li>Round 4: 1ch then (9 sc in each st inc in next st) 4 times sl in beg ch (44)</li> <li>Round 5: 1ch then (10 sc in each st inc in next st) 4 times sl in beg ch (48)</li> <li>Round 6: 1ch then (11 sc in each st inc in next st) 4 times sl in beg ch (52)</li> </ul> <p><strong>Bow</strong><br /> With pink</p> <ul> <li>Round 1: Ch 15</li> <li>Round 2: Sc in second ch from hook, ch 1, turn.</li> <li>Round 3-9: Sc across, ch 1, turn.
Fasten off, leave long tail for sewing.</li> </ul> <p>To Form Bow:
</p> <p>1. Weave in short piece of yarn (where ch was started) to center</p> <p>2. Weave in long tail to center</p> <p>3. Pinch center and wrap long tail around 5 times</p> <p>4. Thread through blunt needle and secure by running under the wrapped part, bringing it out; secure firmly.</p> <p>5. Use yellow to create a little detail at the middle of the bow.</p> <p>6. Sew to head.</p> <p> </p>

Home & Garden

Placeholder Content Image

How to stamp and stencil napkins

<p>If you’re interested in some craft that isn’t too difficult but looks fantastic, why not try stamping and stencilling?</p> <p>Whether it’s napkins, tea towels, cushion covers, tablecloths or even pillow cases, this is a simple way to add a personal touch to your linens.</p> <p>Stamps and stencils are available at most craft shops, though if you are after something specific you could look online.</p> <p><strong><span style="text-decoration: underline;">You will need: </span></strong></p> <ul> <li>Cotton or linen napkins (or any item you wish to use)</li> <li>Fabric paint</li> <li>Rubber stamps, or wooden printing blocks</li> <li>Stencils</li> <li>Paintbrush or roller</li> </ul> <p><strong><span style="text-decoration: underline;">How to:</span></strong></p> <p>Note: Wash the napkins and iron them well to ensure there are no creases.</p> <p><strong>Stamping</strong></p> <ol> <li>Apply a small amount of paint to your stamp or block with a paintbrush or roller.</li> <li>Push down firmly onto the fabric, and remove carefully. Repeat the stamping until you have created your desired pattern. This might be around the edges of the fabric, or all over.</li> </ol> <p><strong>Stencilling</strong></p> <ol> <li>If you would rather use a stencil, simply place it onto the napkin and paint over it with a small amount of paint. Carefully remove the stencil to avoid smudging. Be sure to let the stencil dry between each use.</li> <li>Allow the napkins to dry, and then iron the reverse side to set the paint in place.</li> </ol> <p>Do you do any stamping or stenciling? We would love for you to share your ideas in the comments section.</p> <p><strong>Related links:</strong></p> <p><a href="/lifestyle/home-garden/2016/06/the-secret-to-keeping-your-whites-white/"><span style="text-decoration: underline;"><em><strong>The secret to keeping your whites white</strong></em></span></a></p> <p><a href="/lifestyle/home-garden/2016/05/easy-diy-vases/"><span style="text-decoration: underline;"><em><strong>12 DIY vases that are easy to make</strong></em></span></a></p> <p><a href="/lifestyle/home-garden/2016/05/common-decorating-mistakes-to-avoid/"><span style="text-decoration: underline;"><em><strong>10 common decorating mistakes to avoid</strong></em></span></a></p>

Home & Garden

Placeholder Content Image

DIY art and craft projects you can do with the grandkids

<p>When the grandkids come over it’s a great idea to have a few projects up your sleeve to do with them.</p> <p>Here are some ideas that are suitable for school age kids that will keep them occupied for a few hours at least!</p> <p><strong>Spray painted jars</strong></p> <p>Grab some old glass jars and wrap some rubber bands or string around them. Spray with spray paint and allow to dry. Remove the bands or string and use the decorated jars as vases or candleholders. </p> <p><img width="500" height="500" src="https://oversixtydev.blob.core.windows.net/media/3041/painted-jars_500x500.jpg" alt="Painted Jars"/></p> <p>Image credit: <a href="http://www.pinterest.com/pin/479140847826466470/" target="_blank">Pinterest</a></p> <p><strong>Make your own blackboard</strong></p> <p>Kids will get a kick out of making their very own blackboard. Grab an old serving tray and a small tin of blackboard paint. <a href="https://www.masters.com.au/masters/home.jsp" target="_blank">The Masters Home Improvement site</a> suggests that you can also use the paint on a play-room door or even on a kitchen cabinet. </p> <p><img width="500" height="500" src="https://oversixtydev.blob.core.windows.net/media/3042/blackboards_500x500.jpg" alt="Blackboards"/></p> <p>Image credit: <a href="http://www.pinterest.com/pin/186617978280054046/" target="_blank">Pinterest</a></p> <p><strong>Decorated mugs</strong></p> <p>Design your very own mugs with a gold Sharpie pen. Take a plain mug, decorate with a Sharpie pen (we love the gold Sharpie, available from office supplies stores) and then bake in the oven at 180°C for 30 minutes to set. Allow the mugs to cool in the oven. </p> <p><img width="500" height="658" src="https://oversixtydev.blob.core.windows.net/media/3043/nice-mugs.png" alt="Nice Mugs"/></p> <p>Image credit: <a href="http://www.pinterest.com/pin/311100286734686245/" target="_blank">Pinterest</a></p>

Home & Garden

Placeholder Content Image

6 genius ways to organise almost everything with a PVC pipe

<p>If clutter is getting the better of you (and your house), fear not! We’ve got just the solution to help you get organised quickly, easily and effectively. Even better, our nifty solution is budget friendly and requires a single piece of equipment you can find at your local hardware store; the PVC pipe. Read on to find out how an item usually found in a plumbers van can spell the end of your organisation woes and help sort (almost) everything in your house.</p> <p><strong> 1. Shoe sorter</strong> – If the entryway to your house resembles a shoe shop at sales time, employ your PVC pipe to create individual “shoe compartments” for your most worn pairs. If you want to pretty things up, wrap each tube in wallpaper for an eye catching and effective storage solution.</p> <p><strong>2.  Untangle underwear</strong> – Underwear drawer a tangled mess? Keep your individual pairs of knickers sorted by using small sections of pipe as “undie holders”. Saw pipes down to size, sand the tops back and glue together for a quick and easy solution.</p> <p><strong>3. Keep craft supplies under control</strong> – If washi tape, spools of thread and ribbon are causing crafting nightmare, try creating a storage rack by affixing thin width pipe to the wall using brackets hooks. You can slide your supplies straight onto the pipe, pop it back into its bracket, and ta-da, instant organisation!</p> <p><strong>4. Tidy up tools</strong> – Use sawn off sections of pipe affixed to the wall as a nifty garden tool organiser. You’ll never have to fight through a pile of rakes to find your shovel again.</p> <p><strong>5. De-clutter your desk</strong> – A group of pipes cut on the bias, sanded, spray painted and glued together make the perfect storage spot for scissors, pens/pencils, glue sticks and paperclips. Easy and eye catching.</p> <p><strong>6. Wine storage</strong> – Long and cyclical, PVC pipe is almost made to hold your favourite bottles of wine. Try pairing wine sized pieces of pipe with smaller connecting pieces for an abstract piece of storage art.</p> <p><strong>Related links:</strong></p> <p> </p> <p><span style="text-decoration: underline;"><strong><em><a href="http://www.oversixty.co.nz/lifestyle/home-garden/2015/12/household-tricks-from-the-1900s-2/">More great vintage household tricks from the 1900s</a></em></strong></span></p> <p> </p> <p><span style="text-decoration: underline;"><strong><em><a href="http://www.oversixty.co.nz/lifestyle/home-garden/2015/12/make-your-own-giant-lollipop/">How to make your own giant lollipop decoration</a></em></strong></span></p> <p> </p> <p><span style="text-decoration: underline;"><strong><em><a href="http://www.oversixty.co.nz/lifestyle/home-garden/2015/12/stains-never-to-clean-with-water/">4 stains you shouldn’t use water to clean</a></em></strong></span></p>

Home & Garden

Placeholder Content Image

8 easy (and cheap) Christmas crafts to do with grandkids

<p>Are the grandkids staying over at your place this Christmas? Keep them busy with these kid-friendly Christmas crafts that are cheap and easy to do!</p> <p>1. Make use of those old lightbulbs with this cute idea. With some texta, twigs and twine you can create adorable little snowmen ornaments to hang on the Christmas tree.</p> <p>2. Create a personalised snow globes with your family photos. All you need is a jar, water and lots of glitter to make this magical snow globe.</p> <p>3. Construct a larger-than-life advent calendar out of a hanging shoe rack.</p> <p>4. Get the grandkids to make their own snowflake decorations from paddlepop sticks. Give the sticks a slick of paint and you’ve got some beautiful art for around the house!</p> <p>5. Make your own wrapping paper with some butchers paper, paint and stamps. Don’t worry if you don’t have any stamps: make your own out of potato.</p> <p>6. Turn your grandchildren into Santa’s little helpers with this crafty project.</p> <p>7. With some paint, felt, pipe cleaners and textas, transform toilet paper rolls into cute Christmas characters.</p> <p>8. Personalise Christmas tree baubles with thumbprint reindeers.</p> <p>Image source: Pinterest</p> <p><strong>Related links:</strong></p> <p><em><strong><span style="text-decoration: underline;"><a href="/lifestyle/family-pets/2014/12/family-games/"></a></span></strong></em></p> <p><span style="text-decoration: underline;"><strong><a href="http://www.oversixty.co.nz/lifestyle/family-pets/2015/11/funny-things-grandkids-say-part-4/"><em>The funniest things grandkids kids say</em></a></strong></span></p> <p><span style="text-decoration: underline;"><strong><em><a href="/lifestyle/family-pets/2014/12/family-games/"></a></em></strong></span></p> <p><span style="text-decoration: underline;"><strong><a href="http://www.oversixty.co.nz/lifestyle/family-pets/2015/11/sacrifices-grandparents-make-study/"><em>The many things grandparents sacrifice for their family</em></a></strong></span></p> <p><span style="text-decoration: underline;"><strong><em><a href="/lifestyle/family-pets/2014/12/family-games/"></a></em></strong></span></p> <p><span style="text-decoration: underline;"><strong><a href="http://www.oversixty.co.nz/lifestyle/family-pets/2015/11/interspecies-animal-friendships/"><em>15 unlikely friendships that will melt your heart</em></a></strong></span></p> <p><em><strong><span style="text-decoration: underline;"><a href="/lifestyle/family-pets/2014/12/family-games/"> </a></span></strong></em></p> <p> </p>

Home & Garden

Placeholder Content Image

DIY cookie cutter candles

<p>Don’t throw your old candles away. Use this genius cookie cutter method to make new candles from old.</p> <p><strong><span style="text-decoration: underline;">You will need:</span></strong></p> <ul> <li>Saucepan</li> <li>Water</li> <li>Tin can</li> <li>Candle stubs</li> <li>Crayons (optional, for colour)</li> <li>Sticks, to stir</li> <li>Baking pan</li> <li>Baking paper</li> <li>Metal cookie cutters</li> <li>Wicks (with bases)</li> </ul> <p><strong><span style="text-decoration: underline;">How to: </span></strong></p> <p>1. Partially fill a small saucepan with water and simmer. Place your tin can in the pot and fill it with your candle ends.</p> <p>2. To change the colour of your wax, add a few bits of crayons in while it melts and stir, if desired.</p> <p>3. Heat the wax to around 38°C.</p> <p>4. Line your baking pan with baking paper and place the cookie cutters on top.</p> <p>5. Put wicks in the centre of your cookie cutters. If they won’t stay upright, try pinching them between a clothes pin and laying it across the cutter horizontally to keep them up. </p> <p>6. Hold your cookie cutter down and pour your melted wax inside. If the wax is too hot, it might leak out of the bottom.</p> <p>7. Let the wax cool entirely and take candles out of the cutters.</p> <p>8. Place on a candle holder and burn.</p> <p><em>Photo source: <span style="text-decoration: underline;"><strong><a href="http://adventures-in-making.com/">Adventures-in-making</a></strong></span></em></p>

Home & Garden