Placeholder Content Image

15 hiking tips for beginners

<p>Always be prepared. It’s the motto you should live by if you’re heading off on a trek. To ensure this never happens to you, here are the essential tips that all beginner hikers need to remember.</p> <p>1. It is always safest to hike with at least two other people.</p> <p>2. Each hiker should carry a map and compass, and know how to use them.</p> <p>3. You should tell someone where you are going and an estimated return time.</p> <p>4. Never “wing it” – study a map beforehand so you know the terrain and routes.</p> <p>5. Be prepared for sudden changes in weather by wearing layers and carrying wet weather gear.</p> <p>6. Pace yourself when you first get on the trail. Choose a route that is suitable for the skill and fitness level of all group members – you don’t want to run out of steam half way through the trek.</p> <p>7. Pack an emergency kit, including a basic first aid supplies, matches, emergency shelter, as well as a whistle or signal mirror in case you need to summon for help.</p> <p>8. Never hike in brand new shoes. Wear comfortable socks and shoes that are suitable for the terrain.</p> <p>9. If you are hiking when lightning strikes, never walk above the tree line.</p> <p>10. Bring a light source, such as a flashlight or a headlight.</p> <p>11. Don’t dispose of your trash in the wilderness. Bring it back with you.</p> <p>12. Check the weather report before heading out and adjust accordingly.</p> <p>13. Wear sunscreen and insect repellent.</p> <p>14.  Keep your backpack as light as possible.</p> <p>15. Always bring some supplies of water and food, even if it’s meant to be a short trip.</p>

Domestic Travel

Placeholder Content Image

A beginners guide to herb gardening

<p>There’s an indescribable pleasure in sauntering out to your garden to pick freshly grown herbs to throw into your homemade dish. Anyone with an herb gardens would agree herbs from your personal garden gives food that extra oomph even freshly bought herbs don’t bring. What’s better is growing herbs is easy! How to grow herbs will depend on the particular herb you’re growing but here are some general rules to consider:</p> <p><strong>Choose herbs you will use</strong></p> <p>Think about what herbs you use for daily cooking. Popular options that enhance many dishes include oregano, basil, thyme and rosemary.</p> <p><strong>Provide sunshine</strong></p> <p>Most herbs need at least 6 or more hours of sunlight a day. There are some shade-loving exceptions like mint but Mediterranean herbs, such as rosemary, thyme, lavender and oregano, are drought-hardy and thrive in full sun. However, don’t scorch herbs. Place in an undercover area which receives sunlight.</p> <p><strong>Invest in a good sized pot </strong></p> <p>Don’t crowd your seedlings into a small sized pot. Provide room for them to grow and ensure it is deep enough for the roots to grow.</p> <p><strong>Good drainage </strong></p> <p>Herbs do not enjoy consistently damp or wet soil. Place gravel or stones at bottom of the pot to ensure good drainage.</p> <p><strong>Quality soil</strong></p> <p>Without good soil herbs will not grow properly. Supplement the soil with compost to give seedlings a boost.</p> <p><strong>Water moderately </strong></p> <p>During the early stages of growing herbs, you should water well. Once they are grown though, water moderately making sure you don’t over-water or under-water.</p> <p><strong>Wait before harvesting </strong></p> <p>Allow your herbs to grow before you start harvesting them. Wait into they are well and truly established (around twice the size) before plucking.</p> <p><strong>Prune regularly </strong></p> <p>Once your herbs have grown though don’t skimp on the pruning. This is what makes them grow faster and means more herbs for you to use!</p> <p><em>Image: Getty</em></p>

Home & Garden

Placeholder Content Image

Ten gardening tips for beginners

<p>Wondering how to start a garden? You can find your confidence to do it with these expert gardening tips.</p> <p><strong>Site it right</strong></p> <p>Starting a garden is pretty much all about location. Place your garden in a part of your yard where you'll see it regularly because if it’s out of sight, it’ll be out of mind. This way, you'll be much more likely to spend time in it.</p> <p><strong>Follow the sun</strong></p> <p>Misjudging sunlight is a common pitfall when you're first learning to garden. Pay attention to how sunlight plays through your yard before choosing a spot for your garden. Most edible plants, including many vegetables, herbs, and fruits, need at least six hours of sun in order to thrive.</p> <p><strong>Stay close to water</strong></p> <p>One of the best gardening tips you'll ever get is to plan your new garden near a water source. Make sure you can run a hose to your garden site, so you don't have to carry water to it each time your plants get thirsty. The best way to tell if plants need watering is to push a finger an inch down into the soil (that's about one knuckle deep). If it's dry, it's time to water.</p> <p><strong>Start with great soil</strong></p> <p>When starting a garden, one of the top pieces of advice is to invest in soil which is nutrient-rich and well-drained. You can buy garden soil from hardware stores and mix this in with existing soil to make it more nutrient- dense for your plants.</p> <p><strong>Consider containers</strong></p> <p>When space is at a premium, look to containers. You can grow many plants in pots, including vegetables, herbs, flowers, fruit trees, berries, and shrubs. When gardening in containers, use a pot that's large enough for the plant it's hosting, and fill it with some potting mix. This will help the plants to thrive and it will also protect against over and under watering.</p> <p><strong>Choose the right plants</strong></p> <p>It's important to select plants which match your growing conditions. This means putting sun-loving plants into a sunny spot, choosing heat-tolerant plants in warm climates, and giving ground-gobbling vines like pumpkins and melons ample elbow room - or a trellis to climb up. Do your homework and pick varieties which will grow well where you live and in the space you have.</p> <p><strong>Discover your zone</strong></p> <p>Knowing your ‘hardiness zone’ can help you choose the best plants. Simply put, it describes the coldest place a plant can grow. The higher the zone number, the warmer the climate. So, if a plant is ‘hardy to zone 4’ and you garden in zone 5, that plant will survive in your yard. If, however, you're in zone 3, it's too cold to grow that particular plant.</p> <p><strong>Learn your frost dates</strong></p> <p>Planting too early or late in the season can spell disaster for your garden. You need to know the last average spring frost date for your area so you don't accidentally kill plants by putting them out prematurely. It's also good to know your first average fall frost date so you can get your plants harvested or moved indoors before late-season cold damages them.</p> <p><strong>Add some mulch</strong></p> <p>Apply a layer of mulch that's two to three inches deep around each plant. This will help reduce weeds by blocking out the sun, and reduce moisture loss through evaporation, so you have to water less. Or, you can put down straw, shredded leaves, pine straw or some other locally available material.</p> <p><strong>Feed plants regularly</strong></p> <p>We've already talked about the importance of starting with great soil, but that soil works best in concert with regular boosts of high-quality nutrition for your plants. In other words, amazing soil + top-notch plant food = super garden success!</p> <p>So, a month after planting, begin feeding your garden with some plant food you’re your local store and be sure to follow label directions.</p> <p><em>Photos: Getty Images</em></p> <p><em> </em></p> <p><em> </em></p> <p><em> </em></p> <p><em> </em></p>

Home & Garden

Placeholder Content Image

A beginner’s guide to reading and enjoying poetry

<p>One of the things you get asked most when people find out that you’re a poet is whether you can recommend something that could be read at an upcoming wedding, or if you know something that might be suitable for a funeral. For most people, these occasions – as well as their schooldays – are the only times they encounter poetry.</p> <p>That feeds into this sense that poetry is something formal, something which might stand to attention in the corner of the room, that it’s something to be studied or something to “solve” rather than something to be lounged with on the sofa. Of course, this needn’t be true.</p> <p>We’ve seen over the past couple of months how important poetry can be to people. It’s forming a response in advertisements and marketing campaigns, it’s becoming a regular part of the public’s honouring of frontline heroes and, for people who write poetry more often, it’s becoming a way to create a living historical document of these unprecedented times – this latter point was the aim of the new <a href="https://www2.mmu.ac.uk/write/">Write where we are Now project</a>, spearheaded by poet Carol Ann Duffy and Manchester Metropolitan University.</p> <p>In years to come, alongside medical records and political reporting, historians and classes of schoolchildren will look to art and poetry to find out what life was like on a day-to-day basis – what things seemed important, what things worried people, how the world looked and felt and was experienced. Write where we are Now will, hopefully, be one such resource, with poets from all over the world contributing new work directly about the Coronavirus pandemic or about the personal situations they find themselves in right now.</p> <p><iframe src="https://player.vimeo.com/video/407507872" width="500" height="281" frameborder="0" webkitallowfullscreen="" mozallowfullscreen="" allowfullscreen=""></iframe></p> <p>So the crisis has perhaps brought poetry – with its ability to make the abstract more concrete, its ability to distil and clarify, its ability to reflect the surreal and strange world we now find ourselves in – back to the fore.</p> <p>Many of you might be thinking now is the time to try and get to grips with poetry, maybe for the first time. A novel might feel too taxing, watching another film just involves staring at another screen for longer, but a poem can offer a brief window into a different world, or simply help to sustain you in this one.</p> <p><strong>How to enjoy poetry</strong></p> <p>If you’re nervous around poetry or are scared it might not be for you, I wanted to offer up some tips.</p> <p><strong>1. You don’t have to like it</strong></p> <p>Poetry is often taught in very strange ways: you’re given a poem and told that it’s good – and that if you don’t think it’s good then you haven’t understood it, and you should read it again until you have, and then you’ll like it. This is nonsense. There are poets and poems for every taste. If you don’t like something, fine. Move on. Find another poet. Anthologies are great for this, and a good place to start with your poetry journey.</p> <p><strong>2. Read it aloud</strong></p> <p>Poetry lives on the air and not on the page, read it aloud to yourself as you walk around the house, you’ll get a better understanding of it, you’ll feel the rhythms of the language move you in different ways – even if you’re not quite sure what’s going on.</p> <p><strong>3. Don’t try and solve it</strong></p> <p>This is something else that goes back to our educational encounters with poetry – poems are not riddles that need solving. Some poems will speak to you very plainly. Some poems will simply move you through their language. Some poems will baffle you but, like an intriguing stranger, you’ll want to step closer to them. Poems aren’t a problem to be wrestled with – mostly poems are showing you one small thing as a way of talking about something bigger. Poems aren’t a broken pane of glass that you need to painstakingly reassemble. They’re a window, asking you to look out, trying to show you something.</p> <p><strong>4. Write your own</strong></p> <p>The best way to understand poetry is to write your own. The way you speak, the street you live on, the life you’ve lived, is as worthy of poetry as anything else. Once you begin to explore your own writing, you’ll be able to read and understand other people’s poems much better.</p> <p>I would say this as a poet, but poetry is going to be even more central to how we rebuild after this current crisis. Poetry, especially the teaching of how we might write it, has this wonderful ability to create a new language, to imagine new ways of seeing things, to help people to articulate what it is that they’ve just been through. The way we move forward, as a community, as a society and, in fact, as a civilisation, is to push language to new frontiers, to use language to memorialise, reimagine and rebuild, but also to remember that poetry can be an escape, something to be enjoyed, something to cherish.</p> <p>With that in mind here is a poem I wrote for Write where we are Now.<!-- Below is The Conversation's page counter tag. Please DO NOT REMOVE. --><img style="border: none !important; box-shadow: none !important; margin: 0 !important; max-height: 1px !important; max-width: 1px !important; min-height: 1px !important; min-width: 1px !important; opacity: 0 !important; outline: none !important; padding: 0 !important; text-shadow: none !important;" src="https://counter.theconversation.com/content/137321/count.gif?distributor=republish-lightbox-basic" alt="The Conversation" width="1" height="1" /><!-- End of code. If you don't see any code above, please get new code from the Advanced tab after you click the republish button. The page counter does not collect any personal data. More info: https://theconversation.com/republishing-guidelines --></p> <p><img src="https://images.theconversation.com/files/331106/original/file-20200428-110779-1fegtkr.png?ixlib=rb-1.1.0&amp;q=45&amp;auto=format&amp;w=237&amp;fit=clip" alt="" /> <span class="caption"></span></p> <p><em><a href="https://theconversation.com/profiles/andrew-mcmillan-535042">Andrew McMillan</a>, Senior Lecturer, Department of English, <a href="https://theconversation.com/institutions/manchester-metropolitan-university-860">Manchester Metropolitan University</a></em></p> <p><em>This article is republished from <a href="https://theconversation.com">The Conversation</a> under a Creative Commons license. Read the <a href="https://theconversation.com/a-beginners-guide-to-reading-and-enjoying-poetry-137321">original article</a>.</em></p>

Books

Placeholder Content Image

3 things a first-time gardener needs to know

<p><span style="font-weight: 400;">As it’s the beginning of a new year, many are thinking about what kind of hobbies they’d like to take in 2020. If gardening is on your list, here are three things that beginner gardeners need to know.</span></p> <p><strong>1. Don’t start too big</strong></p> <p><span style="font-weight: 400;">Beginner gardeners might just see what kind of seeds they want to grow and begin planting, but according to Barbara Murphy, a master gardener coordinator and horticulturist with the University of Maine, this is the opposite of what you should do.</span></p> <p><span style="font-weight: 400;">“Starting too large is the most common mistake made by first-time gardeners,” said Barbara Murphy, a master gardener coordinator and horticulturist with University of Maine Cooperative Extension for 23 years.</span></p> <p><span style="font-weight: 400;">“Limit yourself to 10 feet by 10 feet, [3 metres by 3 metres]” she says. “If you grow frustrated because of too many things happening the first year, there’s a good chance you won’t feel like gardening for a second. You can always expand as your skills develop.”</span></p> <p><strong>2. Know your soil</strong></p> <p><span style="font-weight: 400;">Knowing what your garden needs soil wise is vital for success.</span></p> <p><span style="font-weight: 400;">“Good soil preparation is important to success, but be patient,” said Rosie Lerner, an extension horticulturist with Purdue University to <a href="https://www.staradvertiser.com/2020/01/05/features/advice-to-first-time-gardeners-think-small-and-find-your-spot/"><em>Star Advertiser</em></a>. “Don’t force the soil when it’s wet. Soil structures will compact and get tight. That makes it tough for water and air to move through and greatly inhibits growth.”</span></p> <p><span style="font-weight: 400;">Squeeze the soil gently in your hand. If it crumbles a bit when squeezed, it’s ready for use. “It can take a long time to get good soil texture, and just minutes to destroy it if you work it while it’s too wet,” Lerner said.</span></p> <p><strong>3. Get rid of insects as quickly as possible</strong></p> <p><span style="font-weight: 400;">Insects are bad news for growing gardens.</span></p> <p><span style="font-weight: 400;">“Make regular visits to your garden to check for plant pests,” Murphy said. “Don’t worry about the adults. You want to go after the eggs before they develop into juvenile leaf cutters. Most eggs are on the underside of leaves. Use soapy water and picking or simply remove the infested leaves.”</span></p>

Home & Garden

Placeholder Content Image

Your guide to meal prepping for beginners

<p><span>Meal prepping is a sensible option for helping you save time, waste less food and get your daily meals on the table much faster than usual. Are you interested in getting started with meal prepping? Read on to learn more, plus find meal prepping ideas, tips and suggestions for beginners.</span></p> <p><strong><span>What is meal prepping?</span></strong></p> <p><span><a href="https://www.thekitchn.com/how-to-meal-prep-beginner-261658">Meal prepping</a> is the act of consciously allotting time for preparing your meals, or the ingredients you use for making your meals, in bulk ahead of when you will need them. The idea is that you can save time by cooking once, portioning out the food and having it ready to use when you need it.</span></p> <p><span>You’re likely to also save money with this method. This is because you won’t end up buying overpriced takeaway meals at the last minute when you’re hungry and in too much of a hurry to cook a meal from scratch. You’re also likely to waste far less food with this method – because you consciously plan out what to do with each morsel of food instead of letting leftovers go to waste.</span></p> <p><span>Here’s an example of how meal prepping can save you time and increase your efficiency. Let’s say that it takes you 4 hours to make a 2.5 kilogram roast from start to finish. As long as you’re going to all that trouble, why not make 2 roasts, then divide each roast into 12 portions to use for meal prepping? The roast beef meals can then be frozen for later use as needed.</span></p> <p><span>That’s an extreme example of a time consuming meal prep. You do not have to allot that much time to meal prepping if you’d rather prepare simpler meals, or portions of meals.</span></p> <p><span>If you hustle, it is possible to prepare a week’s worth of meals <a href="https://www.thekitchn.com/meal-prep-rules-261129">in only one hour</a>. </span></p> <p><span>Or meal prepping can be as simple as returning from the farmer’s market and then chopping up a week’s worth of fresh salads using the produce you bring home. If you serve a main dish plus a helping of fresh salad for dinner every night, having the salad made ahead of time frees you to focus on the main dish when it comes time to prepare dinner.</span></p> <p><strong>Tools and supplies you’ll need for meal prepping</strong></p> <p><span>First and foremost, you’ll need suitable containers for meal prepping. To avoid creating excess <a href="https://www.oversixty.com.au/lifestyle/home-garden/ways-to-reduce-household-waste">household waste</a>, and to minimise your environmental footprint, avoid using single-use plastics such as plastic baggies or disposable containers for this purpose. Instead, select mason jars, glass storage containers or reusable stainless steel lunch containers for storing the foods you’ll prepare.</span></p> <p><span>There are many kitchen gadgets, utensils and appliances that can make meal prepping more convenient. A few <a href="https://www.mealprep.com.au/p/kitchen-essentials-for-meal-prepping/">meal prepping essentials</a> include a blender, an accurate digital kitchen scale and a set of high-quality kitchen knives.</span></p> <p><strong><span>How to meal prep</span></strong></p> <p><span>Start with a clean kitchen. First, clean out the refrigerator and freezer to make space for the meals you’re going to prep.</span></p> <p><span>Next, wash any dirty dishes that may be lingering in the kitchen. Put everything away except for the gadgets, dishes and utensils you plan to use during the meal prepping process.</span></p> <p><span>Next, decide which meals you’re going to prep. If you’re totally new to meal prepping, it’s probably wise to start small. Choose one meal – breakfast, lunch, or dinner -- to start with. Then decide which dishes you want to prepare for the week. Locate recipes you want to use. The ingredients you need for the recipes will form the basis for your grocery list. Prepare the grocery list and take it to the market with you to shop for the ingredients you need.</span></p> <p><span>When you’ve returned from the market, it’s time to get busy prepping. Cook your ingredients. Set out your containers and your scale. Measure out your ingredients and assemble your meals. Then place everything in the refrigerator or freezer so it’s all ready to go when you need it.</span></p> <p><span>If you freeze your meals, you will obviously need to allow adequate defrosting time before you can easily use them. You may wish to make notes on your calendar to defrost a particular item the night before you need it.</span></p> <p><span>This <a href="https://www.oversixty.com.au/lifestyle/food-wine/15-dollar-kmart-hack-will-save-you-thousands">clever and affordable hack</a> can also help you with planning out your meals if you like to have a visual means of keeping track of your meal plans.</span></p> <p><span>Those are some of the most essential basics you need to know about meal prepping. Like most other skills in life, you will get faster and more efficient at meal prepping if you do it repeatedly. You’ll learn what works best for you, and the process will get easier in time.</span></p> <p><strong><span>Related links</span></strong></p> <ul> <li><span><a href="https://www.oversixty.com.au/lifestyle/home-garden/five-tips-for-an-organised-freezer">5 Tips to help you perfectly organise your freezer</a></span></li> <li><span><a href="https://www.oversixty.com.au/finance/money-banking/21-tricks-to-drastically-slash-your-grocery-bill">21 Tricks to drastically slash your grocery bill</a></span></li> </ul>

Body

Placeholder Content Image

13 wild New Zealand walks from beginner to advanced

<p>New Zealand has many spectacular walkways and tracks providing access to unique wilderness areas and virgin forests.</p> <p>Energetic hikers (or trampers) can discover glacier-carved valleys and traverse mountain passes, while more sedate day-walkers can explore golden beaches, bush walks and other sites of scenic, historic and cultural interest.</p> <p><strong>National parks</strong></p> <p>About one-third of New Zealand’s sparsely populated land has been set aside in national parks or reserves for the enjoyment of the public and increasing numbers of eco-tourists.</p> <p>While opportunities for exploration exist all over the country, nine destinations are recognised as significant and have been designated ‘Great Walks’ by the Department of Conservation (DOC).</p> <p>Apart from the coastal Abel Tasman track in the north of the South Island, the tracks are in high country or mountain areas. Ranging in duration from two to six days, the tracks cover a variety of landscapes on safe, well-maintained pathways.</p> <p>All tracks offer guided tours for which bookings are essential. Accommodation is generally in basic huts or lodges, but some guided talks offer luxury options. The high season starts in October (late-Spring) and lasts until April (early-Autumn).</p> <p><strong>South Island Great Walks</strong></p> <p>Five of New Zealand’s ‘Great Walks’ are in the South Island; a sixth is further south on Stewart Island.</p> <ul> <li><strong>Milford Track</strong></li> </ul> <p>The Milford Track in Fiordland – New Zealand’s largest national park – is the most famous. Visitors spend four days / three nights following historic Maori routes through a dramatic landscape of forest-covered valleys, mountains and steep fiords from Lake Te Anau to Milford Sound. For this much-demanded route, bookings are necessary well in advance, for both independent and guided walks.</p> <ul> <li><strong>Routeburn Track</strong></li> </ul> <p>The Routeburn Track, another famous South Island track, has some of the most diverse scenery: forests, alpine flora, lakes, several waterfalls and panoramic views. The three-day trek covers 39km (24 miles).</p> <ul> <li><strong>Kepler Track</strong></li> </ul> <p>The Kepler Track follows a loop that begins and ends at the Fiordland National Park Visitor Centre in Te Anau. It takes four days and traverses lakeside forest and open tussock grasslands, with one day spent walking along the mountain tops above the bush line.</p> <ul> <li><strong>Rakiura Track</strong></li> </ul> <p>Wilderness explorers wanting to experience the ‘end of the earth’ head for Stewart Island, New Zealand’s southernmost and least populated island. The Rakiura Track has the most birdlife, least predictable weather and conditions but planked walkways keep feet dry and ensure the three-day walk is possible year-round. It has gentle gradients – never more than 300m above sea level – and two huts provide accommodation.</p> <ul> <li><strong>Heaphy Track</strong></li> </ul> <p>The Heaphy Track, in the northwestern corner of the South Island, has undemanding gradients over 80km (around 50 miles). The walk takes about five days. The track is accessible year round, but winter snows can make the higher sections chilly. Attractions on the Heaphy Track include the nikau palm-lined beach at its western end, red tussock downs, lush beech forests and fields of alpine herbs.</p> <ul> <li><strong>Abel Tasman Coastal Track</strong></li> </ul> <p>The Abel Tasman Coastal Track, at the top of the South Island, only requires light walking shoes for the 50km (31 miles) route lined with miles of golden beaches. Along the way, five huts and 21 campsites offer accommodation, but transport has to be arranged from one end or the other.</p> <ul> <li><strong>Pike29 Memorial Walk</strong></li> </ul> <p>New Zealand’s nine great walks became 10 in 2018 with the announcement of the Pike29 Memorial Track. The 45-kilometre walk is to be constructed through the Paparoa National Park on the west coast of New Zealand’s South Island. The national park will be extended by 3971 hectares to include the Pike River area as a memorial to the 29 men who perished in the 2010 mining disaster. The track will travel from Blackball to Punakaiki and include part of the existing Croesus and Pororai River tracks.</p> <p><strong>North Island Great NZ Walks</strong></p> <p>Three ‘Great Walks’ are in the North Island: Tongariro Northern Circuit, Lake Waikaremoana Track and Whanganui Journey. Each offers a distinctive landscape and challenges for energetic walkers.</p> <ul> <li><strong>Tongariro Northern Circuit</strong></li> </ul> <p>The Tongariro Northern Circuit is a loop track of three to four days, starting and finishing at the foot of Mount Ruapehu. Few places equal the drama of this active volcanic region with its lava formations, tussock grassland, fumaroles and geysers, and emerald green mineral lakes – the setting for the scenes in New Zealand director Peter Jackson’s The Lord of the Ringstrilogy. Altitude and climatic conditions mean the Tongariro circuit is best walked from late November to March. The Tongariro Crossing – one section of the circuit – is one of New Zealand’s most renowned day walks.</p> <ul> <li><strong>Lake Waikaremoana Track</strong></li> </ul> <p>Lake Waikaremoana is situated east of the central volcanic plateau, in one of the North Island’s most remote regions. The 46km (28 miles) track encircles the lake, providing a four to five-day walk. Apart from one day climbing a steep bluff, the track follows a leisurely path through rainforest.</p> <ul> <li><strong>Whanganui Journey </strong></li> </ul> <p>Included as one of New Zealand’s ‘Great Walks’, the Whanganui Journey is more correctly a 145km kayak or canoe journey down the Whanganui River. Beginning in Taumarunui, this journey takes about five days to complete and provides an early New Zealand history experience. For hundreds of years, the Whanganui River was an important Maori route; later, in early European settlement days, it became a steamboat highway. The winding river and surrounding lowland forest is now a national park.</p> <p><strong>Day walks</strong></p> <p>Not up for a long hike? New Zealand has plenty of day walks through areas of unique flora and fauna.</p> <p><strong>The Coromandel Peninsula</strong><span> – l</span>ocated two hours’ drive south of Auckland – offers forest and coastal walks. The virgin rain forest that once covered much of the peninsula was heavily logged in the late 19th century, and visitors can see the remains of enormous dams and tramways used to transport logs of the giant and much-prized kauri trees. The regenerated forest is spectacular and the coast has isolated bays of exceptional beauty.</p> <p>Day-walkers not wanting to leave the city far behind can set out from Auckland with a map of the<span> </span><strong>Waitakere Ranges</strong><span> </span>which fringe the western city. These tracks skirt high cliffs and cross wild beaches of black sand.</p> <p>In<span> </span><strong>Kahurangi National Park</strong><span> </span>– in the northwestern corner of the South Island – the Oparara Track offers 31km of pathways through virgin rainforest and access to a series of spectacular limestone caves, home to some of New Zealand’s unique fauna and flora.</p> <p>Further south,<span> </span><strong>Central Otago’s Rail Trail</strong><span> </span>is a unique recreational facility preserving an important part of New Zealand history. The 150km section of old railway route has been redeveloped for walkers, cyclists and horse riders who can enjoy the unique Central Otago scenery and experience the South Island’s remoteness and history.</p> <p><strong>Walker information</strong></p> <p>New Zealand’s sparse population and huge wilderness areas mean that most walking tracks are remote from many of the comforts of civilisation. Facilities at the 900 huts maintained by DOC are basic, and walkers need to equip themselves with adequate food and clothing.</p> <p>Weather conditions can change rapidly, especially in the mountains, and it is essential, even in summer, to carry warm, waterproof clothing. No hike should be undertaken without consulting a detailed guide book and a map.</p> <p>For any of the ‘Great Walks’, bookings are required for accommodation in huts, but permits or admission fees are not required for day walking. Bookings are made through the Department of Conservation.</p> <p><em>Republished with permission of </em><a rel="noopener" href="https://www.mydiscoveries.com.au/stories/new-zealand-walks/" target="_blank"><em>MyDiscoveries</em></a><em>. </em></p>

International Travel

Placeholder Content Image

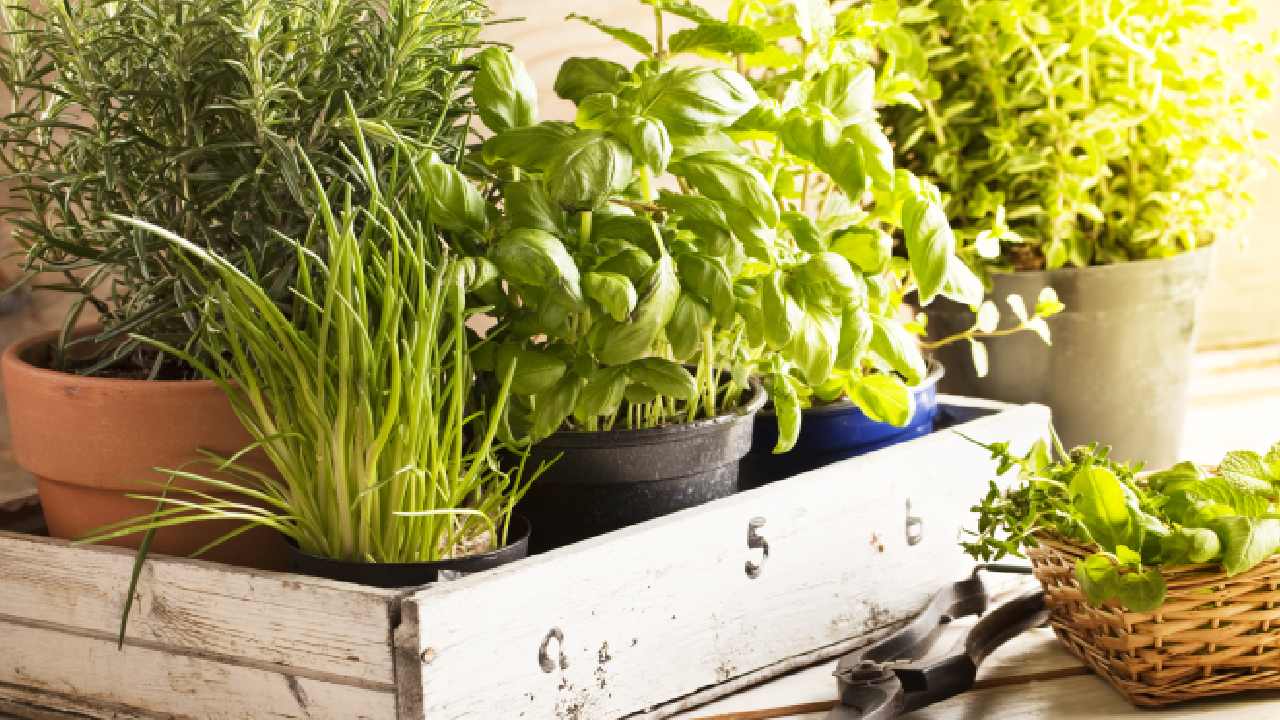
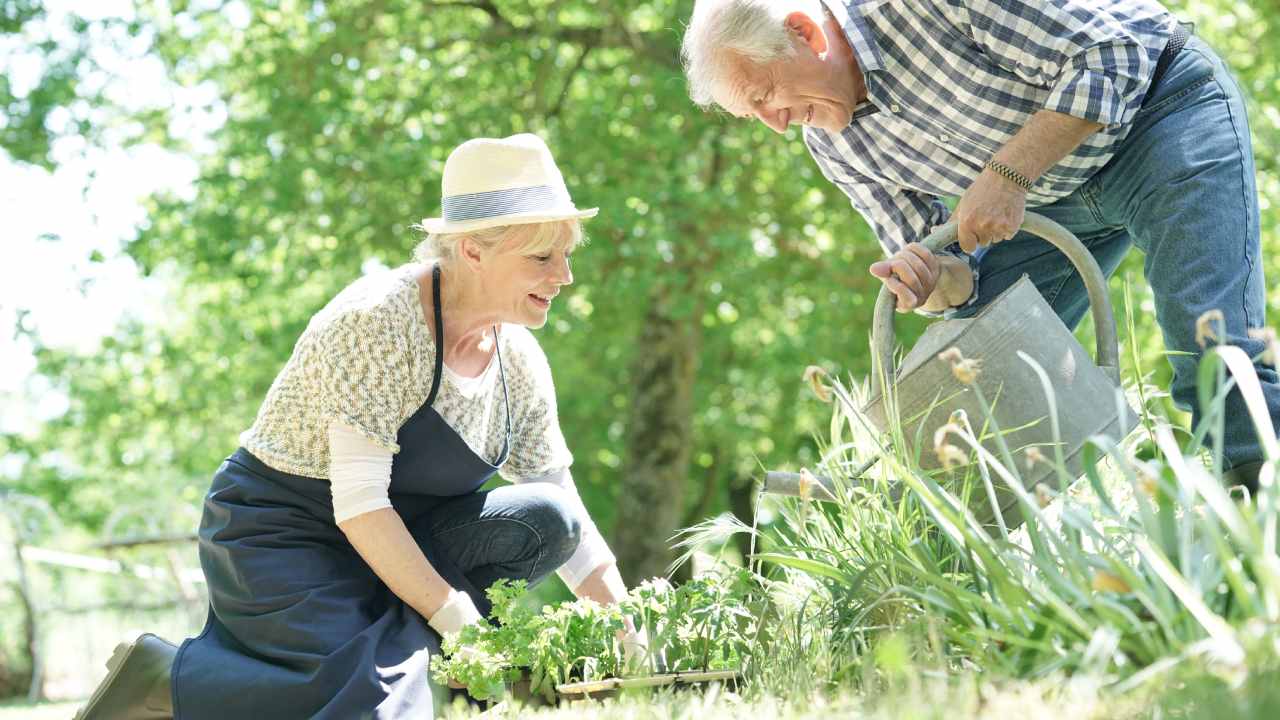
A beginner’s guide to gardening tools

<p class="first-para">It’s difficult enough finding time to maintain your garden, but having the right tools goes a long way to achieving great results. Here, our gardening experts share the gardening toolkit essentials you’ll need to make your garden flourish.</p> <p>A woman, let’s call her Jane, is standing below a tree, neck strained to face the mess of branches above. With pole-pruner in hand, she raises the extension tool through the canopy and anchors the secateurs on a branch.</p> <p>Pulling the tool’s string, the blades carve the wood like a knife through a baguette, sending the offcut tumbling to earth. Jane repeats the process on a bunch of limbs destined for compost. Standing back to admire her work, she spies one more branch that, if removed, will even the canopy perfectly.</p> <p>The pole ascends and lands one final time but as Jane pulls the string, the blades don’t budge. She yanks it again and, suddenly, the secateurs snap and hurtle south hitting Jane on the head and knocking her out cold.</p> <p>This is a true story as told by award-winning garden designer Ian Barker about a friend of his – whose real name isn’t Jane. And the point of the story is there was a better tool for the job. A decent motorised pruner, for example.</p> <p>“Unless you know what the right tool is,” Barker says, “don’t do the job.”</p> <p>Rookie blunders aside, homeowners can rest easy knowing their gardens will flourish under their amateur, time-poor hands if they heed expert advice and invest in reliable, job-appropriate garden tools. Hello weekends!</p> <p>Barker’s must-have tools include, “a really good pair of secateurs” for pruning shrubs, a rake, a hand-cultivator (a claw that loosens the earth), a quality hedge trimmer for neat hedges and a “really good” mower.</p> <p>“I don’t actually like gardening,” Barker confesses. “I love designing gardens and I love building them, but I don’t like maintaining them.”</p> <p>His efficient weekend repertoire, therefore, involves tending to the perimeter of his garden first, pruning plants and cultivating the ground. Cuttings are thrown on the lawn in the middle. “You don’t have to be too thorough picking up the rubbish from the grass, because then you finish with the mower,” he says. Job done.</p> <p>Barker advises against investing in low-grade equipment.</p> <p>“Power tool-wise, buy a quality mower,” he says. “Don’t buy a cheap mower. If you get the mower out and you can’t start it, you just get fed up and you usually stop and go do something else. Same goes for a really good hedge trimmer. The better the hedge trimmer, the sharper [the blades] and you get nice clean cuts, and it’s fast.”</p> <p>Jim’s mowing gardening contractor and Honda ambassador, George Labbad, says he uses Honda equipment because, “they start first time, every time. It’s as simple as that.”</p> <p>The result of any gardener’s efforts is always indicated by the quality of machinery used.</p> <p>“From a home gardener’s perspective, with Honda, you take your equipment out and you’re into it straight away,” Labbad says. “The other beauty of using Honda is it’s all four-stroke. You’re not having to remember the right mix of fuel. You just fill a tin with unleaded fuel and you’re ready to go.”</p> <p>Labbad’s list of gardening tool essentials includes a first-rate brush cutter, hedgecutter, blower and big plastic hands for picking up green waste.</p> <p>The Honda VersaTool is also a mainstay in Labbad’s kit. Attachments such as the blower and hedgecutter work from the one power-head, making storage and cartage easy. The extension pole eradicates the perilous ladder, saving time and putting welfare first. High branches can be trimmed with the power of a four-stroke engine, neatly, quickly and safely.</p> <p>Peter Shaw of Ocean Road Landscaping says there are two types of gardening: the repetitive jobs that don’t need planning, like mowing and edging, and the creative jobs, like heavy pruning and planting.</p> <p>“Get the repetitive stuff done first,” he says, “then the fun can begin doing more creative things.” A decent stainless steel shovel and wire metal rake is in Peter’s must-have toolkit.</p> <p>Barker adds beginner gardeners should take on the “little stuff” until they’re more experienced.</p> <p>“As soon as you think it’s starting to get a bit beyond you, it is,” he says. “Get someone else in. There’s the right tool for every job and unless you know what the right tool is, don’t do it.”</p> <p>Labbad adds: “I truly believe if you invest in good equipment, you’re not continually having to re-buy, you’re not continually having to repair it and, if it’s quality, you’ll use it more and get enjoyment out of using it as opposed to it being a chore.” </p> <p><em>Written by Kristie Hayden. Republished with permission of <a href="http://www.domain.com.au" target="_blank"><strong><span style="text-decoration: underline;">Domain.com.au.</span></strong></a> </em></p>

Home & Garden

Placeholder Content Image

A beginner’s guide to Twitter

<p>You’ve mastered Facebook and even Instagram (if not, check out how to with our <a href="http://oversixty.com.au/technology/technology/2014/09/everything-you-need-to-know-about-instagram/" target="_blank"><span style="text-decoration: underline;"><strong>guide</strong></span></a>) and now it’s time to conquer the world of Twitter. Here’s what you need to know to get started.</p> <p><strong><span style="text-decoration: underline;">What is Twitter?</span></strong></p> <p>Twitter is a fast-moving information network made up of 140-character messages called “tweets.” Unlike other social networks like Facebook, Twitter is not about connecting with people you know (although you can do this) but about following people and organisations that interest you (such as news sources, politicians, comedians, TV shows, celebrities etc). It’s an easy way to discover the latest news related to subjects you care about in real-time and in a short digestible form. Just think of it like reading a newspaper with headlines you’ll always find interesting as you only follow users you want to follow!</p> <p><strong><span style="text-decoration: underline;">How to create an account? </span></strong></p> <p>It’s completely free to sign up to Twitter. Head to the Twitter homepage <a href="https://twitter.com%20" target="_blank"><span style="text-decoration: underline;"><strong>here</strong></span></a> and create an account. Pick a username (you can change it later so don’t worry too much) – it could be your name if it’s a personal account or your business name for your brand.</p> <p>Twitter will take you on a tutorial to teach you the basics – don’t skip this part if you’re feeling a bit unsure about the process. Next, they’ll ask you to start following people. You can do that now or look for people to follow later (or anytime). Just remember that unlike Facebook where you are normally real life “friends” with people, on Twitter it is perfectly acceptable and in fact normal to follow people you don’t know but interest you.</p> <p>Now that your account is set up you can edit your profile. Much like Facebook you can upload a profile picture, a header image and include a little description of yourself. Check your settings to see if everything is set up accurately.</p> <p><strong><span style="text-decoration: underline;">Twitter terms you need to know</span></strong></p> <p><strong>Tweet</strong> - The 140-character message you read from people you follow or “tweet” out to your followers. Twitter users will often link to an article, image or video in a tweet which you click on to find out more.</p> <p><strong>Following</strong> – These are the users you have chosen to follow by clicking “follow” on their Twitter page. It means all their tweets will show up on your news feed.</p> <p><strong>Followers</strong> - These are the people who have chosen to follow you.</p> <p><strong>Retweet or RT</strong> - Re-sharing someone’s tweet to your own followers. You can retweet someone’s tweet by clicking on the two arrows on the bottom of someone’s tweet.</p> <p><strong>Feed</strong> - The stream of tweets you see on your homepage which is made up of people you follow. When you have followed a few users, you’ll have a new page of information every time you log in to your homepage.</p> <p><strong>Handle</strong> - Your username</p> <p><strong>Mention</strong> – You can mention other users by including the @ symbol followed directly by their username. For example, @oversixty60. Mentioning someone ensures they will be notified of your tweet.</p> <p><strong>Direct Message or DM </strong>- A private message between two people. You may only DM a user who follows you</p> <p><strong>Hashtag (represented by # symbol)</strong> - A way to indicate a topic of conversation or participate in a larger linked discussion. For example, you can participate in ABC’s Q and A program by including the hashtag “#qanda”. If you mention them as well (@qanda) you could be retweeted on the show! A hashtag also allows other users to find your tweets even if you do not follow each other. You can click on a hashtag to see all the tweets that mention it in real time. </p>

Technology

Placeholder Content Image

Beginner knitting pattern: DIY winter scarf

<p>As we’ve <a href="http://www.oversixty.com.au/lifestyle/retirement-life/2016/12/5-benefits-of-knitting/" target="_blank"><strong><span style="text-decoration: underline;">discussed previously</span></strong></a>, we’re huge fans of knitting here at Over60. Not only is it a fun way to pass the time, but it’s also a wonderful way to keep your mind in tip-top shape. So, pick up those needles and yarn<a href="https://shop.oversixty.com.au/collections/knitting-crochet/product-type_yarn?utm_source=Over60&amp;utm_medium=in-article-link-knitting-crochet-yarn&amp;utm_campaign=Over60Shop&amp;utm_content=yarn" target="_blank"></a>! Here’s a simple, chic winter scarf tutorial from <a href="https://www.thespruce.com/garter-stitch-scarf-for-beginners-2116203" target="_blank"><strong><span style="text-decoration: underline;">The Spruce</span></strong></a> that’s perfect for beginners.</p> <p><strong><span style="text-decoration: underline;">Required knowledge:</span></strong></p> <ul> <li>Casting off</li> <li>Garter stitch</li> <li>Binding off</li> </ul> <p><strong><span style="text-decoration: underline;">You will need:</span></strong></p> <ul> <li>One skein of super bulky yarn (or more depending on desired length of scarf)</li> <li>9mm needles</li> <li>Scissors</li> <li>Crochet hook (easier to use with bulky yarn than a needle)</li> </ul> <p><strong><span style="text-decoration: underline;">Steps:</span></strong></p> <ol start="1"> <li>Cast on 12 stitches.</li> <li>Knit every stitch and row until scarf is at desired length. If you wish to use another skein, <a href="https://www.thespruce.com/how-to-join-a-new-ball-of-yarn-2116492" target="_blank"><strong><span style="text-decoration: underline;">here’s how</span></strong></a> to add in a new one.</li> <li>Bind off.</li> <li>Cut the yarn, leaving about a 15cm tail.</li> <li>Using the crochet hook, weave in the ends at the top and bottom</li> <li>Finished!</li> </ol> <p>Interested in giving it a try?</p> <p>Tell us in the comments below, what’s the most challenging thing you’ve ever made?</p>

Family & Pets

Placeholder Content Image

Beginner’s guide to decorating your home with colour

<p>Spring is the perfect time to give your home a makeover and there’s no better way to freshen up a space with an injection of colour. Adding colour to the home is an easy and cheap way to transform your space, but many people are often too afraid to take the plunge and give their interiors a lick of paint.</p> <p>Dulux colour expert Andrea Lucena-Orr says there’s no need to be afraid of colour, telling Over60, "never feel afraid of changing colour on a wall. A fresh coat of paint is a simple and inexpensive way to add colour, personality and create a place where you feel comfortable, inspired and happy.”</p> <p>When it comes to home decorating, changing the colours of a wall or walls is such an easy and cheap way to transform the entire feel of your home. It’s big on impact without getting into a major decorating project.</p> <p>“Colour plays a pivotal role in the home as it helps define the feeling and mood of a space and it so simple to create with a simple painting project,” says Andrea, continuing, “Adding small changes more regularly to your home will ensure your home stays up-to-date and the projects can remain on a small and cost effective scale rather than having to do a whole home at once.”</p> <p>So how do you go about picking the right colour for your home? Remember colour is a personal preference so Andrea advises you to think about what you want to achieve with your home.</p> <p>“Colour choice should always be based on the outcome you are trying to achieve,” she says. “Think about the overall ambience you want and do not think of colour as flat. In-between spaces such as corridors and circulation spaces between rooms are often overlooked. They act as transition spaces and can add delight, linking spaces in the home.”</p> <p><strong>Andrea’s top tips for decorating with colour:</strong></p> <ul> <li>Consider what aspect the room is facing. For example, north or west rooms will receive most intense light so you need to consider this before colour selection.</li> <li>Consider the lighting in the space to ensure you are making the most of natural daylight.</li> <li>Review your existing fittings and furnishings to ensure these colours will work with elements that cannot be changed easily.   </li> <li>Always use a sample pot to check how your colour appears either on the wall or painted on a large cardboard sheet, so that you can move around the room and look in different areas. Leave the sample ‘on’ for at least three days before making a final decision.  </li> <li>Don’t select colours on advice from friends or neighbours visiting - great that they want to help but unless they are professional designers/colour consultants it will be their personal preferences selected rather than yours or your families. To make it your own treasured space it has to be your own taste and considerations taken into the thought process and final decisions.  </li> </ul> <p>Do you have any advice for simple and cheap ways to decorate the home? Share your tips with us in the comments section below.</p> <p><strong>Related links:</strong></p> <p><a href="/lifestyle/home-garden/2016/09/simple-ways-to-freshen-up-your-home/"><strong><em><span style="text-decoration: underline;">6 easy tricks to freshen up your home</span></em></strong></a></p> <p><a href="/lifestyle/home-garden/2016/10/how-to-choose-the-perfect-houseplant/"><strong><em><span style="text-decoration: underline;">How to choose the perfect houseplant</span></em></strong></a></p> <p><a href="/lifestyle/home-garden/2016/10/expert-tips-to-declutter-your-home/"><em><strong><span style="text-decoration: underline;">5 expert tips to declutter your home</span></strong></em></a></p>

Home & Garden

Placeholder Content Image

A beginner's guide to writing an online dating profile

<p>We use the internet for everything from banking to insurance claims and from booking restaurants and movie tickets, so it makes complete sense that we use it to meet people too. Online dating can be a great way to connect with new people and find others who share your interests and values. So how then do you go about setting up a profile? Well, if you’re thinking of trying online dating there are some simple tips and tricks to help you create a great profile. You’ll want to ensure your profile shows you at your best and helps you meet new people who you can feel excited about because you share common interests.<br /> <br />Each dating site has its own process for setting up a profile. And the good news is, they’re all pretty user friendly. Some will ask specific questions while others will give you free reign to share as much or as little of yourself as you like. The best way to approach this task is to think of your profile as a snapshot of who you are. While it’s only brief and you don’t want to reveal too much, the more information you can share about yourself the more likely you are to connect with someone who is well suited to you. A few things to remember:</p> <p><strong>What are you looking for?</strong> <br />One of the worst things that can happen is that you get excited about meeting someone you’re interested in only to find out you’re after different things. People use online dating websites to find both casual and serious relationships, so spend some time thinking about exactly what you’re hoping to find in a match and share your expectations openly.</p> <p><strong>Put your best photo forward</strong> <br />Dating isn’t all about looks but selecting a photo of yourself that is pleasing, and where you look happy, is one the best techniques to attracting attention in the online dating game. Opt for a photo that’s been taken recently (within the last year) and one in which you are smiling.</p> <p><strong>Celebrate your individuality</strong><br />Don’t be afraid to share what makes you different when you’re filling out your profile. It will create a talking point, help you weed out the people that don’t appreciate the things you do and will allow you to be yourself throughout the entire process. Given said that, you only want to talk briefly about these things. Some points to cover are achievements you’re proud of, favourite places to travel, hobbies and other things that make you special and unique. Don't give it all away - you want to gain interest but leave some things to chat about in the near future.</p> <p><strong>Honesty in the best policy</strong> <br />Always avoid exaggerating or embellishing the truth. While it’s natural to want to put your best face forward, if you lie it will only make it harder to connect with people you’re actually interested in and who share the same passions as you. There’s someone out there for everyone, so don’t be afraid to be yourself.</p> <p><strong>Seeking out a second opinion</strong> <br />When you think you’re done creating your profile, it’s a great idea to test the waters and see what a friend thinks before you make your profile live. Getting a second opinion is also handy if you’re struggling to come up with a list of all the things that make you great. Ask someone you trust to help remind you of your best qualities and build a profile you’re happy and comfortable with.</p> <p> </p>

Relationships

Placeholder Content Image

Beginner’s guide to an edible garden

<p>If you enjoy entertaining outdoors and are lucky enough to have the space for an outdoor kitchen, or even just a BBQ, then the food you grow can literally be picked moments before cooking time. As anyone who has ever grown their own can attest, there is nothing like the taste of truly fresh food: tomatoes with actual flavour, crispy lettuce and herbs that pack a real punch.</p> <p><strong>Planning your planting</strong></p> <p>The first thing that you need to do when planning an edible garden is to consider where it will go. Just remember that the more accessible your garden is, the more likely you are to actually use it, so a location close to your kitchen is ideal. As a general rule, an area that gets lots of sun will be best; however, herbs such as mint, parsley, chervil and coriander will all grow in partial shade.</p> <p>Love the idea of growing your own produce but worried you don’t have the space? Instead of filling pots, borders or small garden beds with purely ornamental varieties, why not mix it up a bit by growing edibles instead? Oregano is just one of many low-growing herbs that can be used to fill in vacant space between pavers.</p> <p>Another way to make the most of your space is by planting a vertical garden. These sorts of gardens are right on-trend at the moment with everyone from the local pub to fancy restaurants installing ‘green’ walls and fences. Not only do they look amazing, they are also easy to set up and use with vertical garden kits.</p> <p><strong>What to grow?</strong></p> <p>Here are just a few herbs, fruits and vegetables that you will find relatively easy to grow on your own:</p> <p><strong>Herbs</strong></p> <ul> <li>Parsley: one of the most widely grown herbs. Best used fresh in salads or as a garnish.</li> <li>Basil: an incredibly popular herb to grow, basil enhances the taste of tomatoes and helps protect them from disease and insects.*</li> <li>Oregano: a common ingredient in Italian cooking, oregano is sweet and a little peppery to taste.</li> <li>Rosemary: a woody shrub that loves full sun and dry soil. Rosemary is excellent with potato and lamb.</li> <li>Coriander: a ‘love it or loathe it’ herb. Most commonly used in Indian, Mexican and Vietnamese cooking.</li> <li>Mint: grows very well in moist areas and in shade. It can be used in sweet and savoury recipes and as tea.</li> </ul> <p><strong>Fruit and vegetables</strong></p> <p>Potatoes, tomatoes, carrots and peas are all incredibly easy vegetables to grow and maintain, with specialty items like tomato planters and potato barrels making life easier for the home gardener.</p> <p>Can’t quite fit an orchard in your yard? Never mind: citrus fruits like lemon and lime grow well in pots, and for maximum variety in minimum space, why not try a fruit salad tree? You can choose from four varieties of multi-grafted trees, each bearing up to six different fruits.</p> <p>It’s never been easier to cook and entertain outdoors and, with an edible garden at your fingertips, fresh produce is only a footstep (or two) away!</p> <p><em><strong>Written by Saara Blom. First appeared on</strong></em> <a href="http://www.domain.com.au/" target="_blank"><strong><em><span style="text-decoration: underline;">Domain.com.au</span></em></strong></a></p> <p><strong>Related links:</strong></p> <p><strong><em><span style="text-decoration: underline;"><a href="http://www.oversixty.co.nz/lifestyle/home-garden/2016/01/tips-for-growing-tomatoes/">Top tips for growing tomatoes</a></span></em></strong></p> <p><strong><em><span style="text-decoration: underline;"><a href="http://www.oversixty.co.nz/lifestyle/home-garden/2016/01/how-to-beat-weeds/">5 easy ways to beat weeds</a></span></em></strong></p> <p><strong><em><span style="text-decoration: underline;"><a href="http://www.oversixty.co.nz/lifestyle/home-garden/2015/12/homemade-remedies-for-the-garden/">Homemade remedies for the garden</a></span></em></strong></p>

Home & Garden

Placeholder Content Image

20 thoughts every beginner runner has

<p>So you’ve decided to take on running. You’ve heard of the health benefits, and you’ve been meaning to get into exercise more. You have friends who run. Running is definitely for you. Well then, here are the thoughts you might expect to feel as a first-time runner.</p> <p>1. I can run. Betty runs every day. If Betty can do it so can I.</p> <p>2. Now that I’ve bought nice running shoes and workout clothes, I’ll have so much motivation to run. I feel healthier just wearing them.</p> <p>3. Today is the day. I am going to start running. It’s time to get healthy.</p> <p>4. It looks like it’s going to rain. Maybe I should wait for it to pass.</p> <p>5. It’s too hot now. I should wait for the sun to lower a little bit.</p> <p>6. Okay, no more excuses, I am going. I am running.</p> <p>7. This isn’t so bad. This is what legs were made for. I am a gazelle. Look at me go.</p> <p>8. What do I do with my water bottle? Do I hold it? Do people still wear bumbag? Should I get a fanny pack?</p> <p>9. This sports bra isn’t doing anything. Does Betty have this problem with her sports bra? Betty doesn’t even have boobs.</p> <p>10. I am so tired. How long have I been running? At least 10 minutes, it has to be. 3 minutes?! That’s it?</p> <p>11. Oh no, people are coming my way. I am breathing too loud. They’re going to think that I’m dying.</p> <p>12. I’ll slow down and just walk past them. Nothing to see here, folks. I run every single day. I am a natural. I am a running machine. I’m taking a break because I want to, not because I need to.</p> <p>13. Time to speed up again. This hurts. Everything hurts. My lungs are on fire. Is that a shin splint? I’ve heard about those. I think I have a shin splint. My shins are splinted.</p> <p>14. Do people actually like running? I think Betty is lying. I never trusted Betty.</p> <p>15. Incoming joggers. Why do they look so happy? How do they make it look so easy? Come on, self, pick up the pace, you’re halfway done.</p> <p>16. I hope this person ahead of me doesn’t think I’m following them. They keep looking back. Maybe if I just do a little smile and wave – nope, now it’s even more awkward.</p> <p>17. It’s so hot. I am sweating. I hope I don’t run into anyone I know. No one should ever see me like this.</p> <p>18. Oh look it’s Rob and Betty! And they’re jogging! As a pair! Hi guys! Yes, I have taken up running. No, I don’t want to stop and talk about it. Can’t stop now, I’m running too fast!</p> <p>19. That was surprisingly motivating. I’m almost home.  When I get home, I’m never moving again.  There it is, it’s in sight. I can do it. Wait for me, couch! I’ll be there soon, shower!</p> <p>20. I’ve made it! That wasn’t so bad. That was actually easy. I feel great. I feel invincible. I am a runner now. I wonder if I should run a marathon.</p>

Body

Placeholder Content Image

Beginner’s guide to starting a vegetable garden

<p>Starting your own veggie patch at home is not only an easy way to save money on produce but you’ll soon discover that nothing tastes better than home-grown food (when you’ve got it right!) So if you’re reading to tackle your very own vegetable garden, here’s what you need to do.</p> <p><strong>Picking the perfect spot</strong></p> <p>These are the three basic requirements for the success of any vegetable patch.</p> <ul> <li>Full sun – Veggies love sun and most need at least six to eight hours of direct sun.</li> <li>Well watered – The closer your garden is to a source of water the easier it will be for you to regularly water your veggies.</li> <li>Good soil – Vegetables need moist, loamy, well-drained soil that’s rich in organic matter. It’s a good idea to test the soil’s drainage and pH levels before you beginning planting.</li> </ul> <p>You also want to avoid planting near trees as they’ll steal nutrients and shade the garden. Many gardeners like to keep their veggie garden close to home, which makes it easier to harvest fresh produce while cooking.</p> <p><strong>What to grow</strong></p> <p>One of the most common errors for beginners is planting too much too soon, which often leads to wasting food and feeling overwhelmed by a new garden. Remember, it’s better to be proud of small garden than to be frustrated by a big garden. And as a beginners, it’s best to start small. So firstly, take into consideration what you and your family like, how much you eat and what grows best in your area. Some common, productive and favourite veggies that are great for beginners include tomatoes, cabbage, lettuce, carrots, onions, garlics and herbs.</p> <p><strong>How much space do I need?</strong></p> <p>The limit of the garden should be defined by the amount of time you can devote to your garden and the number of people you want to feed. For a beginner, a good-sized patch is around 5 x 3 metres. Even a well-tended 3 x 3 metre garden with easy to grow veggies will usually produce more than enough produce for a season than a disease-ridden, weed-filled giant veggie patch.</p>

Home & Garden

Placeholder Content Image

Still life drawing for beginners

<p>Do you love to doodle? If you enjoy sketching and scribbling in your spare time, have you ever thought about exploring it further? Drawing is not only enjoyable but a great form of artistic self-expression and, best of all, it is one of the few activities that doesn’t cost much money. In fact, all you need is a pencil, paper and an object to draw to create your very own artwork. This form of art, called still life drawing, is a great way for beginners to learn the basics and experiment. If you’d like to take your sketches up a notch and turn your drawing into a fun and fulfilling hobby, here are a few aspects to consider. First of all, though, banish all thoughts that you “can’t draw” because if you can write, you can certainly learn to draw. In fact, once the creative juices start to flow, you might be surprised at what you can achieve.</p> <p><strong>What you will need</strong></p> <p>To get your started you need to have a pencil, eraser, paper and some ideas. Pick a simple object without too much detail like a book, mug or a piece of fruit. An apple or a pear is a great subject as you’ll likely have one in the kitchen and they have an interesting and irregular shape that is perfect for drawing and working light and shade. If you are looking for a challenge, flowers in a vase, a pile of toys or even a pair of shoes can make excellent subjects.</p> <p><strong>Visualise basic shapes</strong></p> <p>It is common to feel overwhelmed by the detail of the object when you begin. Ignore all those details and concentrate on the outline of the object. Look for basic shapes such as circles and rectangles. All objects can be reduced to their shapes; an apple becomes a circle or a mug becomes a rectangle. Lightly sketch the outline so you can erase if there are any mistakes. Remember not to work on a particular part of your drawing until you have drawn the outline of all the objects first. This will help you see if the composition and proportions are right.</p> <p><strong>Think composition and proportion</strong></p> <p>Now that you have thought about the shape of your drawing, consider the size of your object and where it should be placed on your paper. You don’t want it to be too big as you might run out of space or too small as it might look like you chose the wrong sized paper. The proportion of your object is crucial in drawing as it determines the realism. If you have multiple objects, make sure they are in proportion to each other. If the mug is twice as big as your apple in real life, the drawing should reflect the differences.</p> <p><strong>Look from a different perspective</strong></p> <p>Perspective in art is about giving your artwork a sense of real-life depth. This means the buildings in the background look further away than the object at the front. It is one of the hardest aspects of drawing to master so don’t worry if you can’t master it at the beginning. It will come with practice but if you feel ready to incorporate perspective in your drawings, establish a horizon line and one vanishing point on that line. Your subjects should become smaller the closer it gets to the vanishing point. As your become better with practice, you can create multiple vanishing points which will give your drawing the illusion of depth in reality.</p> <p><strong>Shading in the texture</strong></p> <p>Once you are happy with the basic outline of your object it is time to add the detail. Observe your object and determine where the light and shadows falls. Lightly outline the shapes of any shadows and reflections on the object. Begin shading slowly building the dark and mid-tones shadows. Always shade with a light touch, as pressing heavily with your pencil will leave indentations that cannot be erased.</p> <p><strong>Practice makes perfect</strong></p> <p>Like any skill, if you want to improve your drawing you must practise, practise and then do more practice. There is a wealth of material out there such as books, magazines and even YouTube video tutorials, which will give you a great base. However, if you are looking to further your skills it might be beneficial to take a course. A qualified teacher can guide you through tried and tested techniques as well as identify any areas that need improvement.</p>

Mind