Placeholder Content Image

6 kitchen mistakes you don’t know you're making

<p>The kitchen is the heart of the home, but it can also be an area where we make the most mistakes in the way we use it. Check out our top tips to help keep your kitchen ship-shape.</p> <p><strong>Clean the inside of the dishwasher</strong></p> <p>You may not realise that the appliance that keeps everything clean can in fact be quite dirty. The inside of the dishwasher can be a breeding ground for bacteria. Run a hot cycle with nothing but a cup of white vinegar in the top and bottom shelves. Then simply wipe clean the sides and seams of the dishwasher.</p> <p><strong>Don’t wash your chicken</strong></p> <p>You may think this is necessary, but in fact washing your chicken can spread bacteria across your work surface, towels, cloths, and your hands. You can avoid it altogether as cooking will get rid of anything harmful on your meat.</p> <p><strong>Change your kitchen towel</strong></p> <p>The towel can be harbouring many kinds of bacteria, so it’s best to change them daily. Don’t rely on the sniff test to see if it needs a wash. A dirty towel used to dry your clean dishes can quickly spread germs that can make you sick.</p> <p><strong>Avoid putting wooden items in the dishwasher</strong></p> <p>The heat from the appliance can cause wooden items to warp and crack. That means wooden chopping boards, salad servers, or pots and pans with wooden handles need to be hand washed.</p> <p><strong>Never wipe up floor spills with the dishcloth or tea towel</strong></p> <p>If you wipe up some spilled milk off the floor and then use that same cloth to wipe your bench, germs can quickly spread. Same goes with a tea towel. Always use paper towel for cleaning mess from the floor.</p> <p><strong>Fix leaking taps</strong></p> <p>It’s too easy to ignore the drip drip of a leaky tap. But did you know a leaking tap could use over 6,000L of water in a month? Save the Earth (and reduce your water bill) by staying on top of any leaks around the home.</p> <p><strong>Have a separate chopping board for meat</strong></p> <p>Cross contamination can occur if you chop raw meat on a chopping board and then use it later (even after cleaning) for chopping fruit or vegetables. It’s best to have a board designated just for meat – it’s great if it’s a different colour to your everyday boards. Wash in hot soapy water after each use.</p> <p><em>Image credits: Getty Images </em></p>

Home & Garden

Placeholder Content Image

7 ways you’re shortening the lifespan of your refrigerator

<p><strong>How you may be shortening the lifespan of a refrigerator</strong></p> <p>Refrigerators are a necessity in the home, but they cost a pretty penny. They can range in price from $700 to thousands of dollars, depending on which refrigerator brand you buy and which bells and whistles you want. Since it takes a good chunk of change to pay for this appliance, it makes sense to take great care of it so it lasts as long as possible. The typical lifespan of a refrigerator is 10 to 15 years, but it could last up to 20 years if you take superb care of it.</p> <p>Knowing how you may be shortening the life of your fridge helps you nip bad habits in the bud and make those well-spent dollars go the extra mile. That’s why we’ve rounded up the ways you may be knocking valuable time off your fridge’s life – read on and take note! Then, brush up on the signs your refrigerator is about to die and what your refrigerator temperature should be – both important things to know for fridge upkeep.</p> <p><strong>You’re not cleaning the internal mechanics</strong></p> <p>“If the defrost drain is clogged with debris, or frozen, the water dripping off the coils will overflow the drain trough and drip into the bottom of your refrigerator,” experts at the Repair Clinic told Reader’s Digest. Not only can this overwork your fridge, leading to a shorter lifespan, but it potentially causes your fridge/freezer to leak water all over your kitchen floor. </p> <p>Leaking water is a sign you should get any appliance looked at – it’s also a symptom of some of the ways you’re shortening the life of your washer and dryer.</p> <p><strong>You’re not cleaning the fridge itself</strong></p> <p>Additionally, debris, foodstuff, sticky spills and more common food mishaps that stay on the gasket of the refrigerator’s door too long can tear or break the seal of your refrigerator door. That can cause a leak, allowing cold air to escape. This makes learning how to clean your refrigerator properly all the more important (psst – these are the best fridge cleaners that’ll get the job done). </p> <p>To keep your fridge in tip-top shape as long as possible, wipe down the door edges often. And while you’re wiping down your fridge, see if you’ve organised your refrigerator the right way to keep ingredients fresh and avoid food poisoning.</p> <p><strong>You’re not cleaning the coils</strong></p> <p>More than 70 per cent of service calls for your fridge can be eliminated by cleaning your coils once a year – so experts recommend upping that to twice a year if you have furry pets (like an adorable but extra-fluffy pup). </p> <p>Debris on the coils can stop your fridge from properly dissipating heat, which means your compressor works harder and longer than it was designed to. That makes your fridge use more energy and shortens its lifespan.</p> <p><strong>It's too full </strong></p> <p>We’ve all played a few games of Tetris with our refrigerator after we get home with the groceries, but be careful when stocking up and storing. While this isn’t a huge problem with newer models, some older models have fan blades that are less protected. You may even be able to see the fan blades in your freezer or fridge.</p> <p>Cramming your food into the fridge and freezer to the point of applying undue pressure on this small part can affect its shape and fit among related parts of your fridge, risking a break. Ineffective fridges are overworked fridges, which will eventually lead to a refrigerator that doesn’t work. To avoid overfilling your fridge, do a deep clean of the contents of your fridge every once in a while and eliminate clutter.</p> <p><strong>You’re not changing the water filter often enough</strong></p> <p>If you have the type of fridge that makes ice – with the dispenser either within the freezer or on your door – the water filter is key to keeping this part of your refrigerator in great condition. An old, broken or dislodged water filter can create all kinds of problems for your fridge. At best, your ice dispenser breaks. At worst, your fridge overworks itself to an early death and you’re stuck footing the bill for a new one.</p> <p>Luckily, CNET reports that you likely can detect this problem early, as your ice cubes will start coming out smaller, oddly shaped or not at all. Keep this in mind next time you’re filling up your water bottle.</p> <p><strong>Your freezer temperature is too high</strong></p> <p>“Ideally, the temperature should be set -18 degrees Celsius,” said experts at Repair Clinic. The wrong freezer temperature can affect the longevity of your ice maker, as well as the safety of the food you’ll be eating. </p> <p>A temperature higher than -9 degrees Celsius can also cause the defrost thermostat to stop working, which, in turn, overworks your refrigerator and shortens its life.</p> <p><strong>You ignore weird noises or constant running</strong></p> <p>If you notice that your fridge is always running, or is running louder than usual, do something about it right away. Some fixes are easy enough that you can do them yourself, or they’re inexpensive for a professional, but even if that’s not the case, allowing a fridge to work itself harder than it is intended to is a good way to put an early expiration date on it. Depending on the age of your fridge, you may want to decide not to fix it and invest in a new, more energy- and cost-efficient option.</p> <p><em>Image credits: Getty Images</em></p> <p><em>This article originally appeared on <a href="https://www.readersdigest.co.nz/food-home-garden/7-ways-youre-shortening-the-lifespan-of-your-refrigerator" target="_blank" rel="noopener">Reader's Digest</a>. </em></p>

Home & Garden

Placeholder Content Image

3 household items that expire sooner than you think

<p>Milk, cheese and other fridge-dwelling food items are stamped with expiration dates that, should you choose to ignore them, will make themselves known via smell.</p> <p>But your house is actually peppered with items that require regular replenishment - many of which are outside of the kitchen.</p> <p>Thanks to this handy info, we're now aware of the many surprising household items that require a monthly or yearly upgrade.</p> <p>From knickknacks on your dresser to the staples in your pantry, your house is chock-full of items that can go bad.</p> <p>Here are a few of the most surprising.</p> <p><strong>Hydrogen Peroxide</strong></p> <p><span style="text-decoration: underline;"><em>Expires in:</em></span> 2 months</p> <p><span style="text-decoration: underline;"><em>Why:</em></span> Hydrogen peroxide, the versatile topical antiseptic used to prevent infection in cuts, scrapes, and minor burns, actually turns into water just two months after opening. An unopened bottle should be thrown out after one year.</p> <p><strong>Kitchen spices</strong></p> <p><span style="text-decoration: underline;"><em>Expires in:</em></span> 1-3 years</p> <p><span style="text-decoration: underline;"><em>Why:</em></span> Household kitchen spices, like cinnamon, cumin and basil, reportedly begin losing their lustre after just one year - both in terms of taste and smell. Brightside also claims that ground spices should be thrown out after just six months.</p> <p><strong>Mosquito repellents</strong></p> <p><span style="text-decoration: underline;"><em>Expires in:</em></span> 3 years</p> <p><span style="text-decoration: underline;"><em>Why:</em></span> Mosquito repellents are essentially useless after just two years, according to Brightside. You can usually tell if a bug repellent has expired by the smell - if one spray doesn't emit the pungent odour you've grown used to, it's time to throw it out.</p> <p><em>Written by Kelsey Clark. First appeared on <a href="http://www.Stuff.co.nz" target="_blank" rel="noopener"><span><strong>Stuff.co.nz</strong></span></a>. </em></p> <p><em>Image credits: Getty Images </em></p>

Home & Garden

Placeholder Content Image

5 tips for getting off gas at home – for a cleaner, cheaper, healthier all-electric future

<p><a href="https://theconversation.com/profiles/trivess-moore-12580">Trivess Moore</a>, <em><a href="https://theconversation.com/institutions/rmit-university-1063">RMIT University</a></em>; <a href="https://theconversation.com/profiles/alan-pears-52">Alan Pears</a>, <em><a href="https://theconversation.com/institutions/rmit-university-1063">RMIT University</a></em>, and <a href="https://theconversation.com/profiles/nicola-willand-441807">Nicola Willand</a>, <em><a href="https://theconversation.com/institutions/rmit-university-1063">RMIT University</a></em></p> <p>Burning gas in our homes to cook food or heat air and water has become a contentious issue. Gas is an expensive, polluting fossil fuel, and there’s mounting evidence to suggest it’s also <a href="https://www1.racgp.org.au/ajgp/2022/december/health-risks-from-indoor-gas-appliances">bad for our health</a>.</p> <p>Five million existing Australian households will need to <a href="https://grattan.edu.au/report/getting-off-gas/">get off gas</a> within the next 30 years. But for homeowners, the upfront cost can be a major barrier to action. Renters rarely get a say over the appliances installed in their homes. And apartment owners can struggle to make individual changes too.</p> <p>In most cases it’s worth making the switch, for the energy bill savings alone. For example, analysis suggests a household in Melbourne switching from gas to electricity can save <a href="https://theconversation.com/all-electric-homes-are-better-for-your-hip-pocket-and-the-planet-heres-how-governments-can-help-us-get-off-gas-207409">up to A$13,900</a> over a decade.</p> <p>If you’re contemplating upgrading gas appliances in your home, or even disconnecting from the gas network altogether, here are a few handy tips and resources to cut through the confusion.</p> <figure><iframe src="https://www.youtube.com/embed/2JuZgXz6zNo?wmode=transparent&amp;start=0" width="440" height="260" frameborder="0" allowfullscreen="allowfullscreen"></iframe><figcaption><span class="caption">Homes must switch away from gas by 2050, says policy think tank (ABC News)</span></figcaption></figure> <h2>Tip 1 – Find trusted, independent information</h2> <p>There is no shortage of information on how to make the switch from gas to all-electric appliances. The challenge is finding <a href="https://theconversation.com/we-need-a-lemon-law-to-make-all-the-homes-we-buy-and-rent-more-energy-efficient-204369">trusted and independent information</a>.</p> <p>Not-for-profit organisation <a href="https://renew.org.au/">Renew</a> has compiled a range of <a href="https://renew.org.au/resources/how-we-can-help/efficient-electric-homes/how-we-can-help-going-off-gas/">presentations, guides, case studies and research</a>. <a href="https://www.choice.com.au/">Choice</a> provides independent reviews of household appliances, including operating costs. The Australian government’s <a href="https://www.energyrating.gov.au/">Energy Rating website</a> provides information on appliances to help consumers compare performance. Some <a href="https://www.yarracity.vic.gov.au/services/take-climate-action">local councils</a> and <a href="https://totallyrenewableyack.org.au/">community groups</a> also provide information, support and bulk-buying schemes.</p> <p>You could also visit some of the all-electric homes open to the public for <a href="https://sustainablehouseday.com/">Sustainable House Day</a>. This can help you learn what works from people who have already made the change.</p> <p>The <a href="https://www.facebook.com/groups/MyEfficientElectricHome">My Efficient Electric Home</a> group on Facebook is another active and helpful forum.</p> <p>If you are going all-electric as part of a wider retrofit, consider an independent <a href="https://www.homescorecard.gov.au/">Residential Efficiency Scorecard assessment</a>. This will help you understand what to else you can do to maximise <a href="https://theconversation.com/the-other-99-retrofitting-is-the-key-to-putting-more-australians-into-eco-homes-91231">thermal comfort, environmental benefits and financial outcomes</a>.</p> <h2>Tip 2 – Plan your approach</h2> <p>Once you understand what to do, the next step is planning how to go about it. Think about what is most important to your household. What is driving the change? If it’s your health, you might like to start by eliminating indoor air pollution from the gas stove. Or if you want to save money, start using reverse-cycle air conditioning to heat your home, rather than gas.</p> <p>There are three main ways to go all-electric:</p> <ul> <li> <p><strong>Replace all your gas appliances at once</strong>. Making the change quickly minimises disruption to your home. You may save money on installation costs by doing everything in one go. You will avoid ongoing fixed gas supply charges once you disconnect from the gas network, but you may be required to pay an “<a href="https://energy.act.gov.au/switching-off-your-gas-connection/">abolishment fee</a>” for permanent disconnection. That fee can vary significantly, depending on your location and gas provider. Costs <a href="https://www.smh.com.au/environment/sustainability/would-you-pay-1000-to-get-off-gas-consumer-dismay-over-disconnection-cost-20230223-p5cmw9.html">could be up to $1000 (or more)</a> but some states like Victoria have capped the price a <a href="https://reneweconomy.com.au/fossil-gas-death-spiral-regulator-sets-exit-fee-to-socialise-cost-of-mass-disconnection/">household can be charged at $220</a>. Renters wouldn’t be able to permanently disconnect without permission from the landlord, so they would still be open to paying the daily connection fee even if they found alternative electric options for everything else.</p> </li> <li> <p><strong>Replace your gas appliances one at a time</strong>, as finances allow. However, there will come a point where <a href="http://www.ata.org.au/wp-content/projects/CAP_Gas_Research_Final_Report_251114_v2.0.pdf">financially you will be better off</a> replacing all the remaining gas appliances. This is largely because it will not be affordable to keep paying the daily connection cost for gas if you just have one gas appliance remaining.</p> </li> <li> <p><strong>Just stop using gas appliances</strong> in favour of existing electric appliances that do the same job, such as a <a href="https://reneweconomy.com.au/the-traps-laid-by-the-fossil-gas-industry-for-uninformed-households/">reverse cycle air conditioner for space heating</a>. You may have – or can buy – plug-in electric alternatives, such as a microwave ovens, portable induction cooktops, air fryers and heaters. These can be a good option for renters when landlords won’t make changes.</p> </li> </ul> <p>You could even borrow portable appliances to see how they work before committing to buying your own.</p> <figure><iframe src="https://www.youtube.com/embed/tLjWZicC4mE?wmode=transparent&amp;start=2" width="440" height="260" frameborder="0" allowfullscreen="allowfullscreen"></iframe><figcaption><span class="caption">Households share their electrification journey (Renew)</span></figcaption></figure> <h2>Tip 3 – Access available rebates and resources</h2> <p>Most states offer various rebates for households to reduce the upfront cost of replacing gas appliances. These could reduce costs by thousands of dollars. Some rebates also target rental housing. Here is a list of key rebates available in different states:</p> <ul> <li><a href="https://www.epw.qld.gov.au/about/initiatives/household-energy-savings-program">Queensland</a></li> <li><a href="https://www.energy.nsw.gov.au/households/rebates-grants-and-schemes">New South Wales</a></li> <li><a href="https://www.climatechoices.act.gov.au/policy-programs/home-energy-support-rebates-for-homeowners">ACT</a></li> <li><a href="https://www.energy.vic.gov.au/for-households/victorian-energy-upgrades-for-households">Victoria</a></li> <li><a href="https://recfit.tas.gov.au/household_energy/energy_saver_loan_scheme">Tasmania</a></li> <li><a href="https://www.sa.gov.au/topics/energy-and-environment/using-saving-energy/retailer-energy-productivity-scheme">South Australia</a></li> </ul> <p>Some not-for-profit organisations (such as the <a href="https://www.bsl.org.au/services/energy-assistance/">Brotherhood of St Laurence</a>) offer financial and other support for lower-income households struggling to pay their energy bills.</p> <h2>Tip 4 – Wait for a sale or negotiate a better deal</h2> <p>It might sound simple but you can always save money by waiting until these electric appliances are on sale. If you are buying multiple appliances you can try to negotiate a better price. Factory seconds outlets offer lower prices as well.</p> <h2>Tip 5 – Know the issues</h2> <p>While the shift to all-electric will likely provide many benefits there are some things you need to consider:</p> <ul> <li>The carbon emissions from electricity are falling fast, and many homes have rooftop solar. Combining <a href="https://grattan.edu.au/report/getting-off-gas/">all-electric with solar panels</a> will maximise returns.</li> <li>You may have to adjust to how new technologies operate and perform. For example, you may need <a href="https://www.theage.com.au/goodfood/tips-and-advice/do-you-really-have-to-buy-new-cookware-all-your-burning-questions-about-induction-cooking-answered-20230810-p5dvd0.html">new, metallic cookware for an induction cooktop</a> and become familiar with their fast response. Additionally, some people find heat from reverse cycle air conditioners to be drier and/or draughtier than gas heating. Floor-mounted units heat more effectively.</li> <li>It is not just the energy performance of appliances that matters. For example, noise from heat pump hot water services can vary across different brands. They can also require more space for installation.</li> <li>Undertaking a wider energy retrofit (for example, increasing insulation in walls, ceiling and underfloor, upgrading windows to double glazing) may mean you can buy a smaller, cheaper reverse cycle air conditioner when replacing gas heating.</li> <li>Electric appliances also need maintenance to make sure they perform optimally. For example, reverse cycle air conditioners have filters that must be regularly cleaned. While this can be done by households, it can be hard for people with mobility issues.</li> <li>Depending on the capacity of your electricity switchboard or wiring, extra electric appliances may require upgrades.</li> <li>For renters, while you could use portable appliances, you may not be able to disconnect from gas completely, meaning you would still have to pay a daily connection fee.</li> <li>Gas and electricity prices can change over time, for many reasons. For example, if fixed gas distribution costs are spread over fewer customers.</li> </ul> <h2>A worthwhile investment</h2> <p>Australian states and territories have started banning gas in new builds. Victoria and the ACT will soon require <a href="https://theconversation.com/cooking-and-heating-without-gas-what-are-the-impacts-of-shifting-to-all-electric-homes-210649">new housing and major renovations to be all-electric</a>. Others are likely to follow.</p> <p>For people in existing housing around Australia, it can be daunting to make the switch. Many of us have grown up with gas in our homes and when one appliance breaks, the easiest thing to do is replace like-for-like. But the weight of evidence shows it’s worth taking the time to look at the alteratives and invest in upgrading to all-electric appliances. The benefits far outweigh the costs. <!-- Below is The Conversation's page counter tag. Please DO NOT REMOVE. --><img style="border: none !important; box-shadow: none !important; margin: 0 !important; max-height: 1px !important; max-width: 1px !important; min-height: 1px !important; min-width: 1px !important; opacity: 0 !important; outline: none !important; padding: 0 !important;" src="https://counter.theconversation.com/content/211261/count.gif?distributor=republish-lightbox-basic" alt="The Conversation" width="1" height="1" /><!-- End of code. If you don't see any code above, please get new code from the Advanced tab after you click the republish button. The page counter does not collect any personal data. More info: https://theconversation.com/republishing-guidelines --></p> <p><em><a href="https://theconversation.com/profiles/trivess-moore-12580">Trivess Moore</a>, Senior Lecturer, School of Property, Construction and Project Management, <a href="https://theconversation.com/institutions/rmit-university-1063">RMIT University</a>; <a href="https://theconversation.com/profiles/alan-pears-52">Alan Pears</a>, Senior Industry Fellow, <a href="https://theconversation.com/institutions/rmit-university-1063">RMIT University</a>, and <a href="https://theconversation.com/profiles/nicola-willand-441807">Nicola Willand</a>, Senior Lecturer, School of Property, Construction and Project Management, <a href="https://theconversation.com/institutions/rmit-university-1063">RMIT University</a></em></p> <p><em>Image credits: Getty Images </em></p> <p><em>This article is republished from <a href="https://theconversation.com">The Conversation</a> under a Creative Commons license. Read the <a href="https://theconversation.com/5-tips-for-getting-off-gas-at-home-for-a-cleaner-cheaper-healthier-all-electric-future-211261">original article</a>.</em></p>

Home & Garden

Placeholder Content Image

15 great kitchen hacks to extend the life of food and save on waste

<p>If you’re sick of throwing food in the bin (and wasting money), try these simple tips to reduce your wastage in the kitchen.         </p> <p><strong>1. Use food scraps to grow vegetables</strong></p> <p>Save the odds and ends from veggies such as potatoes, sweet potatoes, leeks, spring onions, celery, bok choy, garlic and even onions. These can all be replanted in some soil and will grow back. Just don’t forget to water them.</p> <p><strong>2. Reheat leftover slices of pizza in a frying pan</strong></p> <p>If you aren’t a fan of floppy microwaved pizza, just pop your pizza into a hot fry pan instead. Your crusts will stay crispy and it will heat through much faster than it would in the oven.</p> <p><strong>3. Bring stale potato chips back to life in the microwave</strong></p> <p>If you left the bag open overnight, fear not. Pop your stale chips in the microwave on high for 10 seconds or until crisp.</p> <p><strong>4. Use leftover herbs to make herb butter</strong></p> <p>If your herbs are on the turn, just chop them up and mix with some melted butter. Pop it into some ice cube trays and freeze. Then you can enjoy the perfect portion of herb butter to use on your steak or to make homemade garlic bread.</p> <p><strong>5. Keep bananas fresher by wrapping the tips</strong></p> <p>If you want your bananas to last longer in the fruit bowl, just wrap their tips with some cling film. They should keep for around three to five days longer.</p> <p><strong>6. Keep greens fresher in foil</strong></p> <p>Celery, broccoli, and lettuce all last much longer in the fridge if you wrap them in foil first.</p> <p><strong>7. Keep pineapples sweet by storing upside down</strong></p> <p>The sugars in this fruit can all end up on the bottom after the time spent in transit. So keep your pineapple upside down when you get home and the sweetness will be redistributed evenly.</p> <p><strong>8. Use a glass to peel a mango</strong></p> <p>You can use a glass to slide the skin off your mango. This will avoid wasting any fruit that you’d normally toss after peeling with a knife.</p> <p><strong>9. Make a two-ingredient Nutella milkshake</strong></p> <p>When you need a sweet treat but you’re nearly out of Nutella, just add warm milk to the jar and shake well.</p> <p><strong>10. Avoid sprouting potatoes by storing them with apples</strong></p> <p>The ethylene gas in the apples helps to stop your potatoes from sprouting.</p> <p><strong>11. Keep leftover avocado fresh by storing it with a sliced onion</strong></p> <p>There is sulfur in the onion and this keeps the avocado from going brown.</p> <p><strong>12. Keep cake fresh by covering with sliced bread</strong></p> <p>Cover the exposed cake with some bread held in place with toothpicks and it will stay soft.</p> <p><strong>13. Extend the life of your eggs with vegetable oil</strong></p> <p>By rubbing the eggshells with vegetable oil it will keep them fresher in the fridge for three to four weeks.</p> <p><strong>14. Keep lettuce fresh by storing in a brown paper bag</strong></p> <p>No more sad and limp leaves! Keep your lettuce wrapped in a brown paper bag in the fridge. Plus, keeping the outer layers in place even if they have gone brown will keep the inside fresher for longer.</p> <p><strong>15. Reuse coffee grounds in the garden</strong></p> <p>Plants such as roses, hydrangeas, blueberries, raspberries, strawberries and tomatoes will all appreciate a liberal sprinkling of your used coffee grounds.</p> <p><strong>Related links:</strong></p> <p><span style="text-decoration: underline;"><strong><em><a href="http://www.oversixty.co.nz/lifestyle/home-garden/2015/12/stains-never-to-clean-with-water/">4 stains you shouldn’t use water to clean</a></em></strong></span></p> <p><span style="text-decoration: underline;"><strong><em><a href="http://www.oversixty.co.nz/lifestyle/home-garden/2015/12/household-tricks-from-the-1900s-2/">More great vintage household tricks from the 1900s</a></em></strong></span></p> <p><span style="text-decoration: underline;"><strong><em><a href="http://www.oversixty.co.nz/lifestyle/home-garden/2015/12/alternatives-to-wrapping-paper/">8 DIY alternatives to wrapping paper</a></em></strong></span></p>

Home Hints & Tips

Placeholder Content Image

Doctor debunks air fryer myth

<p>Air fryers have become somewhat of a commodity in many kitchens worldwide, with them rising in popularity over the past few years, so news that they could be damaging to our health may cause quite a stir.</p> <p>However, similar to how uncredited information seems to circle the internet, a doctor has told viewers not to take the latest warnings over “toxic” air fryers too seriously.</p> <p>One online user posted a TikTok claiming they had found out "air fryers were toxic because of the material used”, so UK doctor Karan Raj decided to weigh in on the matter.</p> <p>"The biggest worry from fear mongers centres around the non-stick materials used, also known as forever chemicals,” he said in a clip that’s since raked in over a million views.</p> <p>"Forever chemicals” earned the name because they don’t break down in the environment or in our bodies. Also known as PFAS, they are resistant to water, grease, and heat and are found in a number of everyday products such as food packaging, cosmetics, clothing and toilet paper.</p> <p>"Fun fact, every time you sit down to eat microplastics fall from the air and land in your food, or are already part of your food," he explained.</p> <p>The issue of “toxic” chemicals leeching into your food from cooking in an air fryer "is only really an issue if the air fryer is damaged,” Dr Raj added.</p> <p>It is recommended to minimise how much damage and scratching there is to the non-stick coating of the fryer so the chemicals don’t get into your food.</p> <p>"Clean it safely, avoid using abrasive scrubbing tools, use wood or silicone utensils and use liners," he said.</p> <p>"And if you're really worried about the non-stick coating, you can use a ceramic or stainless steel air fryer.”</p> <p>People in the comments thanked him for the explanation. " Some people will trust anyone EXCEPT actual Doctors,” one user teased.</p> <p>Dr Raj went on to ask his followers what their favourite meal to cook in an air fryer was, adding, "Air fried chips just taste special".</p> <p><em>Image credit: TikTok</em></p>

Body

Placeholder Content Image

Top 8 tips for composting

<p>Want to do something good for the earth that will save you money at the same time? Well, you should consider ditching fertilizer and make compost instead. For anyone new to composting, or for those who want to improve the composting skills, we’ve gathered a list of our top tips.</p> <p><strong>1. Get a quality bin</strong></p> <p>The alternative to building a compost heap in your garden, is to try a compost bin. They’re usually compact which makes them perfect for smaller gardens and yards.</p> <p><strong>2. Perfect placement</strong></p> <p>You’ll want to ensure you pick a spot that is level and well-drained spot so that any excess water can drain away easily. This also helps worms to get in and get on with the job of breaking down the content.</p> <p><strong>3. Put the worms to work</strong></p> <p>The humble worm is the perfect (and must-have) addition to any successful compost. They love the moist atmosphere of a compost heap, eating the waste material you put in and converting it into liquid feed and compost. The tiger worm is  great choice for any compost.</p> <p><strong>4. What to compost</strong></p> <p>Good things to compost include vegetable peelings, fruit waste, teabags, plant prunings and grass cuttings. All of these things break down quickly and provide important nitrogen as well as moisture. While slower to rot, it’s also good to include things such as cardboard egg boxes, scrunched up paper and fallen leaves as they provide vital fibre and carbon and also allow important air pockets to form in the mixture.</p> <p><strong>5. Forget these things</strong></p> <p>Meat or dairy products should never but put in your compost. Also, don’t dispose of any diseased plants, dog poo or cat litter, or babies’ nappies in your compost – these belong in the everyday bin. It’s also a good idea to avoid composting perennial weeds (such as dandelions and thistle) or weeds with seed heads.</p> <p><strong>6. Let it air out</strong></p> <p>Composts requires regular turning, which can be a tricky job without the right tools. Opt for something with a long handle and turn your compost as it helps to aerate and mix up the waste and cuttings, which leads to faster composting.</p> <p><strong>7. Add a booster</strong></p> <p>It’s a great idea to encourage the correct enzymes in your compost by using a activator. It helps to turn your grass, leaves and garden waste into dark, rich, crumbly compost in less than half the time.</p> <p><strong>8. Wait for it to be perfect </strong></p> <p>When your compost is ready you’ll have a dark brown, almost black soil-like layer at the bottom of your bin. It should have a spongy texture and will be rich in nutrients. When it’s ready, spread the compost over your flowerbeds this will greatly improve the soil quality by helping it retain moisture and suppressing weeds.</p> <p><em>Image credits: Getty Images </em></p>

Home Hints & Tips

Placeholder Content Image

6 essential tips and tricks for your kitchen

<p>Whether you’re friends with a professional chef, watch every cooking show on which you can lay your eyeballs, or your mum was some kind of wise, kitchen magician, it seems that everyone has their very own secret cooking tips to make life easier, or at least less stressful, in the kitchen. We’ve gathered a few of our own just in case no one’s ever shared them with you until now.</p> <p><strong>1. Where there’s smoke…</strong></p> <p>People often think that setting off the smoke detectors is a sign of an unskilled cook, but, as long as you’re not burning anything, don’t be afraid of a little smoke or vapour. Some foods just need that extra heat to reach their flavourful best, and that’s okay. Just make sure you’re safe.</p> <p><strong>2. Dressing in a jar</strong></p> <p>If you’re not a fan of off-the-shelf salad dressings, the natural solution to lifeless salads is making your own dressing. The annoying part of that is mixing such small quantities of ingredients in a bowl can be ridiculously fiddly. Next time, pop those ingredients into an old (clean) jam jar and give it a good shake. Not only will it be easier, you’re guaranteed to combine everything much better than you could with any whisk.</p> <p><strong>3. When life gives you lemons</strong></p> <p>If you’re using lemons or limes when you’re cooking, save the leftover skins once you’ve juiced them. You can use them to disinfect your chopping board without any chemicals. Plus, the smell is pretty fantastic.</p> <p><strong>4. Perfect pasta</strong></p> <p>When cooking pasta, the best tip we can offer is to remove the noodles from their water just before they’re completely cooked. Then, with just a little bit of the starchy water, pour them into the same saucepan in which you’re cooking your sauce. Cooking the pasta with the sauce for at least a minute or two will help infuse the flavours. If you’re not already cooking your pasta this way, you soon will be.</p> <p><strong>5. You crack me up</strong></p> <p>If you find that you’re constantly picking tiny shards of eggshell out of your dishes before you cook, you might want to adjust the way you crack your eggs. Rapping the eggs onto a sharp/thin edge of a bowl of counter causes these small fractures. If you crack the egg onto a flat surface, you’ll avoid a lot of the fuss. Plus, it’s really easy to do that cool one-handed egg crack this way. Bonus!</p> <p><strong>6. No-stick cheese</strong></p> <p>There’s a reason buying pre-grated cheese is so ridiculously expensive – grating cheese yourself is one of the most loathed kitchen tasks around. But if you spray your grater with a little cooking spray before you start, it will help the cheese glide over a little easier. Plus it’s going to make cleaning a dream.</p> <p><span style="font-family: -apple-system, BlinkMacSystemFont, 'Segoe UI', Roboto, Oxygen, Ubuntu, Cantarell, 'Open Sans', 'Helvetica Neue', sans-serif;"><em>Images: Getty</em>                                                                </span></p>

Home Hints & Tips

Placeholder Content Image

Surprising items to never take into the kitchen

<p>Keeping your kitchen clean may seem like a never ending task at times, what with constant food preparation and other crumb and mess producing activities taking place all day long. There’s a difference however between a “messy” kitchen and a “dirty” kitchen with the latter providing a breeding ground for nasty germs and harmful bacteria. Here’s what to ban now for a cleaner, healthier kitchen space in a snap.</p> <p><strong>1. Sponges –</strong> You’ve probably heard it before but the kitchen sponge is a breeding ground for bacteria. Keep yours spick and span with a weekly soak and wash in bleach followed by a dry in the sun and chuck them out once they start to show signs of wear and tear.</p> <p><strong>2. Shabby re-usable grocery bags –</strong> If your reusable grocery bags are starting to show their age, it may be time to replace them. Your bags can harbour plenty of bacteria from the loads of groceries you use them for. A quick wash and dry can help solve the problem and prolong the life span of your bags.</p> <p><strong>3. Your mobile –</strong> Your mobile phone is crawling with germs. Taking it into the kitchen while cooking is a sure fire way to transfer the yuckiness to your food. Try and keep your device out of the kitchen or if you need it for cooking, set it somewhere away from the food and wipe your hands and device down with an antibacterial wipe after you’ve finished cooking.</p> <p><strong>4. Pet food –</strong> While keeping your dog or cat food in the house can help prevent outdoor pest problems, the kitchen isn’t the place for food bowls. If their food sits out for a longer period of time it can attract indoor pests and create a less than appealing smell. Try moving your feeding station to the laundry for a more sanitary solution.</p> <p><strong>5. Your handbag –</strong> Similar to your mobile, your handbag is literally covered in grime. Think about where you take it on a daily basis! Keep it out of the kitchen when and where possible.</p> <p><em>Image credit: Shutterstock</em></p>

Home & Garden

Placeholder Content Image

How to deep clean your kitchen bin

<p>Cleaning the kitchen bin is household chore that can be easily overlooked until a stench begins to creep into your home.</p> <p>To rid your bin of the odour, follow these deep cleaning steps so that you can have a fresh-smelling and clean kitchen bin.</p> <p><strong>1. Put on your rubber gloves</strong></p> <p>Cleaning a bin requires you to handle an object that has been full of food scraps and questionable liquids, it is best to wear some rubber gloves to protect you from the germs.</p> <p><strong>2. Empty the bin</strong></p> <p>Begin by emptying your bin and ensuring that there are no lingering food particles in the bottom. Your main objective is to remove any gunk that can be seen.</p> <p><strong>3. Wash the bin</strong></p> <p>If you have access to an outside area, take your bin outside and hose it down. If you can only clean your bin indoors, then you can do this in the bathtub. Once the bin has been rinsed, pat it down with paper towel.</p> <p><strong>4. Spray with disinfectant</strong></p> <p>Using a disinfectant cleaner of your preference, generously spray down the inside and outside of your bin. Also include the top and bottom of the bin as you spray.</p> <p><strong>5. Scrub the bin</strong></p> <p>Use a toilet brush or other long-handled nylon bristle brush to scrub your bin thoroughly. After you have finished scrubbing all over, let the disinfectant cleaner sit for five minutes.</p> <p><strong>6. Rinse and dry</strong></p> <p>After the five minutes has passed, rinse the can thoroughly. Depending on what you prefer, let the bin dry in the sun or dry it with a towel.</p> <p>Once you have deep cleaned your bin, maintain your hard work by wiping down the inside and outside of the bin with disinfectant spray every time you empty the trash can.</p> <p><em>Image credits: Getty Images</em></p>

Home & Garden

Placeholder Content Image

Kitchen organisation ideas you’ll wish you knew sooner

<h2>The benefits of keeping your kitchen neat</h2> <p>They say everything has its place and this was never more true than in the kitchen. An organised kitchen can save time, prevent food waste, and let’s face it, it’s a lot more attractive and cheaper than renovating. With the help of a few experts, we put together kitchen organisation ideas and helpful tips to organise your kitchen cupboards, clean up your kitchen counters, pantry organisation ideas, and more. The best part? Most of these kitchen organisation tips are fast, easy, and free or inexpensive, to implement.</p> <h2>Purge your drawers and cabinets</h2> <p>Maybe you loved the idea of a juicer but only ever eat toast for breakfast. Or you used to be into baking but now you’ve put your focus into healthy meals. The top kitchen organisation idea is to stop thinking about the stuff, and start thinking about your life and how you want to live, says Laura Cattano, professional organiser and founder of Organisational Design. “If it’s not adding to your life, it’s directly taking away from it because it’s taking space away from something else.”</p> <h2>Group by need, not by item</h2> <p>You might keep your masher and microplane grater by the stove with other long-handled items like cooking spatulas, but that’s not the most convenient setup. “There are three things that happen in the kitchen: prep, cook, and serve,” says Cattano. “The best thing is to zone out your kitchen by those categories.” You might keep your spatulas by the stove, but your potato masher belongs near your countertop and big bowls. Take it a step further by asking exactly when you use each item. For instance, there’s no reason your mugs need to be by your water glasses, but putting them next to the coffee maker will save you from running all over your kitchen in the morning, says Cattano.</p> <h2>Set up a drop zone by the door</h2> <p>“The kitchen is still one of the first places we go when we enter a home,” says Maeve Richmond, founder and coach of organising company Maeve’s Method. “All the stuff of life that comes in the door accumulates in the kitchen.” To keep your meal space from becoming a catchall for your handbag, wallet, and gym bag, Richmond recommends setting up a “drop zone” by your door to set those things as you’re walking in. You might make it a permanent home for your wallet and keys, and a temporary place to drop your workout gear while you’re putting away groceries.</p> <h2>Make a place for mail</h2> <p>Taking just five minutes to go through your mail daily or every other day will keep that pile of papers under control so you don’t lose documents in the shuffle when you actually do need them. “The mail just keeps coming,” says Jodie Watson, founder and president of Supreme Organisation. “Keep trimming it down so you’re not losing items in the mix.” Instead of leaving it by your eating space, designate an area that has a basket for papers, and hang a bulletin board to write messages and reminders, she says.</p> <h2>Adjust the height of your shelves</h2> <p>Don’t let your shelf height define how you use your space. People tend to put cereal on a top shelf because that’s the one with the most space, but it’d be easier to reach on a lower shelf, says Watson. On the other hand, too much space for canned goods and you’ll probably start stacking items into an ugly, unstable pile. If your shelves aren’t already adjustable, buy shelf dividers to split one shelf into two, says Richmond. “Re-spacing the shelves takes away the messiness because things aren’t stacked,” says Richmond.</p> <h2>Store small appliances you don’t use on a daily basis</h2> <p>Feel free to leave appliances you use daily, like a coffee maker or toaster, on the counter. But anything you aren’t using every day should be stored in a cabinet to make more room on the counter. “Nobody likes to have to put the appliance away, but balance that against the precious countertop space,” says Richmond. “There’s the convenience of having it out, but it’s more convenient to be able to chop more vegetables or have a cleaner space.”</p> <h2>Keep your cooking utensils within reach</h2> <p>Store your spatulas, servings spoons, etc next to the stove in an attractive ceramic container or jar. But don’t overstuff it, cautions Cattano. “Not every single cooking utensil needs to be right by the stove,” says Cattano.  Leave out the ones you use most often, but hide the rest in a drawer.</p> <h2>Buy only what you need</h2> <p>If you find yourself leaving food out simply because you don’t have room in a cupboard, it might be time to start cutting down. “We want to save money, and it’s good to buy in bulk, but if you don’t have space for it, changing the way you shop might be more helpful,” says Watson. She recommends first going through your pantry to take stock of what you already have. Then head to the supermarket less often so you have a chance to use up what you have before refilling your cabinet.</p> <h2>Organise your oils</h2> <p>Exposure to light can make cooking oils go rancid. If you like having them on the counter, put them in opaque containers and stylise them so they don’t just look like clutter. “Put a tray under them so it looks intentional,” says Cattano.</p> <p><em>This article originally appeared on <a href="https://www.readersdigest.co.nz/food-home-garden/home-tips/kitchen-organisation-ideas-youll-wish-you-knew-sooner" target="_blank" rel="noopener">Reader's Digest</a>.</em></p> <p><em>Images: Getty</em></p>

Home Hints & Tips

Placeholder Content Image

7 ways to clean your kitchen with simple household items

<p>The folks at <a href="http://food52.com/blog/14173-7-kitchen-cleaning-tricks-that-really-work" target="_blank" rel="noopener"><span><strong>Food52</strong></span></a> have exhibited some inspired thinking and shown how we can solve various household problems with simple household items. Some of these are way too clever.</p> <p><strong>1. Get rid of fruit flies in your kitchen</strong></p> <p>Before you flood your kitchen with Mortein, consider this method. Simply halve a lemon, put both sides in your oven and leave the door propped open overnight. In the morning close the door and turn the grill on for a few minutes. Turn it off, let the oven cool, throw away the lemons, clean the bottom of your oven and voila, no more fruit flies! It sounds strange but it really works.</p> <p><strong>2. Remove hard water deposits using just vinegar</strong></p> <p>Forget toxic chemicals, you can brings your dingy sinks back to their glory by simply applying vinegar. It’s not just good for fish and chips – it’s pretty much a ready-made, powerful household cleaner.</p> <p><strong>3. Clean kitchen cabinets with baking soda</strong></p> <p>The perfect cleaner for your gunky kitchen cabinets is actually already sitting in your kitchen! Make a solution that’s one part vegetable oil, two parts baking soda and you can clean those gunky kitchen cabinets in no time at all. All you need is a sponge, toothbrush or even just your fingers.</p> <p><strong>4. Cleaning white sinks with lemons</strong></p> <p>When life gives you lemons, you actually have the perfect tool for cleaning your sink. White sinks can look dodgy with the smallest bits of mess, so combine baking soda with a lemon half to kill germs and bring back shine. Sprinkle the soda in the sink and use your lemon wedge as a scrubber.</p> <p><strong>5. Toothpicks for mixers and machinery</strong></p> <p>Electric mixers and other devices can open up a world of possibilities in the kitchen, but they get dirty fast. A good way to get around this is by using a toothpick to get into any cracks and crevices that may have opened up. Then simply wipe off the residue with a damp cloth.</p> <p><strong>6. Get rid of grout with baking soda and vinegar</strong></p> <p>These two common household items combing to make a gentle solution that's very effective at getting rid of stains. Simple make a paste, apply it to the grout and let it sit for a little while. Before too long spray it with vinegar. It will fizz a little, then scrub with a toothbrush and voila – clean!</p> <p><strong>7. Clean the air in odd smelling kitchens</strong></p> <p>Sometimes no matter how hard we try we just can’t get our kitchens to smell clean. But before you go all gung-ho with the bleach, try this solution. Simmer some vinegar on the stove. This will help you clean the air and restore it to a more neutral smell for cooking and cleaning.</p> <p><em>Images: Getty</em></p>

Home Hints & Tips

Placeholder Content Image

5 kitchen gadgets you need (and 5 you actually don’t)

<p>If you’re trying to save valuable cupboard or bench space in your kitchen, knowing which items you need and which you don’t can be a big help.</p> <p><strong><span style="text-decoration: underline;">5 gadgets that are actually useful</span></strong></p> <p><strong>Slow cooker:</strong> add your ingredients in the morning and come home to a delicious home cooked meal. In a pinch though you can just use a casserole dish with a lid, in a low oven (but unlike a slow cooker you can’t really leave the house when it’s on).</p> <p><strong>Vegetable peeler:</strong> you can get some great peelers now that make peeling a breeze with very little wastage.</p> <p><strong>Non-stick pans:</strong> life is too short for soaking and scrubbing regular pans each night.</p> <p><strong>Garlic press:</strong> no need to fiddle about peeling garlic cloves when you can just throw it in the press. Plus you can avoid having smelly garlic fingers.</p> <p><strong>Stick blender:</strong> takes up minimal room and is great for blending soups, smoothies or batters.</p> <p><strong><span style="text-decoration: underline;">5 items you could get rid of</span></strong></p> <p><strong>Knife block:</strong> save your valuable bench space and keep your knives in a drawer instead.</p> <p><strong>Meat mallet:</strong> these are used infrequently and their bulky size means they aren’t exactly drawer-friendly. Use a small, heavy based saucepan instead.</p> <p><strong>Sandwich press:</strong> these bulky items can take up a whole cupboard. Pop your sandwich in a frying pan and place a heavy pot on top.</p> <p><strong>Icing bag:</strong> these are tough to clean and most likely get used once or twice per year. Just fill a zip lock bag with icing or cream and snip the corner off for a disposable icing bag.</p> <p><strong>Avocado or egg slicer:</strong> these one-trick ponies just clutter up your utensil drawer without making life that much easier. Just use a sharp knife.</p> <p><em>Image credits: Getty Images</em></p>

Home & Garden

Placeholder Content Image

"Back to the kitchen": Granny Guns flexes down at online trolls

<p>A body-builder granny has hit back at trolls after showcasing her killer biceps online.</p> <p>The TikTok star, 62, shows herself pumping iron, and doing various workouts on her account, with nasty individuals leaving comments saying she belongs in the kitchen.</p> <p>The 62-year-old enjoys making TikTok fitness videos, and she’s proved to be extremely successful online, having just shy of 800,000 followers.</p> <p>In one video, the granny is pumping iron at the gym.</p> <p>The video then cuts to her dancing around with a tray of homemade cookies, which she says is how she acts “any other time”.</p> <p>However, trolls online labelled her as just a woman made for the kitchen, and that’s when the biceps came out.</p> <div><iframe title="tiktok embed" src="https://cdn.embedly.com/widgets/media.html?src=https%3A%2F%2Fwww.tiktok.com%2Fembed%2Fv2%2F7208386374041423146&amp;display_name=tiktok&amp;url=https%3A%2F%2Fwww.tiktok.com%2F%4065_strong%2Fvideo%2F7208386374041423146%3Flang%3Den&amp;image=https%3A%2F%2Fp16-sign.tiktokcdn-us.com%2Fobj%2Ftos-useast5-p-0068-tx%2F632c57901f47459e97728aea3dbe7729_1678333249%3Fx-expires%3D1678683600%26x-signature%3DQUziUnUI1Gk%252FIjO45MfLA8OhWNk%253D&amp;key=59e3ae3acaa649a5a98672932445e203&amp;type=text%2Fhtml&amp;schema=tiktok" width="340" height="700" frameborder="0" scrolling="no" allowfullscreen="allowfullscreen"></iframe></div> <p> </p> <p>The granny made a video where she threw shade at a few hate comments such as “women are weak” or “back to the kitchen”.</p> <p>The video then cuts to her friends lifting weights in a show of strength.</p> <p>The gym granny was showing off a tough move at the bicep curl machine.</p> <p>As she pulled the bar to her chest, her biceps flexed to reveal some serious muscle.</p> <p>She captioned her TikTok, “For all my fellow female fitness lovers”.</p> <p>Fellow users flocked to the comments to show their support.</p> <p>“I have a crush on everyone,” one user said.</p> <p>Another exclaimed: “I love this! And all the amazing women in this video!”</p> <p>“I love you grandma”, a third gushed.</p> <p>To which the granny replied, “Love you back”.</p> <p><em>Image credit: TikTok</em></p>

Body

Placeholder Content Image

Top tips for a kitchen cleanup

<p dir="ltr">Whether you’re gearing up for a move or just looking for a little more space in your crowded cupboards, downsizing is both an effective and rewarding activity. Plus, the whole family can hop in and lend a helping hand. </p> <p dir="ltr">The concept of a downsize is no new thing, but with the likes of Netflix’s Tidying Up with Marie Kondo taking the world by storm, it’s become bigger than ever with people eagerly taking to cutting down on household clutter.</p> <p dir="ltr">From keeping only their most treasured items to only keeping those that are absolutely necessary, households around the world have benefitted from putting in a little elbow grease. However, as many can attest, one of the best spots to tackle is none other than the kitchen. </p> <p dir="ltr">Downsizing and minimising the items you have in your home isn't a new concept, but it's become more popular as of late. This simple act of pairing your current items down and keeping only the essentials is proving to be worthwhile, and one room that can definitely benefit from this kind of attention is the kitchen. This is one of the most trafficked and used areas in the home and if you're not careful, kitchens can become a hoarding ground for things we don't always need or use.</p> <p dir="ltr">The kitchen, with cupboards, drawers, and pantries galore, is a breeding ground for items that will have anyone exclaiming “I forgot I had that”. From removing unnecessary appliances, dining ware, four sets of mismatched cutlery, and old food, here are some top tips and tricks to keep on top of the task, and master the art of the kitchen downsize. </p> <ul> <li dir="ltr"><strong>Set achievable goals </strong></li> </ul> 
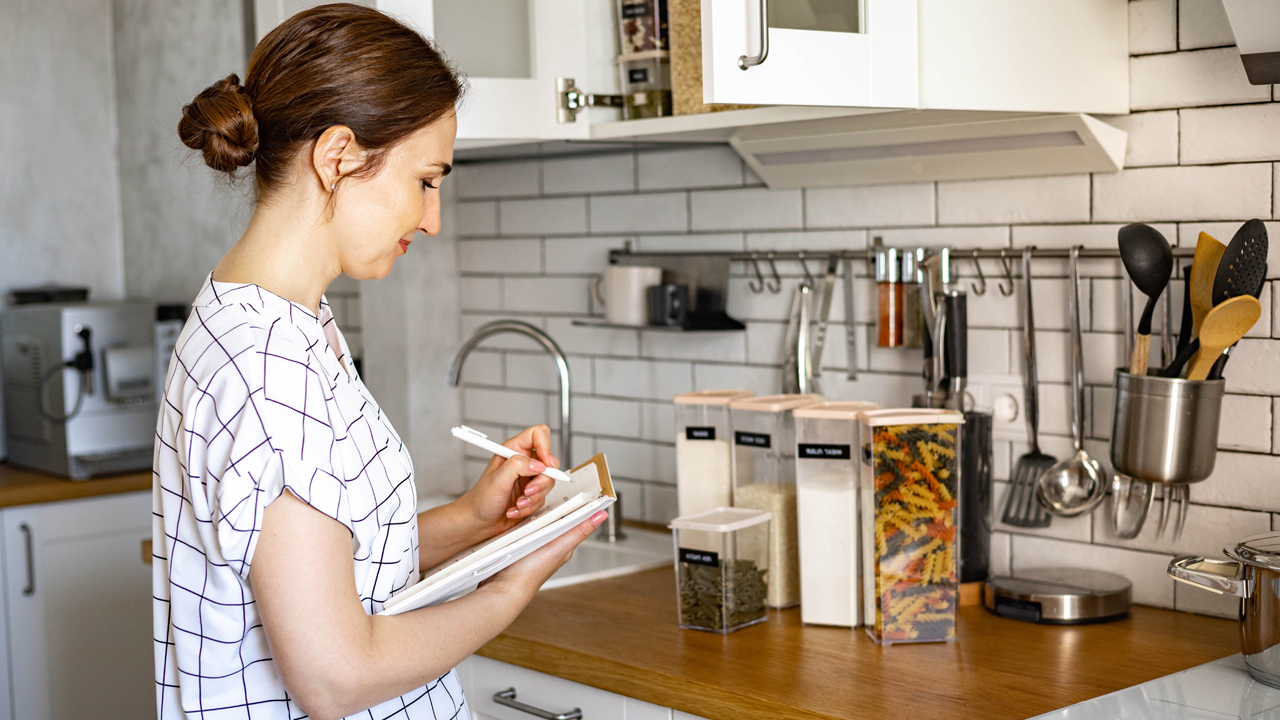
<p dir="ltr">The first critical mistake any budding (or avid) downsizer can make is to set a goal that isn’t realistic - whether that be in scope or in time frame. When setting your goal, make sure to factor in things such as the size of your kitchen, how long it’s been since your last cleanup, how many helpers you may be able to rope in, and when you’d like to be finished. </p> <p dir="ltr">Start from the end: decide the date you want to be able to check this item off your to-do list, and work back from there, figuring out how long you’ll realistically have to spend on it each week or month, and allow yourself some wiggle room should you have to skip a day. </p> <p dir="ltr">Give yourself checkpoints along the way in the form of smaller milestones. Is cleaning out your pantry your top priority? Do you consider finally emptying that overflowing second utensils drawer an achievement in itself? Would removing the old jam jars from the back of the fridge give you the boost you need to tackle the next shelf? If so, these little accomplishments could make all the difference. </p> <ul> <li dir="ltr"><strong>Remove duplicates </strong></li> </ul> <p dir="ltr">It is common advice that when starting out, you should remove everything from the area you plan to work on. While this isn’t always possible, especially if you’re short on room, it can make the world of difference to see exactly how much space you have to work with, and to be able to group together any similar items that may have been lying around - utensils with other utensils, pots with other pots, and so on. </p> <p dir="ltr">Once this is done, the next step is to remove any duplicate items from your collection. While it can help to have a few of each thing - surely there’s no such thing as too many wooden spoons - this can be a great opportunity to get rid of the unnecessary items chewing up space in your kitchen. This, of course, will vary from household to household - those who cook larger meals for bigger households may require more than those of a single person household, for example. </p> <p dir="ltr">It’s important, of course, to hold on to the one from the set that you’ll get the most use out of. Often, these are the ones in best conditions, or that are the best quality. It can help too to remove the largest one from your collection, especially if saving space is why you started this project. For those who’d prefer to hold on to your favourite one instead, that’s okay. Downsizing is meant to help, not upset. </p> <ul> <li dir="ltr"><strong>Cut back </strong></li> </ul> 
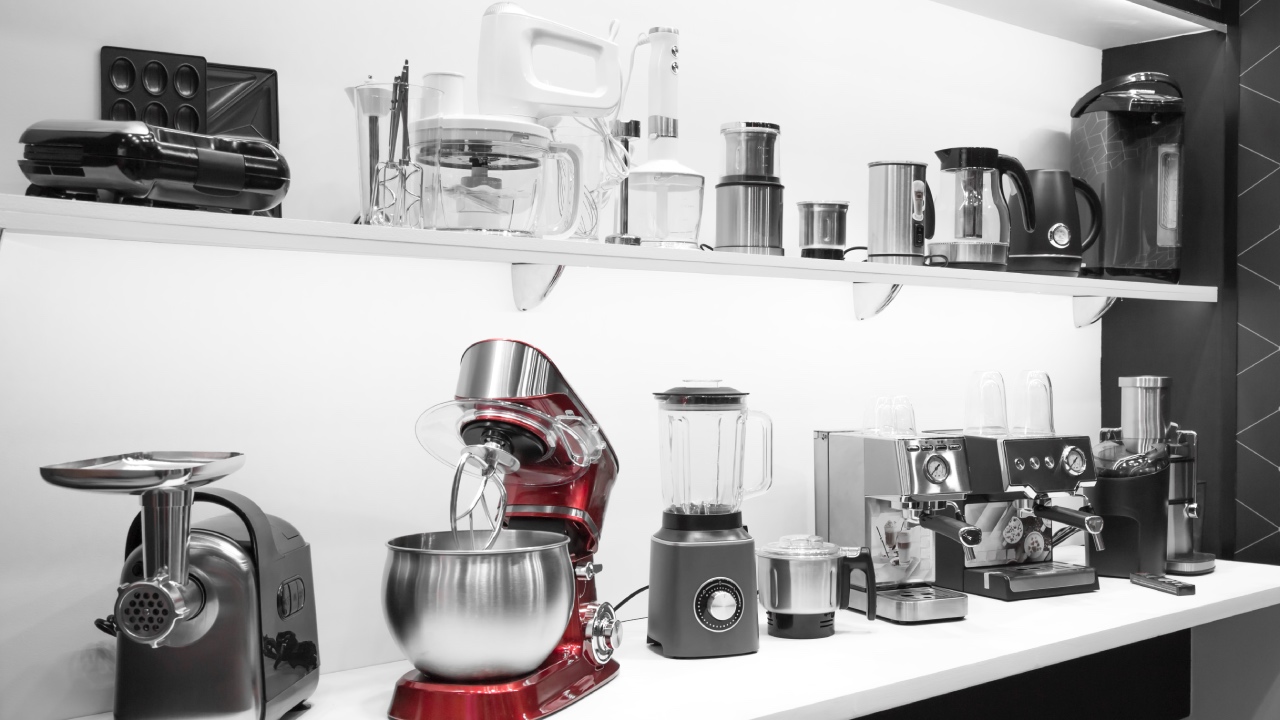
<p dir="ltr">We all have that kitchen gadget sitting in the back of a cupboard from Christmasses past - probably still in the box, waiting to see the light of day. From gimmicky single-use items (keep the ones you use, stop hanging on to the rest) to bulky specialty appliances, we’ve all been there, and we could all gain some room back if we cut the ties. </p> <p dir="ltr">The key, when deciding which devices to keep, is to focus on the ones you actually use. Pasta makers, smoothie blenders, ice cream machines, bread ovens, and vegetable slicing contraptions are all well and good to have - if you’re making the most of them. But if their primary purpose in your kitchen is to collect dust, it might be time to let them go. If you’re unsure, it’s suggested you ask yourself if you will use the appliance in the next few months. If your answer is no, it’s probably a sign. </p> <p dir="ltr">And the best part? Gifting it is always an option, especially if it’s still snug in its box. </p> <ul> <li dir="ltr"><strong>Storage solutions </strong></li> </ul> 
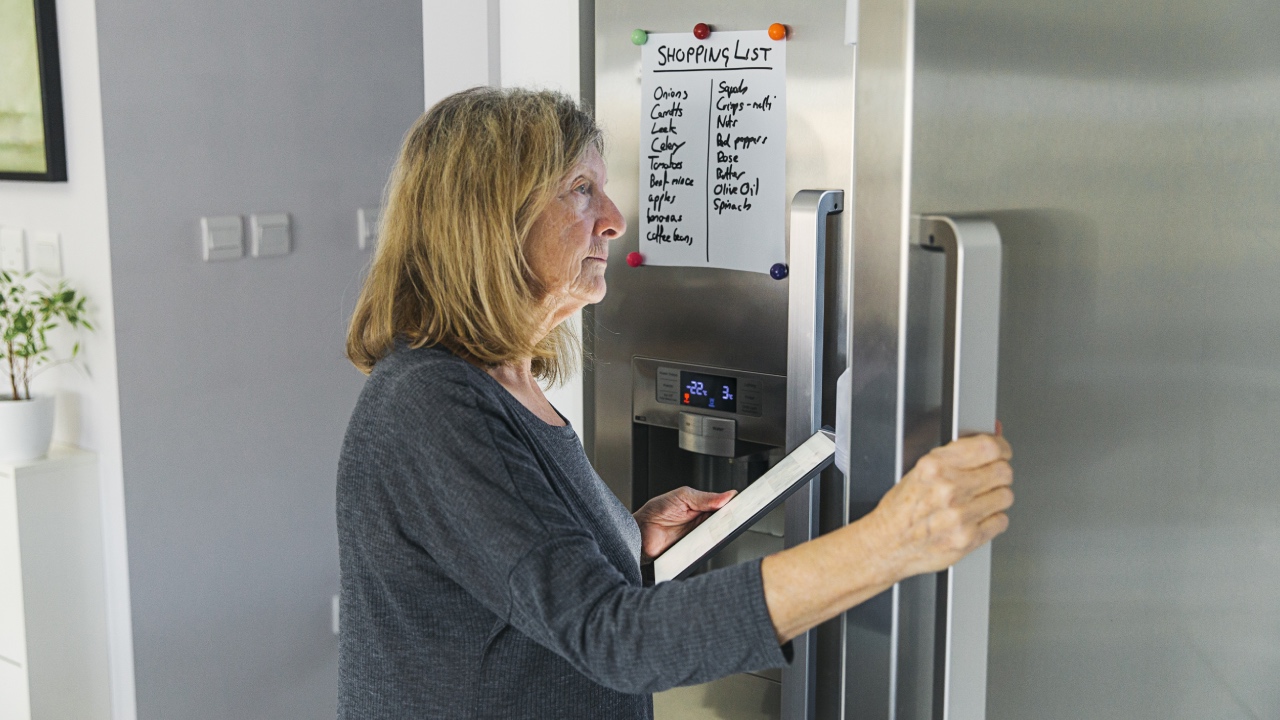
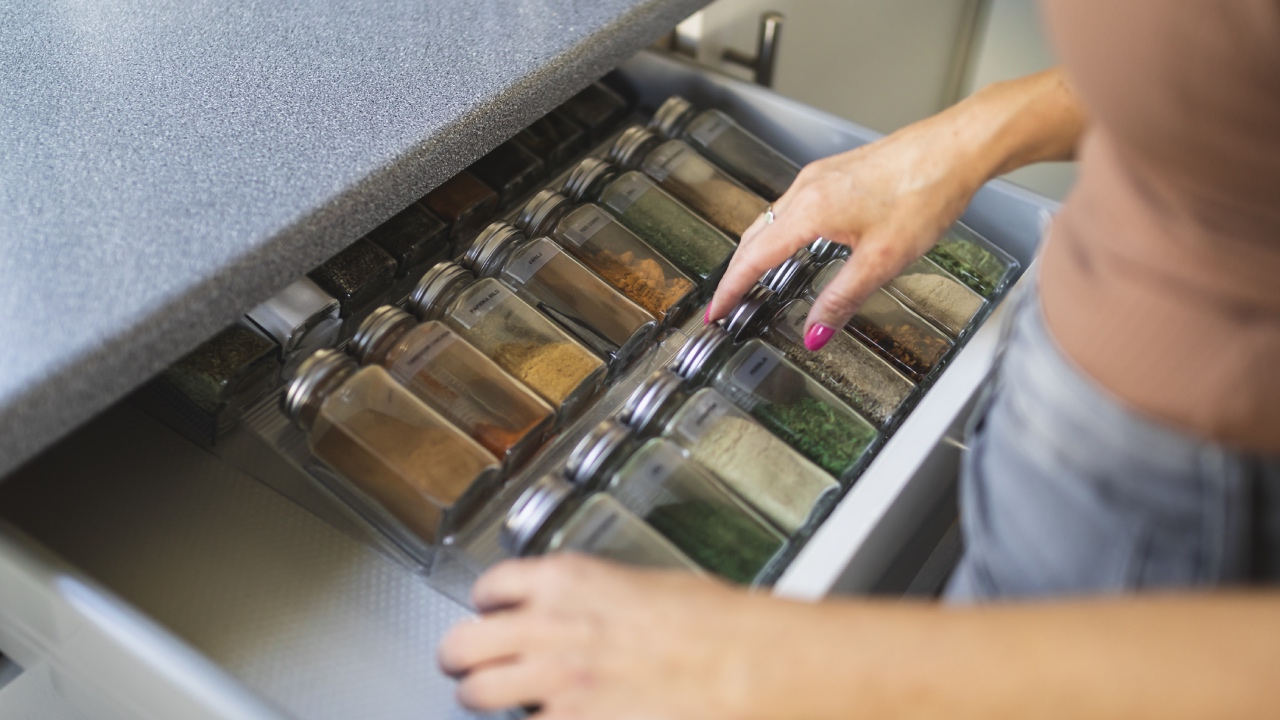
<p dir="ltr">Organised pantries are all the rage, from orderly labelled tubs to chaotically unique household solutions, everyone wants to know exactly what’s in there and where to find it. <a href="https://www.kmart.co.nz/search/?searchTerm=pantry+storage" target="_blank" rel="noopener">Clear containers</a> are a hero item, and as with most things reusable, you can feel like you’re doing your bit for the environment, as an added bonus. Plus, you’ll feel good opening those doors to see the order in your shelves. </p> <p dir="ltr">When it comes to cupboards, a top tip is to look into a <a href="https://www.ikea.com/au/en/p/variera-shelf-insert-white-50177727/">shelf raiser</a> or two. Being able to see everything in your collection as soon as you peer inside can put you at a great advantage when it comes to keeping on top of your cleanup in the long term. This goes for all areas of the kitchen - from the fridge to the pantry, spice rack, cupboards, and saucepan spot - and is crucial in avoiding going through the entire process faster than you can tell people “I sorted my house and I feel so much better now”. </p> <p dir="ltr"><em>Images: Getty </em></p>

Home Hints & Tips

Placeholder Content Image

7 things you didn’t know your rice cooker could do

<p>You’d be forgiven for thinking that the humble rice cooker is a one trick pony. After all, the name implies that it performs a highly specific function with no mention of anything else. Interestingly, though, the rice cooker can be used for a whole range of culinary tasks far above and beyond booking your long grain. Here are seven of our favourite dishes to cook in the rice cooker.</p> <ol> <li><strong>Frittata</strong> – Perfect frittata by simply switching to the cook setting, heat olive oil, add veggies followed by beaten eggs, cover and reset to let the cycle run through.</li> <li><strong>Macaroni and cheese</strong> – Super simple with minimal mess. Add all the ingredients and set to cook. Perfect mac and cheese with no washing up!</li> <li><strong>Rice pudding</strong> – Cook in the same way you’d usually cook your rice, just make sure to stir every 15 minutes or so.</li> <li><strong>Cheesecake and banana bread</strong> – Prepare your recipe as you usually would and then pour the batter into the lined rice cooker insert.</li> <li><strong>Porridge</strong> – Wake up to perfect porridge every time! Presoak steel cut oats overnight in the rice cooker then run the cook cycle in the morning for creamy, delicious porridge.</li> <li><strong>Quinoa</strong> – If you fancy jumping on the quinoa train, try cooking it in your rice cooker. It cooks at the same rate as long grain white rice so makes the perfect substitute that doesn’t require any fiddly programming changes.</li> <li><strong>Polenta</strong> – Create creamy polenta by adding one cup of polenta to three cups of liquid and set to cook. Add cheese or butter at the end and you’re done.</li> </ol> <p>Have you ever used your rice cooker to cook something other than rice? Share your experience with us in the comments below.</p> <p><strong>Related links:</strong></p> <p><a href="/lifestyle/home-garden/2016/08/your-bed-sheets-could-be-making-you-sick/"><span style="text-decoration: underline;"><em><strong>Your bed sheets could be making you sick</strong></em></span></a></p> <p><a href="/lifestyle/home-garden/2016/08/how-to-clean-your-bathroom-like-a-professional/"><strong><span style="text-decoration: underline;"><em>How to clean your bathroom like a professional</em></span></strong></a></p> <p><a href="/lifestyle/home-garden/2016/08/ways-to-ripen-your-avocado-in-minutes/"><span style="text-decoration: underline;"><em><strong>5 ways to ripen your avocado in minutes</strong></em></span></a></p>

Home & Garden

Placeholder Content Image

10 nifty new uses for your vegetable peeler

<p>The humble veggie peeler has a place in most homes. Its life is mostly spent peeling potatoes or carrots, perhaps the occasional pumpkin or zucchini before being popped in the dishwasher for the next skimming session. As it happens, your veggie peeler actually has a range of different uses far and beyond merely peeling. Here are 10 of our favourites.</p> <ol> <li><strong>Hull strawberry stems</strong> – In nifty news, the pointy end of your peeler is actually designed to remove potato eyes. Make use of that newly discovered function by using it to hull the stems on strawberries.</li> <li><strong>Peel an onion</strong> – Bye bye onion tears! A veggie peeler can be used to shave thin slices of onion so that you can speed through the process before the tears start to well up.</li> <li><strong>Seed a chilli</strong> – Remove the spicy seeds in a hot chilli by slicing off the top then working a peeler around the middle to cleanly remove the seeds.</li> <li><strong>Create soap shavings</strong> – If you’re sick of slippery bars of soap that stick to the bath or shower, try creating ‘soap shavings’ that can be used a handful at a time. Less wastage as well!</li> <li><strong>Create a decorative lemon</strong> – If you’ve got a dinner party coming up, a pretty floral lemon is an easy way to impress guests. Simply use your peeler to make ridges down the sides of the lemon then slice with a knife as usual.</li> <li><strong>De-string celery</strong> – If the strings on celery end up in your teeth remove them altogether with your peeler. All you need to do is shave the curved side of the celery to remove fibres with ease.</li> <li><strong>Make chocolate shavings</strong> – Decorate a cake or bowl of ice cream with super easy chocolate shavings. Use a peeler to shave off three to five-cm pieces that can then be used to sprinkle on top of your favourite dessert.</li> <li><strong>Zest citrus</strong> – Need the zest of a lemon for a recipe but don’t have a zester? No problem! Use a veggie peeler to slice strips of your citrus fruit then process or crush the pieces for your recipe.</li> <li><strong>Sharpen your chalk</strong> – If you run your house off a chalkboard or have a chalkboard calendar you’ll know that blunt chalk is a nightmare. Use a peeler to remove blunt ends and bring chalk back to life.</li> <li><strong>Peel a mango</strong> – It may not be summer but come the warmer months be prepared by using a peeler to peel a delicious mango. The tough skin can be tricky to slice effectively where as a peeler does a neat and tidy job in a fraction of the time.</li> </ol> <p>Have you ever used a peeler for an unusual purpose? Tell us about it in the comments below.</p> <p><em>Image: Getty</em></p>

Home & Garden

Placeholder Content Image

You've got to be yoking! Easy boiled egg hack that actually works

<p>The not so enjoyable part of the holiday season, the food prep.</p> <p>Everybody would agree that one of the most messy and time-consuming chores is de-yolking hard boiled eggs. If devilled eggs are on the menu this one is for you.</p> <p>TikTok user, US based woman Andrea VanDerweker demonstrates her hot tips to extracting the hard-boiled egg yolk perfectly. She uses her knife to gently cut the perimeter of the egg, like you would with an avocado.</p> <blockquote class="tiktok-embed" style="max-width: 605px; min-width: 325px;" cite="https://www.tiktok.com/@andrealanev/video/7166718280185417006" data-video-id="7166718280185417006"> <section><a title="@andrealanev" href="https://www.tiktok.com/@andrealanev?refer=embed" target="_blank" rel="noopener">@andrealanev</a></p> <p>I’m just now figuring this out after almost 30 years on this spinning rock?</p> <p><a title="♬ original sound - Andrea VanDerwerker" href="https://www.tiktok.com/music/original-sound-7166718301282994990?refer=embed" target="_blank" rel="noopener">♬ original sound - Andrea VanDerwerker</a></section> </blockquote> <p>With the knife, she pulls the egg along the cutting board and the egg yolk just pops right out with no messy residue left on the inside of the egg-whites.</p> <p>"Hey, if you guys all knew about cutting hard boiled eggs like this, and you didn't tell me, we're gonna have some serious beef," she joked as she shared the tip.</p> <p>The simple and very effective technique has left viewers stunned.</p> <p>"$22,000 for culinary school and THEY DIDN'T TEACH ME THIS," read one of the many comments.</p> <p>Make sure you try this throughout the holiday season and let us know if it really works!</p> <p><em>Image: TikTok</em></p>

Food & Wine

Placeholder Content Image

5 ways to ripen your avocado in minutes

<p>The humble avocado can be a wily adversary when it comes to eatability. What lies beneath their dark, glossy skin is at best a guessing game. Many a meal has been ruined by slicing one open only to discover rock hard flesh. Fortunately, there are a few clever tricks you can you to ripen up an avocado quicker than you can say “guacamole”. Here are five of our favourites.</p> <p><strong>1. Wrap it in glad wrap</strong></p> <p>One of the easiest ways to quickly ripen an avocado is by wrapping it in glad wrap! Something to do with the heat and moisture generated we are led to believe.</p> <p><strong>2. Peas and a blender</strong></p> <p>If you’re really stuck and need to do something with your rock hard avo, try dicing it up and popping into the blender with a handful of frozen peas. Instant creamy guacamole!</p> <p><strong>3. The tin foil trick</strong></p> <p>For really, really unripe avocados, this tin foil hack might just do the trick. Simply wrap your unripe avocado in foil and pop it in a low temperate oven (around 90c). Leave for around 10 minutes then transfer to the fridge to cool. Avocadoes release ethylene gas (which helps them to ripen) much faster in the oven due to the warmth. This method can change their taste slightly though so is best used when the avocado will be turned into something like guacamole or added to a recipe.</p> <p><strong>4. Lime juice + apple cider vinegar</strong></p> <p>Another trick to create instant, creamy guacamole. Take a sharp knife, cut your avocado in half then score the flesh into sections. Pop the segments out into a bowl and sprinkle with a tsp of apple cider vinegar and the juice of ½ a lime. Allow to sit for a few minutes then mash.</p> <p><strong>5. Brown paper bag + flour</strong></p> <p>As bizarre as it sounds, the humble brown paper bag can help ripen up an avocado considerably faster than nature alone. Pour ½-1 cup of flour into the bottom of the bag then add your avocado. Seal the bag and leave in a warm spot to ripen. This can take anywhere between 12-48 hours. To speed up the process, add another piece of fruit like a banana or apple to the bag as this will add to the ethylene gas production and thus speed up ripening.</p> <p><em>Image credits: Getty Images</em></p>

Food & Wine