Placeholder Content Image

Enjoy some hearty sticky beef rib with beurre bosc pear

<p>This sticky beef recipe is messily delightful, with sliced pears for an added health kick to your meal!</p> <p><strong>Serves: </strong>4 to 6</p> <p><strong>Ingredients</strong></p> <p><strong>Beef</strong></p> <ul> <li>2kg beef short ribs</li> <li>5 litres water</li> <li>3 cups Chinese cooking wine</li> <li>2 cups dark soy</li> <li>1 cup light soy</li> <li>1½ cups white sugar</li> <li>1 cup ginger roughly chopped</li> <li>10 garlic gloves crushed</li> <li>1 bunch of green shallots roughly chopped</li> <li>3 cinnamon quills</li> <li>8 star anise whole</li> <li>1 orange, zest removed</li> </ul> <p><strong>Salad</strong></p> <ul> <li>2 beurre bosc pears pealed and finely sliced</li> <li>1 bunch sea parsley picked</li> <li>1 small kohlrabi, peeled and finely sliced</li> <li>1 lemon</li> <li>Extra virgin olive oil</li> </ul> <p><strong>Sticky sauce</strong></p> <ul> <li>50g sugar</li> <li>50ml Chinese black vinegar or balsamic vinegar</li> </ul> <p><strong>Directions</strong></p> <p><strong>For the beef</strong></p> <ol> <li>Place all ingredients except for the meat in a stockpot and bring to a simmer. Cook for about 15-20 minutes to bring out flavour.</li> <li>To prepare the beef ribs, cut excess fat away and place in the simmering stock for 2½-3 hours, keeping in mind that the beef should be under the stock at all times. It is a good idea to place a piece of baking paper over the top of the beef as this helps keep it submerged.</li> <li>Once cooked, remove from the stove and let the beef steep for about 1 hour.</li> </ol> <p><strong>For the pear and kohlrabi salad</strong></p> <ol> <li>Place sliced pear, kohlrabi, sea parsley and native pepper berry in a bowl.</li> <li>Season with salt, lemon juice and a splash of olive oil. Set aside.</li> </ol> <p><strong>For the sticky sauce</strong></p> <ol> <li>In a pan, add 200ml of braising liquid, Chinese black vinegar and sugar and reduce to a thick sticky sauce.</li> <li>Slice ribs and place on a serving platter, pour over the reduced sauce and garnish with the pear and kohlrabi salad.</li> </ol> <p><em>Recipe thanks to <a href="http://rediscoverthepear.com.au/">Australian Pears</a>. Republished with permission of <a href="https://www.wyza.com.au/recipes/sticky-beef-rib-and-beurre-bosc-pear.aspx">Wyza.com.au</a>.</em></p>

Food & Wine

Placeholder Content Image

Enjoy a hearty salmon and redbelly in cartoccio with smashed potatoes

<p>This seafood dish with a citrus twist from Lyndey Milan is the perfect meal for a summer's day.</p> <p><strong>Time to prepare: </strong>10 minutes</p> <p><strong>Cooking time: </strong>12 minutes</p> <p><strong>Serves: 4</strong></p> <p><strong>Ingredients</strong></p> <p><strong>Smash potatoes</strong></p> <div class="article-body"> <ul> <li>800g chat potatoes, boiled until very tender</li> <li>2 tablespoons (40ml) extra virgin olive oil</li> </ul> <p><strong>Salmon</strong></p> <ul> <li>6 redbelly citrus (also known as blood oranges)</li> <li>4 salmon fillets</li> <li>1 baby fennel, cored, thinly sliced, fronds reserved</li> <li>20 green Sicilian olives, stoned</li> <li>2 tablespoons capers, drained and rinsed</li> <li>Salt flakes and freshly ground black pepper</li> <li>⅓ cup (80ml) extra virgin olive oil</li> </ul> <p><strong>Directions</strong></p> <ul> <li>1. Pre-heat oven to 200⁰C (180⁰C fan-forced).</li> </ul> <p><strong>Smashed potatoes</strong></p> <ol> <li>Place boiled potatoes on a paper-lined baking tray and use the back of a fork or a potato masher to lightly crush each potato. Drizzle with olive oil and season with salt and pepper.</li> <li>Bake for 30 minutes or until crisp and golden, turning once half way to encourage browning. Increase oven to 220’C (200’C fan-forced). Leave potatoes in the oven.</li> </ol> <p><strong>Salmon</strong></p> <ol> <li>Cut eight 34 x 30cm pieces of baking paper. Lay four pieces over the bench, top each with a second piece.</li> <li>Wash 2 redbelly citrus, leave skin on and slice into rounds. Juice 1 redbelly, cut 3 redbelly into segments and cut a small slice off the ends of each remaining redbelly. Stand up on one end, and carefully, following the contour of the redbelly, cut down to remove the peel and the pith. Holding the fruit in one hand, cut down one side of the membrane on one segment, almost to the core. Cut down along the inside of the opposite membrane, to cut out a wedge with no pith or membrane attached. Repeat until you have cut out all segments. Squeeze juice out of the remaining core into the juice then discard the core.</li> <li>Place a bed of redbelly slices in the centre of each layer of baking paper, and top evenly with salmon fillet, fennel, olives, capers, salt and pepper and drizzle with redbelly juice and olive oil.</li> <li>Bring the long sides of each piece up and fold and roll firmly down. Then fold in the 2 short sides and tuck them under tightly to create a pocket. Repeat to make five more parcels.</li> <li>Place parcels seam side on oven tray. Bake until just cooked through 10 minutes.</li> <li>Remove straight onto serving plates, carefully open the top of each parcel. Serve with smashed potatoes.</li> </ol> <p><strong>Tips:</strong></p> <ul> <li>Any fish can be used or try thinly sliced chicken breast or pork medallions.</li> <li>Vegetarian alternative: replace salmon with zucchini strips and mushrooms.</li> </ul> <p><em>Republished with permission of <a href="https://www.wyza.com.au/recipes/lyndey-milan-salmon-and-redbelly-in-cartoccio.aspx">Wyza.com.au</a>.</em></p> </div>

Food & Wine

Placeholder Content Image

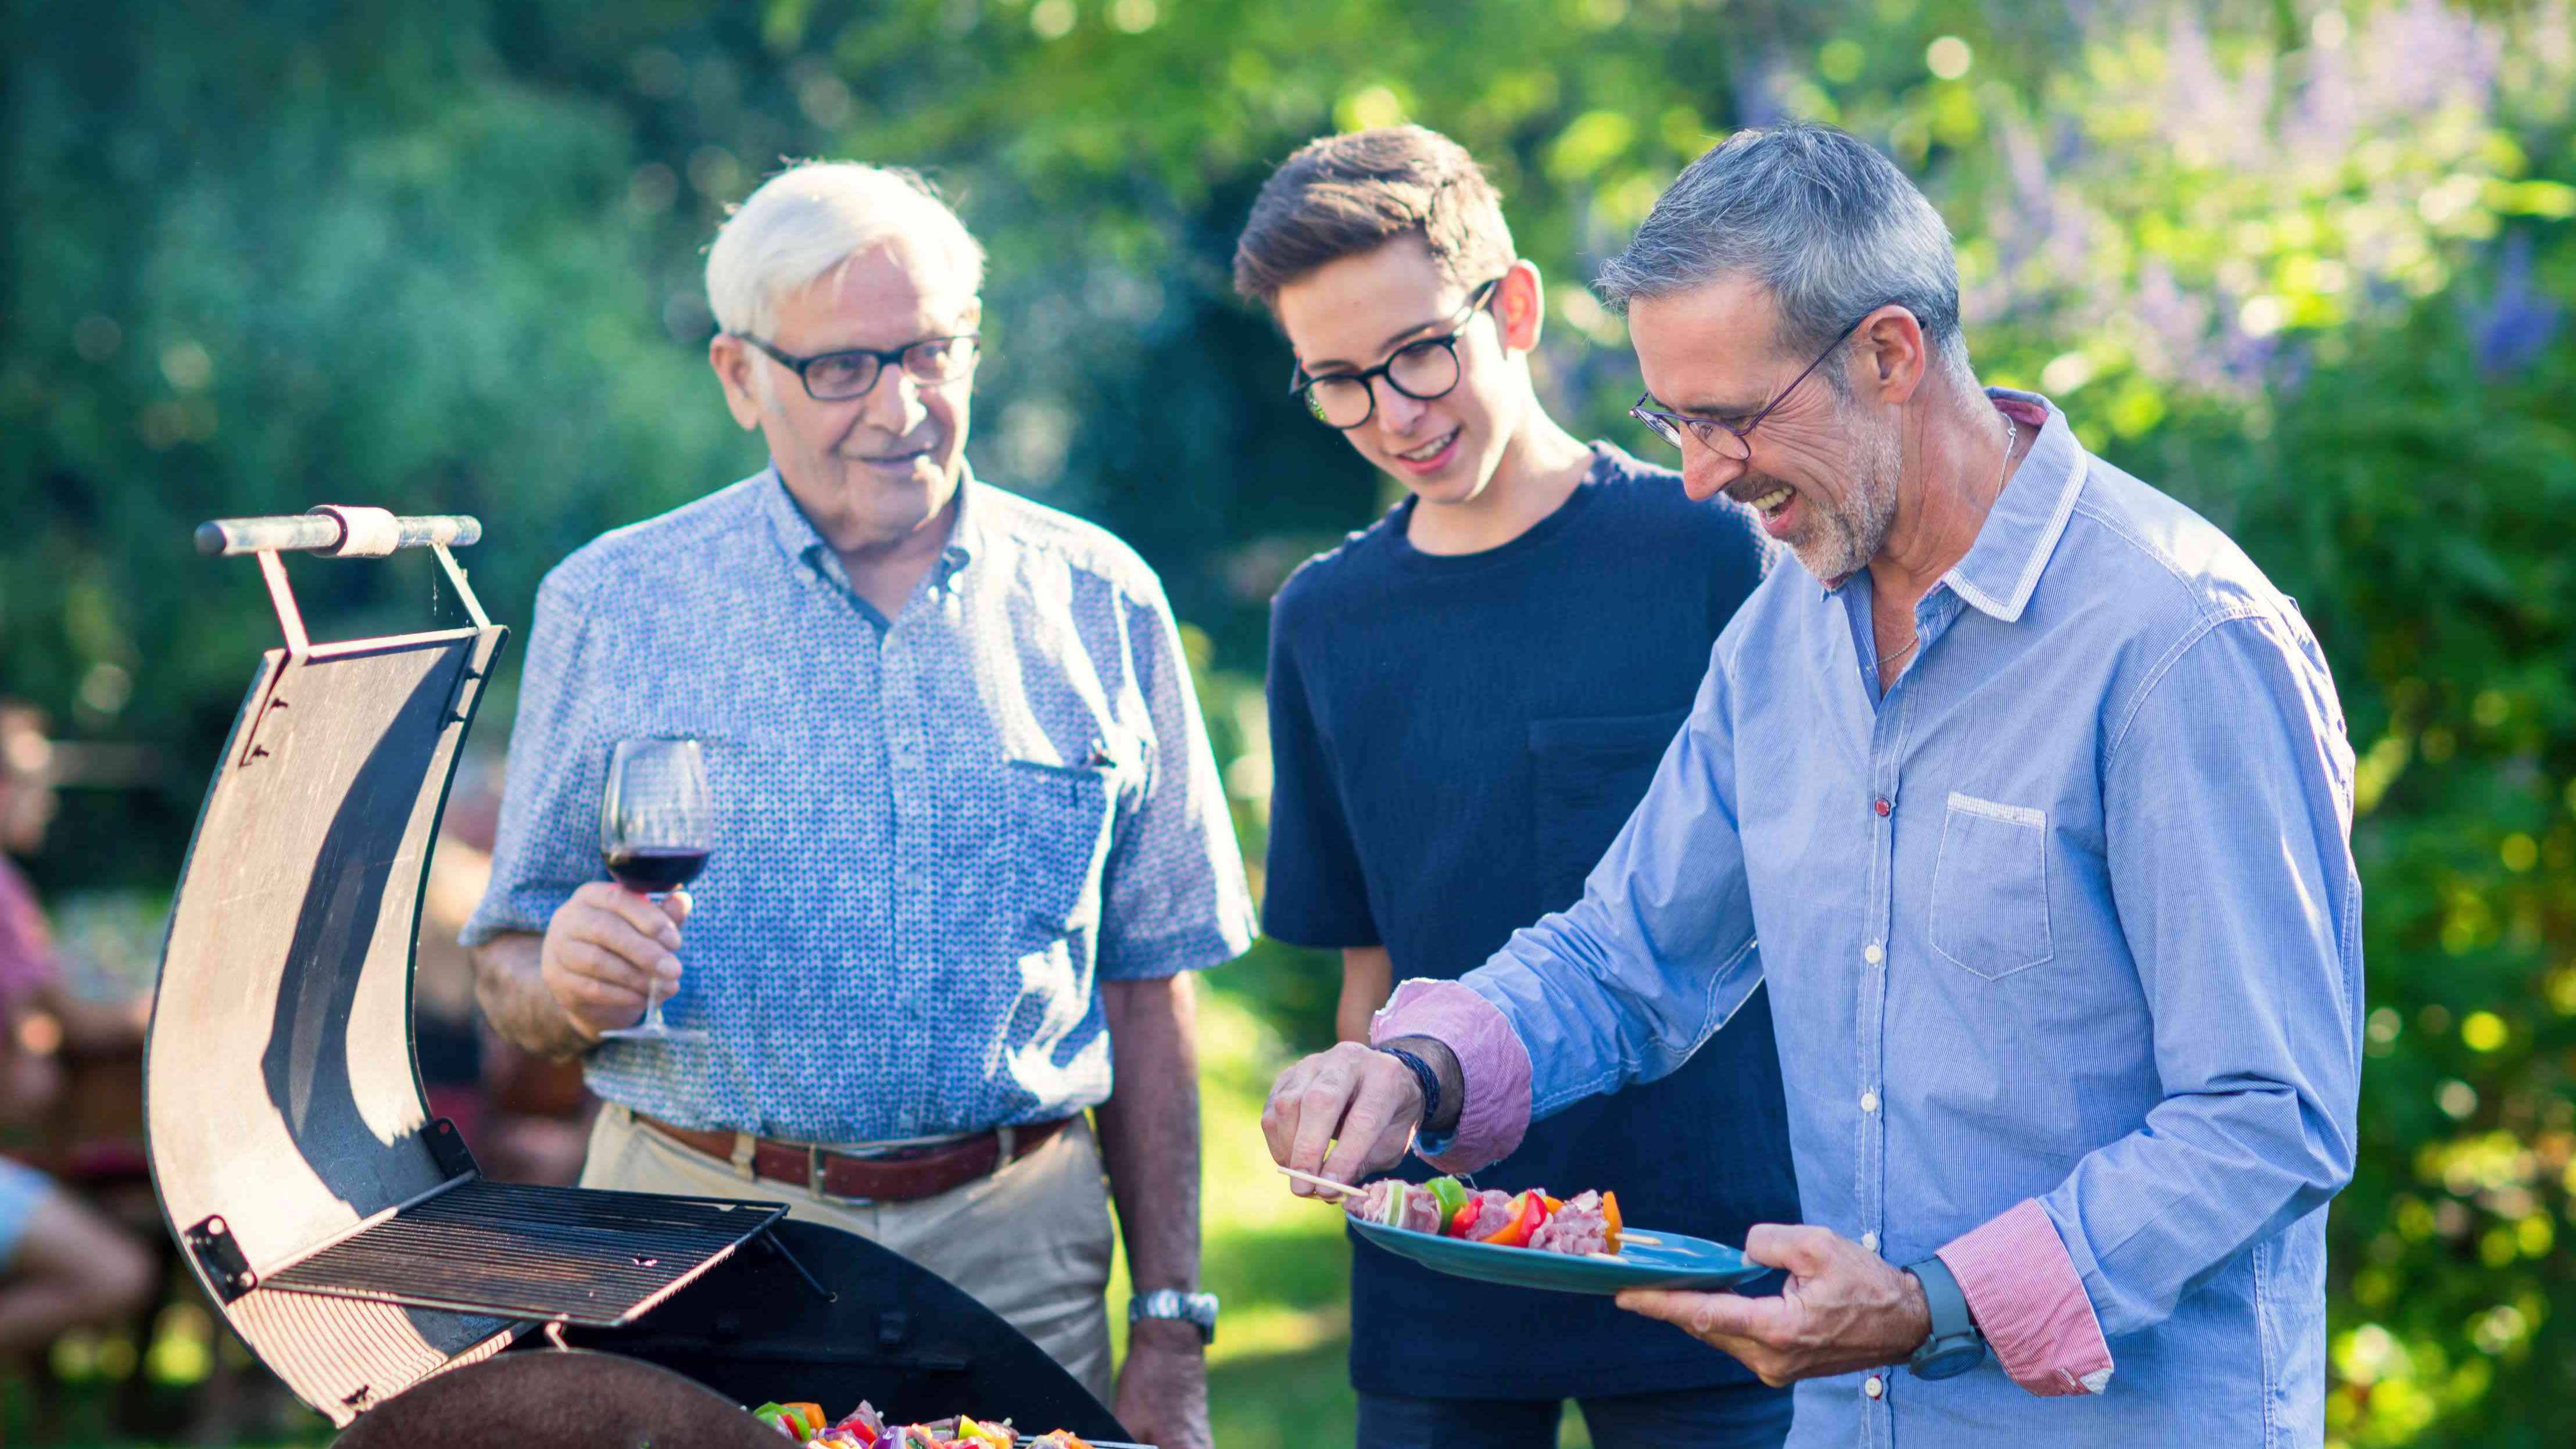
How to host the perfect BBQ

<p>Nothing gets the tastebuds tingling like the smell and sizzle of a great aussie barbecue. The warmer weather makes it almost compulsory and there is no better way to get family and friends together. But how can you make sure your next barbie is trouble free and has some extra-special touches that take it out of the ordinary? To help you out, we have put together a smorgasbord of simple ideas that will make sure you impress without any stress.</p> <p><strong>Get your equipment in good shape</strong></p> <p>It’s difficult to have a great barbecue if the tools of trade are not in good condition. Every 10 sessions or so you should dismantle plates grills and drip trays for a wash with soapy water followed by a light oiling to protect from rust. Every time you cook you also need to ensure that the plate and grill are free from any residue from previous uses. This is critical to avoid meat sticking to the grill. It is well worthwhile investing in a solid barbecue brush with wire bristles and notched scraper, so that you can get right into the difficult to reach places in between the grill grates.</p> <p>Check your burners are giving an even flame and use some wire to clear any blocked outlet holes. If you have lava rocks, then make sure they are not clogged with grease and replace them if they are. Now you’re ready to start cooking.</p> <p>There’s nothing more embarrassing than running out of gas, so use this quick trick to check your bottle isn’t empty. Pour some hot tap water down the side of the bottle, which will heat up the metal. Because the gas is naturally at a lower temperature the metal will cool a lot quicker, so simply run your hand down the bottle and wherever the metal suddenly becomes cooler is where your gas level is.</p> <p><strong>Do some delegation</strong></p> <p>If you are inviting guests they will invariably want to contribute something, so get them involved and delegate some of the menu. There are two general approaches to this. One is to keep the barbecued food under your control and ask guests to bring salads and side dishes. This has the advantage of allowing you to keep control over the barbecuing itself. Just remember to let guests know if there is a particular cuisine theme in your cooking, so that they bring sides that are complimentary.</p> <p>The second approach is to do all the sides inhouse and ask guests to bring their own meat. You lose a bit of control on the cooking front, but it will save on costs for you.</p> <p><strong>Top tips for great grilling</strong></p> <p>Let’s get down to the business end of things. To get the best of that great barbecue char flavouring, it is best to grill on a grate rather than a flat plate. It is essential to have your grill well and truly preheated to a high temperature before you begin cooking – that is key to getting the all-important char effect. If your barbecue has a lid then always use it to avoid heat loss and to maximise the smoky flavour.</p> <p>With those basics in mind, here are some specifics on cooking different types of meats:</p> <p><strong>Steak</strong></p> <ul> <li>For the perfect steak, always season generously about 15 minutes before cooking and have the meat at room temperature – not straight out of the fridge.</li> <li>To get those classic cross-hatch patterns on a steak, use the “10 and 2 method”. Position the steak so it is angled on the grill with the top end pointing to the 10 o’clock position. Leave it for 3 or 4 minutes without moving it and then lift and place it back down pointing to 2 o’clock for a couple more minutes. Turn the steak and repeat the process (with a little less cooking time on the second side).</li> <li>If you prefer your steak well done, move it away from the direct heat for the last few minutes of cooking to avoid it drying out.</li> <li>Always rest meat with a loose foil covering for a few minutes before serving.</li> </ul> 
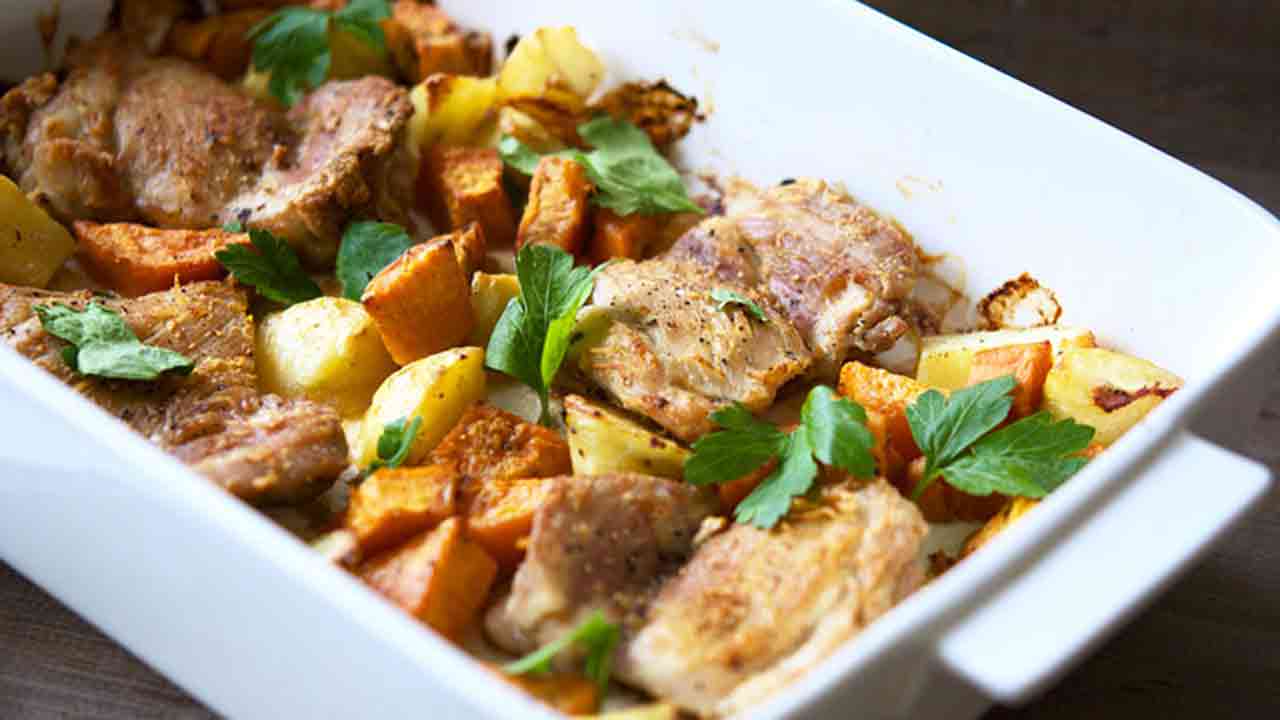
<p><strong>Chicken</strong></p> <ul> <li>Use boneless for a quicker and more predictable result.</li> <li>Thigh fillets are a lot more forgiving that breast. Breast can go from perfect doneness to dry in a matter of a minute, whereas thigh will remain juicier even if overcooked a little.</li> <li>Chicken can be a bit bland on its own and will benefit from oil based marinades – particularly for breast meat, which is a lot leaner.</li> <li>Always cook the shinier side of the breast or thigh first. The key to avoiding the chicken sticking and tearing is to LEAVE IT ALONE once it hits the grill. You need to hold your nerve and let it develop caramelised grill marks BEFORE you attempt to turn it. If it’s sticking when your try to turn it, leave a little longer – it will eventually release easily.</li> </ul> <p><strong>Fish</strong></p> <ul> <li>Baste with oil before cooking and don’t be afraid to start with high heat – it’s essential to the caramelisation process.</li> <li>Place the fish on the grill skin side up and LEAVE IT ALONE until it has caramelised enough to release easily from the grill, before turning.</li> <li>Use the 70/30 – 70% of the cooking time is on the first side and just 30% on the second.</li> </ul> <p><strong>Vegetables</strong></p> <ul> <li>Unlike meat, vegetables only need a medium heat</li> <li>Vegetables such as eggplant, zucchini and capsicum are ideal for barbecuing. Cut them lengthwise to achieve maximum surface area. Large mushroom caps are also a perfect BBQ choice.</li> <li>Brush with oil to prevent sticking and to preserve moisture</li> <li>Avoid overcooking which can leave them soggy.</li> </ul> <p><strong>Change it up with BBQ entrée or dessert</strong></p> <p>If you go the BYO meat route, then why not surprise and delight your guests with entrée and dessert done on the barbecue. It can be super quick and easy . . . and sure to make an impact. Try these ideas:</p> <ul> <li>BBQ nachos – a great way to spark the socialising. Simply layer corn chips, grated cheese and salsa in an aluminium tray and throw on the barbecue with lid down for 5 minutes. Dollop on some avocado puree and sour cream and watch the smiles ignite when you serve.</li> <li>Paul Hogan tribute – The famous “shrimp on the barbie” is an ideal entrée. Peel, clean and pack the prawns tightly on kebabs (to maintain succulence) using two skewers (for easier flipping). Brush with olive oil and a generous sprinkle of your favourite seasoning. Use a high heat and cook 2 minutes one side and 1 minute on the other.</li> <li>Brilliant bruschetta – Whisk up a dressing of olive oil, julienne basil leaves, balsamic and salt, then toss through some quartered cherry tomatoes. Brush some olive oil on to sliced baguette and toast on the grill. Rub the toasted bread with a cut garlic clove, spoon on the tomato and top with some crumbled fetta.</li> <li>For a glorious finish, what could be simpler for dessert than a range of grilled fruits, such as melon, pineapple, stone fruit, apple and pear. Just cut into thick slices and grill for a couple of minutes on each side, while you melt down a glaze of melted butter, brown sugar and cinnamon in a small saucepan. Brush on the glaze and grill for another couple of minutes and serve with vanilla ice cream.</li> </ul> <p><strong>How to become “world’s best grandparent”!</strong></p> <p>Make the grandkids feel a little special with some easy BBQ mini burgers. Just slice hamburger buns into 3 slices, discard the middle slice and use a 4cm scone cutter to punch out mini buns from the top and bottom slices. Combine grated onion, salt, Worcester sauce and an egg with 250 grams of mince and form into flattened balls to grill on the BBQ plate. Melt some cheese slices on the cooked burgers and using large toothpicks skewer the bun, burger, sliced cherry tomato and lettuce leaves.</p> <p>Treat them for dessert too by slitting along the inside curve of a banana and pressing in some choc bits and mini marshmallows in the banana flesh. Wrap in foil and throw on the barbecue for a few minutes. The rich, gooey result will blow the kids away when served with some ice cream.</p> <p><em>Written by Tom Raeside. Republished with permission of </em><a href="https://www.wyza.com.au/articles/lifestyle/food-and-wine/how-to-host-the-perfect-bbq.aspx"><em>Wyza.com.au.</em></a></p>

Food & Wine

Placeholder Content Image

Hearty cheat's lasagna

<p>It’s quick and easy to make and it’s packed with flavour. Try it out for yourself! You won’t regret it.</p> <p><strong>Serves:</strong> 6</p> <p><strong>Prep:</strong> 20 mins</p> <p><strong>Cooking time:</strong> 50 mins</p> <p><strong>Ingredients</strong></p> <ul> <li>1 tbs olive oil</li> <li>2 red onions, peeled, finely chopped</li> <li>2 garlic cloves, crushed</li> <li>500g beef mince</li> <li>3 x 400g cans diced tomatoes</li> <li>1 tsp white sugar</li> <li>1⁄2 cup fresh basil leaves, roughly chopped</li> <li>625g packet fresh ricotta and spinach tortellini</li> <li>250g piece mozzarella, thickly sliced</li> <li>fresh basil leaves, to serve Béchamel sauce</li> <li>40g butter, chopped</li> <li>1⁄4 cup plain flour</li> <li>3 cups full cream milk</li> <li>Pinch ground nutmeg</li> </ul> <p><strong>Method</strong></p> <ol> <li>Preheat oven 220°C fan forced. Lightly grease a large, deep ovenproof dish.</li> <li>Heat oil in a medium, deep frying pan over medium heat. Add onions and garlic. Cook, stirring occasionally for 6 minutes, or until onion is soft. Increase heat to high, add mince. Cook, stirring to break up mince, for 4 minutes, or until browned.</li> <li>Add tomatoes and sugar. Bring to boil. Gently boil, stirring occasionally, for 15 minutes, or until sauce thickens slightly. Stir in basil. Season.</li> <li>Meanwhile, cook pasta in a large saucepan of boiling, salted water for 3 minutes. Drain.</li> <li>For béchamel sauce, melt butter in a medium saucepan over medium-high heat until foaming. Add flour. Cook, stirring for 2 minutes, or until bubbling. Remove from heat. Slowly add milk, whisking constantly, until smooth. Return to the heat. Cook, whisking until sauce comes to the boil. Remove from heat. Stir in nutmeg, season.</li> <li>To assemble, spoon half the pasta into the prepared dish. Spoon over half the beef mixture. Spoon over half the béchamel sauce. Repeat with remaining pasta, beef mixture and béchamel sauce. Top with mozzarella.</li> <li>Place onto a tray and bake for 25 minutes, or until cheese is golden. Sprinkle with extra basil leaves and pepper. Serve.</li> </ol> <p><strong>Serving suggestion:</strong> Delicious served with rocket and baby spinach tossed with balsamic dressing.</p> <p><strong>Tip:</strong> Tortellini can be replaced with other types of filled pasta i.e. agnolotti or ravioli.</p> <p><strong>Tip:</strong> Try adding 2 teaspoons dried chilli flakes with onion and garlic for a spicy kick.</p> <p><strong>Make ahead tip:</strong> You can make the lasagna to the end step 5 the night before. Cover and place in the fridge. It will take about 40 minutes to cook from fridge temperature.</p> <p><em>Photo and recipe courtesy of </em><a href="https://www.australianonions.com.au/#Weo4XWk0tYlugxcw.97"><em>Australian Onions</em></a><em>.</em></p>

Food & Wine

Placeholder Content Image

Hearty Chicken and root vegetable tray bake

<p>Healthy recipe blogger Lilian Dikmans shares her go-to meal recipe that requires minimal effort! She shares a delicious dinner bake recipe here.</p> <p>"I love tray bakes. They're versatile, require minimal effort and create minimal washing up. I'd rather stick a fork in my eye than do a mountain of dishes. They are also great if you're cooking for a crowd; just use a huge tray and add more ingredients.</p> <p>I use free-range chicken thighs (which I buy in bulk and freeze in portions) and then change up the root vegetables depending on what I have (i.e. what's in season/cheapest at the grocer). So feel free to adjust the recipe to suit what you have, keeping in mind that larger pieces of meat will require longer cooking time."</p> <p><strong>Ingredients:</strong></p> <ul> <li>4 free-range chicken thighs</li> <li>1 sweet potato</li> <li>2 small white potatoes (I used dutch cream ones)</li> <li>1/4 teaspoon chilli powder</li> <li>Sea salt</li> <li>Black pepper</li> <li>Olive oil</li> <li>Fresh parsley, to serve</li> </ul> <p><strong>Directions:</strong></p> <p>1. Preheat your oven to 180°C fan-forced. Place the chicken thighs in a large baking tray.</p> <p>2. Chop the potatoes into pieces about 3cm thick and arrange around the chicken. Drizzle everything with a good amount of olive oil and sprinkle over the chilli powder, some sea salt and cracked black pepper.</p> <p>3. Bake in the preheated oven for about 45 minutes until the chicken is cooked through and everything is browned. To serve, season with more sea salt and black pepper if required and top with torn up fresh parsley.</p> <p><strong>Tips:</strong></p> <p>I used skinless chicken thighs, but if you're using chicken with the skin on I would recommend searing the chicken skin-side down in a pan (or in the baking tray if it's flame-proof) before baking to ensure that the skin goes crispy.</p> <p><em>Republished with permission of <a href="https://www.wyza.com.au/recipes/chicken-and-root-vegetable-tray-bake-ld.aspx">Wyza.com.au.</a></em></p>

Food & Wine

Placeholder Content Image

Delicious chicken pie

<p><span>In just 35 minutes, this hearty chicken pie will be ready to be served up, hot and fresh - it's sure to keep you warm this winter.</span></p> <p><strong>Ingredients</strong></p> <ul> <li>1 tbs olive oil*</li> <li>460g skinless chicken breast, trimmed of fat, cut into 5-cm strips*</li> <li>200g mushrooms, sliced </li> <li>250g can chicken soup*</li> <li>1/2 cup frozen peas*</li> <li>1/2 tbs low fat Greek-style yoghurt</li> <li>Cracked black pepper, to season</li> <li>1 bunch broccolini, stalks trimmed  </li> <li>1 1/2 sheets reduced fat puff pastry, thawed*</li> <li>1/2 egg yolk, beaten* </li> <li>Steamed vegetables or green salad, to serve</li> </ul> <p><strong>Method</strong></p> <p>1. Preheat oven to 200°C (180°C fan-forced).  </p> <div>2. Heat 1/2 tablespoon of the olive oil in a large frypan and brown chicken strips for 1 to 2 minutes on each side. Remove chicken from pan and set aside.</div> <div><br />3. Heat remaining oil and sauté mushrooms for 2 minutes.</div> <div><br />4. Return chicken to pan with mushrooms; add soup, peas and Greek yoghurt.<br />Season with cracked pepper. Bring to the boil, then turn off the heat.</div> <div><br />5. Transfer mixture to a pie dish approximately 28 cm x 21 cm.</div> <div><br />6. Arrange broccolini on top of chicken filling.</div> <div><br />7. Cover pie dish with puff-pastry sheets, cut a hole in the centre using a sharp knife and press down edges with the prongs of a fork.</div> <div><br />8. Brush pastry surface with beaten egg yolk and cook in oven for 25 minutes.</div> <p>9. Serve with extra steamed vegetables or salad.</p> <p><em>Republished with permission of<a href="https://www.wyza.com.au/recipes/chicken-pie.aspx"> Wyza.com.au.</a></em></p>

Food & Wine

Placeholder Content Image

Hearty beef cottage pie with garlic mash

<p>Nothing beats a home-made pie! This recipe combines the classic beef pie with a garlic mash that will soon become an all-time favourite.</p> <p><strong><span style="text-decoration: underline;">Ingredients: </span></strong></p> <ul> <li>400 g potatoes</li> <li>½ brown onion</li> <li>1 clove garlic</li> <li>2 carrots</li> <li>1 zucchini</li> <li>3 sprigs rosemary</li> <li>3 sprigs thyme</li> <li>2 tbs butter</li> <li>3 tbs milk</li> <li>1 tbs olive oil</li> <li>1 tbsp Dijon mustard</li> <li>1 tbs Worcestershire sauce</li> <li>1 tbs plain flour</li> <li>½ cup warm water</li> <li>1 cube beef stock</li> <li>300g diced beef</li> <li>2 stalks celery</li> </ul> <p><strong><span style="text-decoration: underline;">Method:</span></strong></p> <p>1. Boil a full kettle of water. Peel the potato and chop into 2 cm cubes. Peel and crush the garlic.<br /> <br /> 2. Place the potato and boiling water from the kettle in a medium saucepan over a high heat. Boil for 10-15 minutes, or until the potato is soft when pierced with a knife. Drain and set aside in a colander to allow the excess moisture to evaporate. Return the saucepan to a low heat and add the garlic, butter and milk. Cook for 1-2 minutes, or until fragrant. Turn off the heat. Return the potato to the saucepan and mash using a potato masher or fork. Season to taste with salt and pepper. Cover to keep warm.<br /> <br /> 3. Meanwhile, finely chop the brown onion, peel and dice the carrots, dice the zucchini and celery and pick and finely chop the rosemary and thyme leaves. Heat the olive oil in a medium frying pan over a medium-high heat. Add the brown onion, carrot, zucchini and celery and cook for 5-6 minutes, or until softened. Add the rosemary and thyme and cook for a further 1-2 minutes, or until fragrant.<br /> <br /> 4. Add the diced beef and plain flour and cook for 2 minutes, or until browned. Add the Dijon mustard, Worcestershire sauce (if using), warm water and crumble in the beef stock cube. Stir to combine. Reduce the heat to low and simmer for 10 minutes to develop the flavours.<br /> <br /> 5. Preheat the grill to high. Spoon the beef mixture into a small pie dish or individual ramekins. Top with the garlic mash. Place the pie under the grill and cook for 7-8 minutes, or until golden on top.<br /> <br /> 6. Remove the hearty beef cottage pie with garlic mash from the grill and divide between plates.</p> <p><em>Recipe courtesy of <a href="https://www.hellofresh.com.au/tasty/" target="_blank"><strong><span style="text-decoration: underline;">Hello Fresh</span></strong></a>. </em></p> <p><em><strong>Have you ordered your copy of the Over60 cookbook, </strong></em><strong>The Way Mum Made It</strong><em><strong>, yet? Featuring 175 delicious tried-and-true recipes from you, the Over60 community, and your favourites that have appeared on the Over60 website, <a href="https://shop.abc.net.au/products/way-mum-made-it-pbk" target="_blank"><span style="text-decoration: underline;">head to the abcshop.com.au to order your copy now.</span></a></strong></em></p>

Food & Wine