Placeholder Content Image

Vinegar and baking soda: a cleaning hack or just a bunch of fizz?

<p><em><a href="https://theconversation.com/profiles/nathan-kilah-599082">Nathan Kilah</a>, <a href="https://theconversation.com/institutions/university-of-tasmania-888">University of Tasmania</a></em></p> <p>Vinegar and baking soda are staples in the kitchen. Many of us have combined them in childhood scientific experiments: think fizzy volcanoes and geysers.</p> <p>But people also frequently mix vinegar and baking soda to produce a reportedly effective household cleaner. Unfortunately, the chemistry behind the bubbly reaction doesn’t support the cleaning hype. The fizzy action is essentially <a href="https://theconversation.com/six-surprising-things-about-placebos-everyone-should-know-220829">a visual “placebo</a>”, formed by the combination of an acid and a base.</p> <p>So, how does it work, and is it worth using these chemicals for cleaning? To understand all this, it helps to know a little more about chemistry.</p> <h2>What’s an acid?</h2> <p>Foods with a sour taste typically contain acids. These include citric acid in lemon juice, malic acid in apples, lactic acid in yoghurt and <a href="https://theconversation.com/kitchen-science-everything-you-eat-is-made-of-chemicals-56583">phosphoric acids in soft drinks</a>. Most vinegars contain around 4–10% acetic acid, the rest is water and small amounts of flavour chemicals.</p> <p>There are other naturally occurring acids, such as formic acid in ant bites and hydrochloric acid in our stomachs. Industrially, sulfuric acid is used in mineral processing, nitric acid for <a href="https://theconversation.com/what-is-ammonium-nitrate-the-chemical-that-exploded-in-beirut-143979">fertiliser manufacturing</a> and the highly potent hydrofluoric acid is used to etch glass.</p> <p>All of these acids share similar properties. They can all release hydrogen ions (positively charged atoms) into water. Depending on their potency, acids can also dissolve minerals and metals through various chemical reactions.</p> <p>This is why vinegar is an excellent cleaner for showers or kettles – it can react with and dissolve mineral deposits like limescale.</p> <p>Other common acidic cleaning ingredients are oxalic acid, used for revitalising timber decks, hydrochloric acid in concrete and masonry cleaners, and sulfamic acid in potent toilet cleaners.</p> <h2>What’s a base?</h2> <p>In chemistry, bases – the opposite of acids in many ways – can bind, rather than release hydrogen ions. This can help lift and dissolve insoluble grime into water. Bases can also break apart fat molecules.</p> <p>Baking soda (also known as sodium hydrogen carbonate, sodium bicarbonate, or bicarb) is a relatively weak base. Stronger common bases include sodium carbonate (washing soda), sodium hydroxide (lye) and ammonia.</p> <p><a href="https://theconversation.com/spill-at-a-nuclear-facility-shows-potential-burn-risks-from-a-household-chemical-112763">Sodium hydroxide</a> is a potent drain cleaner – its strong base properties can dissolve fats and hair. This allows blockages to be broken down and easily flushed away.</p> <h2>Mixing a base and an acid</h2> <p>Mixing vinegar and baking soda causes an immediate chemical reaction. This reaction forms water, sodium acetate (a salt) and carbon dioxide – the fizzy part.</p> <p>The amount of carbon dioxide gas that is produced from baking soda is remarkable – one tablespoon (around 18 grams) can release over <a href="https://www.chemedx.org/JCESoft/jcesoftSubscriber/CCA/CCA8/MAIN/8/06/2/4/movie.html">five litres of gas</a>! But only if you add enough acid.</p> <p>Reactions in chemistry often use equal quantities of chemical reagents. A perfect balance of acetic acid and baking soda would give you just water, carbon dioxide and sodium acetate.</p> <p>But the majority of vinegar and bicarb cleaner recipes use a large excess of one or the other components. An example from TikTok for a DIY oven cleaner calls for one and a half cups of baking soda and one quarter cup of vinegar.</p> <p>Crunching the numbers behind the chemical reaction shows that after the fizz subsides, over 99% of the added baking soda remains. So the active cleaning agent here is actually the baking soda (and the “elbow grease” of scrubbing).</p> <p>Ovens can be cleaned much more rigorously with stronger, sodium hydroxide based cleaners (although these are also more caustic). Many modern ovens also have a self-cleaning feature, so read your product manual before reaching for a chemical cleaner of any sort.</p> <h2>What about the sodium acetate?</h2> <p>Devotees of vinegar and baking soda mixtures might be wondering if the product of the fizzy reaction, sodium acetate, is the undercover cleaning agent.</p> <p>Unfortunately, sodium acetate is an even weaker base than baking soda, so it doesn’t do much to clean the surface you’re trying to scrub.</p> <p>Sodium acetate is used in <a href="https://www.youtube.com/watch?v=vABpel-11Nc">crystallisation-based heating packs</a> and as a concrete sealant, but not typically as a cleaner.</p> <p>Fun fact: sodium acetate can be combined with acetic acid to make a crystalline <a href="https://theconversation.com/busting-the-myth-that-all-food-additives-are-bad-a-quick-guide-for-label-readers-82883">food additive</a> called sodium diacetate. These crystals give the vinegar flavour to <a href="https://www.youtube.com/watch?v=N0hEutu_goY">salt and vinegar chips</a> without making them soggy.</p> <h2>Sorry to burst your bubbles</h2> <p>There are a few rare cases where mixing vinegar and baking soda may be useful for cleaning. This is where the bubbling has a mechanical effect, such as in a blocked drain.</p> <p>But in most cases you’ll want to use either vinegar or baking soda by itself, depending on what you’re trying to clean. It will be less <a href="https://theconversation.com/visually-striking-science-experiments-at-school-can-be-fun-inspiring-and-safe-banning-is-not-the-answer-195362">visually exciting</a>, but it should get the job done.</p> <p>Lastly, remember that mixing cleaning chemicals at home can be risky. Always carefully read the product label and directions before engaging in DIY concoctions. And, to be extra sure, you can find out more safety information by reading the product’s <a href="https://theconversation.com/a-new-tiktok-trend-has-people-drinking-toxic-borax-an-expert-explains-the-risks-and-how-to-read-product-labels-210278">safety data sheet</a>.<img style="border: none !important; box-shadow: none !important; margin: 0 !important; max-height: 1px !important; max-width: 1px !important; min-height: 1px !important; min-width: 1px !important; opacity: 0 !important; outline: none !important; padding: 0 !important;" src="https://counter.theconversation.com/content/225177/count.gif?distributor=republish-lightbox-basic" alt="The Conversation" width="1" height="1" /></p> <p><a href="https://theconversation.com/profiles/nathan-kilah-599082"><em>Nathan Kilah</em></a><em>, Senior Lecturer in Chemistry, <a href="https://theconversation.com/institutions/university-of-tasmania-888">University of Tasmania</a></em></p> <p><em>Image credits: Shutterstock </em></p> <p><em>This article is republished from <a href="https://theconversation.com">The Conversation</a> under a Creative Commons license. Read the <a href="https://theconversation.com/vinegar-and-baking-soda-a-cleaning-hack-or-just-a-bunch-of-fizz-225177">original article</a>.</em></p>

Home & Garden

Placeholder Content Image

9 tricky ways to clean your house while you sleep

<p><strong>1. Soak a showerhead</strong></p> <p>Mineral deposits can clog a showerhead and affect its pressure over time. To clean, fill a plastic bag with vinegar. Place the bag around the showerhead, submerging it in the liquid.</p> <p>Secure the bag to the neck of the showerhead with a twist tie and leave overnight. The vinegar will break down the buildup by morning.</p> <p><strong>2. Remove stains on pots and pans </strong></p> <p>If a batch of cookies left your baking sheet gunky, let a dryer sheet clean it overnight. Place the sheet on the pan and fill with warm water.</p> <p>Cleaning agents in the dryer sheet will help loosen stuck-on grime and stains. In the morning, easily wipe off with a sponge.</p> <p><strong>3. Polish stove grates </strong></p> <p>Cleaning greasy, food-splattered stove burners can be a tiresome chore. Before you go to bed, seal each burner in a large plastic bag with ¼ cup of ammonia. </p> <p>The overnight soak will make it easy to wipe off the surface with a sponge the following day.</p> <p><strong>4. Banish rust on tools </strong></p> <p>If your rusty tools have seen better days, fill a tray with Coca-Cola. Submerge the tools, allow to soak overnight, and scrub clean with a stiff brush in the morning.</p> <p>The soda’s phosphoric acid will help loosen the gunk.</p> <p><strong>5. Eliminate wet messes </strong></p> <p>If your sofa or carpet became the victim of an icky, wet mess (say, vomit or urine), mix a paste of baking soda and water to soak it up.</p> <p>Use a spoon to spread the paste over the soiled area. Allow to dry overnight, then vacuum in the morning.</p> <p><strong>6. Descale a kettle </strong></p> <p>Limescale can build up from calcium carbonate deposits in water, leading to an off-white, chalky deposit in your kettle.</p> <p>To clean, cut a lemon into large slices, place in the kettle, and add water. Bring to a boil, then take the kettle off the heat and leave overnight.</p> <p>The lemon’s citric acid will loosen the limescale. Toss the fruit and water mixture in the morning and rinse before using your newly cleaned kettle.</p> <p><strong>7. Clean bath toys</strong></p> <p>To make grubby rubber duckies, boats, and other bath toys new again, mix one gallon warm water with ¾ cup vinegar. Soak the toys overnight. Rinse thoroughly and allow to air dry.</p> <p><strong>8. Make diamonds sparkle</strong> </p> <p>Quickly polish a diamond ring by filling a bottle cap with Windex. Soak the ring overnight and dry with a soft cloth in the morning to remove grime and add shine.</p> <p><strong>9. Remove red wine stains</strong></p> <p>If red wine marked up your favorite garment, sprinkle the stain with salt and cover with club soda. The salt absorbs the stain while the club soda’s carbonation and sodium helps lift it. Leave overnight before laundering.</p> <p><em>Image credits: Getty Images</em></p> <p><em>This article originally appeared on <a href="https://www.readersdigest.co.nz/diy-tips/9-ways-clean-house-your-sleep" target="_blank" rel="noopener">Reader's Digest</a>. </em></p>

Home & Garden

Placeholder Content Image

Outrage after renters confronted with cleaning “scoring system”

<p dir="ltr">An Australian real estate agent has come under fire for their “demoralising” scoring system for tenants during routine inspections. </p> <p dir="ltr">One fired up renter said they were shocked to receive a scorecard from the agent after they complied with an inspection, and shared their feedback on Reddit. </p> <p dir="ltr">The scorecard rated the tenant’s efforts cleaning the property in 17 different rooms and areas, marking them on cleanliness, and if the areas were damaged or required maintenance. </p> <p dir="ltr">The renter was then also given an overall rating out of five stars, based on the upkeep of their rental home. </p> <p dir="ltr">The Reddit user showed that they received just three and half stars, despite being marked down in only one area due to a light globe not working.</p> <p dir="ltr">In their post, the tenant said they had made every effort to clean the home, adding that the rating was “demoralising”.</p> <p dir="ltr">“I’ve been renting a long time, and my deep cleaning routine is based around inspections,” they explained.</p> <p dir="ltr">“I go all out - every room in my little 3x2 villa is given a spring clean, every surface is washed including walls, doors, lights, windows, carpets etc.”</p> <p dir="ltr">“Had my latest inspection a few weeks ago and just received the report. Despite the agent commenting once again that she never sees houses as clean as mine, and taking 112 (!) photos of every single thing that shows how great the condition of the house is - having one light globe not working is so terrible that I’m scored three and a half out of five.”</p> <p dir="ltr">The renter went on to say that they had only recently discovered that the broken light globe was the real estate’s responsibility to replace, and does not warrant such a severe marking down in their “score”.</p> <p dir="ltr">“The globe in question is a downlight fitting. We have so many downlights that I don’t even use this particular one,” they continued.</p> <p dir="ltr">“I can’t replace the globe itself, I need to get into the roof to replace the whole unit. Thanks to people here I’ve learned this isn’t even my responsibility to fix!”</p> <p dir="ltr">The renter’s post sparked a huge outrage online, with many up in arms over the current state of the rental market and unrealistic expectations of estate agents. </p> <p dir="ltr">One person said, “I fully believe that the average renter keeps a home to a higher standard than an owner, and it seems deliberately demoralising that someone could be marked down for having a light out.”</p> <p dir="ltr">Another added, “This is ridiculously petty, and more importantly, totally irrelevant to the purpose of a periodic inspection. Which is to identify whether any maintenance is needed.”</p> <p dir="ltr">A third person took their anger out on the entire system, summing it up by writing, “I sort of wonder what little lightbulb clicks in your mind and you wake up one day and ask yourself, ‘How can I be a massive c*** who offers no value to society? I know! I will get into real estate.’”</p> <p dir="ltr"><em>Image credits: Getty Images / Reddit</em></p>

Real Estate

Placeholder Content Image

How to clean these bathroom items that get overlooked

<p>Cleaning the bathroom will not only make your house feel nicer for but it is important for your hygiene as so many bathroom items are used on a daily basis. Even if your bathtub, shower, tiles and sink is clean, these bathroom items deserve your frequent attention.</p> <p><strong>1. Toothbrush and toothbrush holder</strong></p> <p>For obvious reasons keeping your toothbrush and toothbrush holder clean is vital to your mouth health. To keep your toothbrush clean, make sure you rinse it well after each use to avoid a build-up of toothpaste.  Frequently you should do a deep clean of your toothbrush and this can be done by leaving it in a cup of vinegar for 30 minutes. The vinegar will remove the build of bacteria on your toothbrush. Remember to replace your toothbrush every 3-4 months and then you can use your old one for cleaning. A toothbrush holder can be cleaned thoroughly by putting it in the dishwasher or you can rinse it out in hot water and dish soap to remove the build-up of gunk.</p> <p><strong>2. Loofah</strong></p> <p>Loofahs do a great of cleaning bodies but it is important to remember to clean them as well. Your loofah can be cleaned by submerging in a 50/50 mixture of hot water and vinegar for an hour. Then leave it to dry. This method can also be used on sponges or wash cloths.</p> <p><strong>3. Razors</strong></p> <p>It is important to clean your razor as a wet razor can become rusty and a moist blade can cause ingrown hairs and irritation when shaving. To keep your razor in top condition, put some rubbing alcohol on a cotton pad and swipe across your razor. Dry your razor with a towel once you are done and store your razor in a dry place in your bathroom.</p> <p><strong>4. Toilet brush</strong></p> <p>To give your toilet brush a thorough clean, rest the brush between the toilet bowl and seat after cleaning the toilet. Spray the brush with a disinfectant and then let it sit as it drips for ten minutes or so. Then rinse the brush in very hot water and allow it to drip dry again. The<strong> </strong>brush holder<strong> </strong>should also be cleaned with disinfectant and then leaving it for ten minutes and rinsing with hot water.</p> <p><strong>5. Plunger</strong></p> <p>After each use of the plunger, spray it with a disinfectant and leave for ten minutes and then let it air dry. It is helpful to store your plunger with a plastic bag so that way, after you use it you can put in the bag and then take it somewhere to clean to avoid any dripping. Don’t re-use the plastic bag.</p> <p><em>Image: Getty</em></p>

Home Hints & Tips

Placeholder Content Image

How to deep clean your kitchen bin

<p>Cleaning the kitchen bin is household chore that can be easily overlooked until a stench begins to creep into your home.</p> <p>To rid your bin of the odour, follow these deep cleaning steps so that you can have a fresh-smelling and clean kitchen bin.</p> <p><strong>1. Put on your rubber gloves</strong></p> <p>Cleaning a bin requires you to handle an object that has been full of food scraps and questionable liquids, it is best to wear some rubber gloves to protect you from the germs.</p> <p><strong>2. Empty the bin</strong></p> <p>Begin by emptying your bin and ensuring that there are no lingering food particles in the bottom. Your main objective is to remove any gunk that can be seen.</p> <p><strong>3. Wash the bin</strong></p> <p>If you have access to an outside area, take your bin outside and hose it down. If you can only clean your bin indoors, then you can do this in the bathtub. Once the bin has been rinsed, pat it down with paper towel.</p> <p><strong>4. Spray with disinfectant</strong></p> <p>Using a disinfectant cleaner of your preference, generously spray down the inside and outside of your bin. Also include the top and bottom of the bin as you spray.</p> <p><strong>5. Scrub the bin</strong></p> <p>Use a toilet brush or other long-handled nylon bristle brush to scrub your bin thoroughly. After you have finished scrubbing all over, let the disinfectant cleaner sit for five minutes.</p> <p><strong>6. Rinse and dry</strong></p> <p>After the five minutes has passed, rinse the can thoroughly. Depending on what you prefer, let the bin dry in the sun or dry it with a towel.</p> <p>Once you have deep cleaned your bin, maintain your hard work by wiping down the inside and outside of the bin with disinfectant spray every time you empty the trash can.</p> <p><em>Image credits: Getty Images</em></p>

Home & Garden

Placeholder Content Image

10 tips for cleaning your car’s interior

<h2>Clear rubbish</h2> <p>Before you pull out the vacuum and cleaning supplies, clear out all the obvious rubbish. Check everywhere thoroughly. There will likely be rubbish on the floor, under the seats and in the seat cracks. Toss out any wrappers, bottles, toys and other objects that your vacuum can’t handle.</p> <h2>Tackle floor mats</h2> <p>Pull the floor mats out of the vehicle and shake them out as much as possible. This will make vacuuming easier. Scrub them with soap and hot water or a foaming carpet cleaner and allow them to air dry completely before reinstalling them.</p> <h2>Vacuum, vacuum, vacuum</h2> <p>Vacuum both front and back seats, the floor and, if necessary, the boot. Vacuum every area of the vehicle where you can get the nozzle, including under the pedals and along the side door panels.</p> <h2>Wipe away grime</h2> <p>Now that the car is vacuumed, grab a soft cloth or cleaning wipes to wipe up all that dirt, sticky stuff and dust. You can also spray a small amount of car-specific cleaner over the console, steering wheel and the area between the seats to restore that new-car look.</p> <h2>Clean cup holders</h2> <p>Cup holders can harbour grime – and the residue from sticky spilled drinks. Try using a cotton swab dipped in a little cleaning solution to reach those difficult areas.</p> <h2>Wipe windows</h2> <p>Spray a window cleaner solution on windows and wipe clean with a paper towel or microfibre cloth. You can also mix one cup of water, two tablespoons of vinegar and one cup or rubbing alcohol for an effective homemade window cleaner.</p> <h2>Attack stains</h2> <p>If there are stains on the seats or on the carpet (and we guarantee there will be, especially if you have kids!) try this homemade solution. In a spray bottle mix two cups of water, one cup of vinegar and about a tablespoon of dish soap. Spray on the stains and let it sit for 15 minutes. Then wipe clean with a wet cloth. If the stain persists, try a stain remover. Spot-test in an inconspicuous area to make sure the upholstery fabric is colourfast.</p> <h2>Remove pet hair</h2> <p>If you have a dog, you know the pain of dealing with pet hair in the car. If the vacuum doesn’t remove all the fur, try using a rubber-dipped glove. Simply brush the hair away with your hand, and it sticks to the glove like magic! To protect your car’s interior from any future pet damage, try a waterproof seat protector.</p> <h2>Get into crevices</h2> <p>Grab a paint stirrer or two next time at you’re at the hardware store. Wrap an end with a microfibre cloth and use the stick to get into those hard-to-reach areas between the seats and around the centre console.</p> <h2>Freshen up</h2> <p>Create a homemade car freshener with one cup of baking soda and five drops of your favourite essential oil. Place both the soda and oil in a sealable plastic bag or glass jar for 24 hours. Then shake it up, sprinkle on the car’s floor and let it sit for 20 minutes. When the time has passed, vacuum up the baking soda. The scent will linger, making your car smell fresh and clean!</p> <p><em>Image credit: Shutterstock</em></p> <p><em>This article originally appeared on <a href="https://www.readersdigest.co.nz/food-home-garden/home-tips/10-tips-for-cleaning-your-cars-interior" target="_blank" rel="noopener">Reader's Digest</a>.</em></p>

Home Hints & Tips

Placeholder Content Image

10 items you need to clean every week

<p>Don’t let these household chores be bumped to the bottom of your to-do list. These are the items that need to be cleaned every seven days.</p> <p><strong>1. Laundry</strong></p> <p>To prevent a huge pile of dirty clothes piling up, it is best to tackle the load weekly.</p> <p><strong>2. Bathroom surfaces</strong></p> <p>Although your counter and mirror may look clean, it is important to clean with a disinfectant wipe once a week to remove bacteria and germs that build up from everyday use.</p> <p><strong>3. Carpets and rugs</strong></p> <p>Carolyn Forte, the director of the Cleaning Lab at the Good Housekeeping Institute, said, “If you don't vacuum, heavy dirt gets ground in and light dust sits on top.” It is especially important to vacuum the areas around the front and back doors where dirt is carried in.</p> <p><strong>4. Dusty furniture</strong></p> <p>Not only does dust look bad but it can be bad for your health and your furniture. Carolyn said, “Dust can be abrasive and can put fine scratches in the finish if something rubs against it.” Use a microfibre cloth to clean so you grab particles rather than spread them around.</p> <p><strong>5. Sheets</strong></p> <p>If you have the time to wash them every week, it is important to do so as germs, sweat, and body oils build up quickly.</p> <p><strong>6. Kitchen appliances</strong></p> <p>Clean your kitchen appliances with a disinfectant wipe each week to prevent a build-up of germs. "Kitchen appliances need to be cleaned of fingerprints and food bits,” Carolyn said.</p> <p><strong>7. Bathtub and shower</strong></p> <p>These places collect mildew and scum. It is important to remove this material with a bath scrubber every week.</p> <p><strong>8. Toilet</strong></p> <p>It is important to deep clean your toilet bowl every week. Carolyn recommends pouring a cup of bleach into the bowl and brushing it around the sides and under the rim. "Let it sit for five minutes as you move on to the next task.”</p> <p><strong>9. Kitchen floors</strong></p> <p>Kitchen floors can collect liquids and food crumbs without anyone even noticing. To prevent this, clean your kitchen floors weekly.</p> <p><strong>10. Mirrors</strong></p> <p>Clean mirrors will not only make your home look fresh but it will also make it easier to put makeup on.</p> <p><em>Images: Getty</em></p>

Home & Garden

Placeholder Content Image

Woman’s “ultimate” cleaning hack for cruise cabins goes viral

<p dir="ltr">An Aussie woman has shared her “ultimate” hack for keeping things clean in your cruise ship cabin, claiming her tips will “change your life”. </p> <p dir="ltr">Cruising fanatic Olivia believes there are few things worse when on a cruise than waiting around for dirty dishes to be collected and replaced. </p> <p dir="ltr">She has found a unique way to get around this problem with her “game-changing” hack, that only requires three items: a cheap sponge, dishwashing liquid and a reusable ziplock bag. </p> <p dir="ltr">In a now-viral clip that has racked up almost one million views, Olivia explained she came across the nifty hack on YouTube and was surprised to discover it actually worked. </p> <p dir="ltr">“Go to your local supermarket and purchase the cheapest sponge you can find or use a sponge you have already got at home,” she began. </p> <p dir="ltr">“Once you’ve done this, grab one to two sponges and cut them into little squares.”</p> <p dir="ltr">“Place them all on a plate, grab dishwashing liquid and make sure you drizzle it over sponge squares (evenly).”</p> <p dir="ltr">She then said to place the sponges outside in the sun to dry. </p> <p dir="ltr">“You want the dishwashing liquid to dry into the sponge,” she said.</p> <p dir="ltr">Olivia then demonstrated how it works, taking one of the squares and running it under water before using it to wash the dirty dishes. </p> <p dir="ltr">“Instead of having to wait for your mugs, plates, cutlery in your state room or cabin to be replaced every day or cleaned, if you are staying in a cabin with multiple people and they need to use it, you can (now) clean it so easily in no time.”</p> <p dir="ltr">She said the squares can be used multiple times before the dishwashing liquid is completely used up.</p> <p dir="ltr">“It will last for about a two-week cruise; it’s fantastic,” she said.</p> <p dir="ltr">While hundreds of thousands of people have viewed Olivia’s video, many people were torn in the comment section about the unusual tip.</p> <p dir="ltr">Some praised the unique trick, thanking Olivia for sharing the information. </p> <p dir="ltr">“Okay that’s actually really good,” one TikTok user wrote. </p> <p dir="ltr">“Thanks! Doing this with the wine glasses before I use them” said another.</p> <p dir="ltr">However, while many were impressed by the hack, some wondered why she was washing dishes on a holiday. </p> <p dir="ltr">“Great idea but no…,” one TikTok user wrote. </p> <p dir="ltr">“Girl, we’re not going on a cruise to do the dishes … margaritas and mojitos don’t go into cups,” another joked.</p> <p dir="ltr"><em>Image credits: TikTok</em></p>

Cruising

Placeholder Content Image

Top tips to keep your home clean when living with pets

<p class="first-para">Even the most doting of pet owners will grimace at the domestic headaches furry friends can cause. Labrador tumbleweeds rolling through the living room, cat scratches on table legs and spilt food on the floor – these are the prices we pay for cohabiting with animals. But for those who want to have a clean home and keep their pets too, there are ways to keep these messes in check.</p> <p><strong>Managing shedding</strong></p> <p>No. 1, brush your pet regularly. This can go a long way to preventing moulting in the home, and has health benefits as well.</p> <p>“Grooming is not just cosmetic, it is an essential part of responsible pet ownership,” says Dr Liz Walker, chief executive officer of RSPCA Victoria. “Regular brushing gets out the knots that would become mats. And some dogs – poodle mixes in particular – don’t shed, so they need regular clipping.”</p> <p>Moreover, tangled hair can hide lumps and skin conditions, so keeping pooches well-groomed helps ensure they’re well.</p> <p>Deb Morrison, founder of national pet sitting and dog walking business PetCloud, says how frequently you should brush depends on your dog’s fur.</p> <p>“Short-haired dogs need a brush once a week,” Morrison says. “However, for dogs that have thicker, curlier or longer coats, like a golden retriever or a German shepherd, it’s important for them to be brushed every two days.”</p> <p>Which brush you use also varies according to fur type. Furminator makes a range of de-shedding tools available at Petbarn for both short and long coats that gently remove loose hair and the undercoat while protecting dogs’ skin.</p> <p>There are versions for cats too, who still need help despite their meticulous grooming habits – particularly medium and long-haired cats, which require daily brushing.</p> 
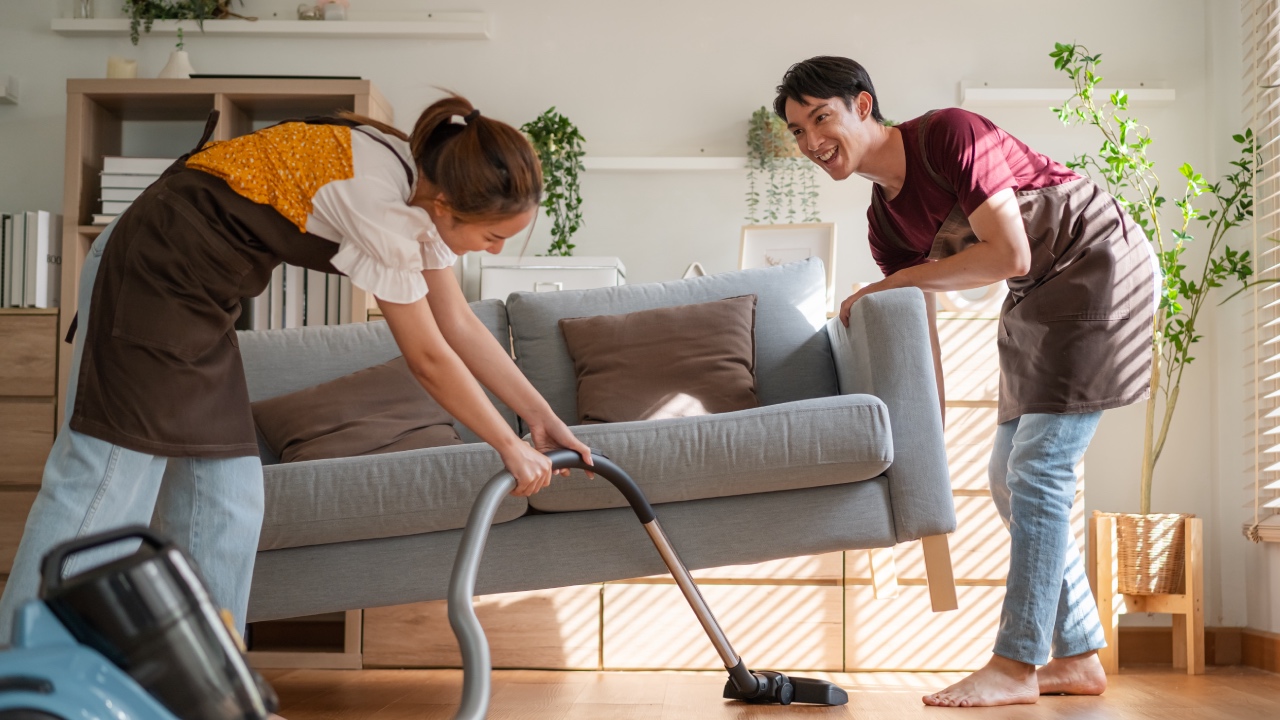
<p>Investing in a quality vacuum cleaner – plus a smaller handheld one for hard-to-reach places – will go a long way to keeping floors clean, and an adhesive pet hair roller can be used on upholstery or clothing.</p> <p><strong>Protecting furniture</strong></p> 
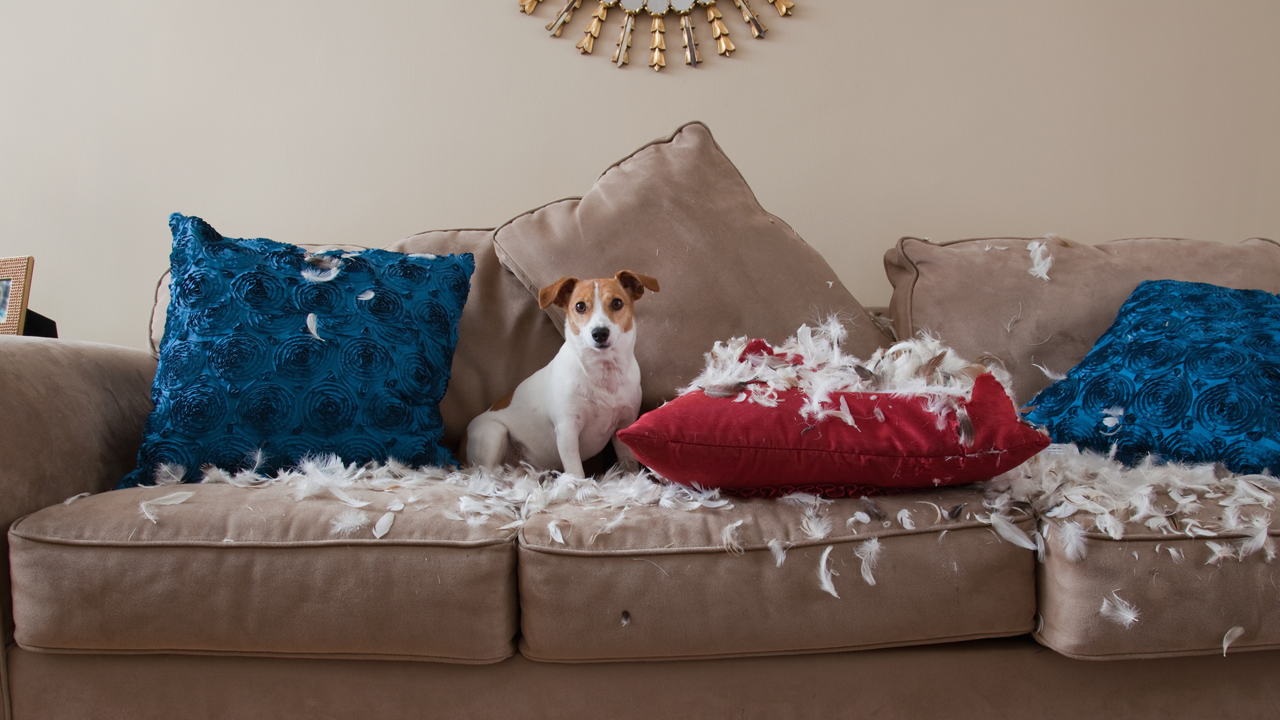
<p>If pets are deliberately wreaking havoc on your furnishings – scratching, chewing, et cetera – Dr Walker says this can be attributed to boredom.</p> <p>“Boredom and excess energy are two common reasons for behaviour problems in pets. This makes sense because they’re meant to lead active lives,” she explains.</p> <p>“Because we all lead busy lives, our pets often end up spending a good portion of their day home alone. If you give your pets tasks to do when they are home alone, they will be less likely to come up with their own ways to occupy the time – like unstuffing your couch.”</p> <p>Leave some chew toys around, including some stuffed with treats, to keep dogs occupied, and make sure they’re getting enough exercise each day. A scratching post will help remove old kitty nails to let new ones grow and is a way for them to mark their territory.</p> <p>When it comes to inadvertent damage, selecting pet-friendlier furniture can help. If pets are allowed on the couch, leather or faux-leather couches are easier to keep fur-free, and providing a blanket for them to lie on will prevent scratches and dirt.</p> <p><strong>Minimising mess</strong></p> <p>Pets that go outside can track dirt into a house, especially after some rough and tumble at the dog park. Morrison suggests keeping a towel handy near the door so muddy paws can be wiped clean before heading back inside.</p> <p>Place an easy-to-clean placemat under food and water bowls for pets that eat indoors to prevent mess on the floor, and if you have hardwood floors, regular manicures to trim nails will put a stop to scratches.</p> 
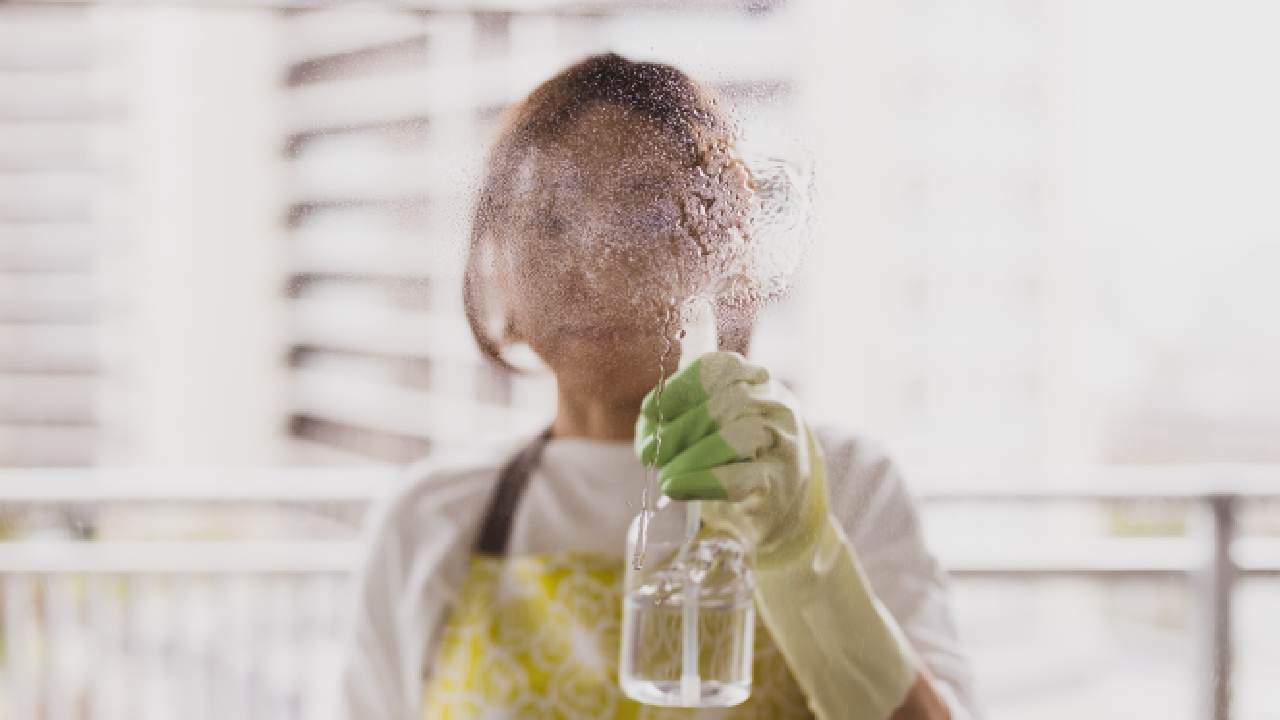
<p><strong>Keep your home smelling fresh</strong></p> 
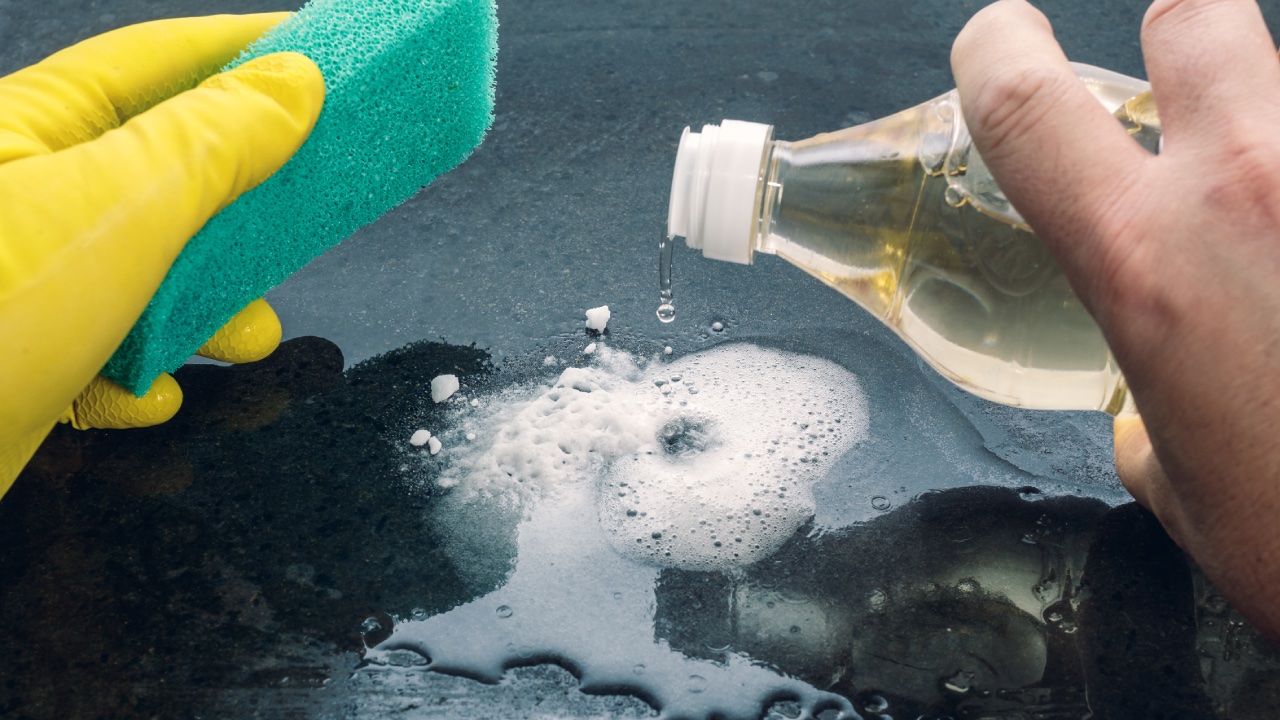
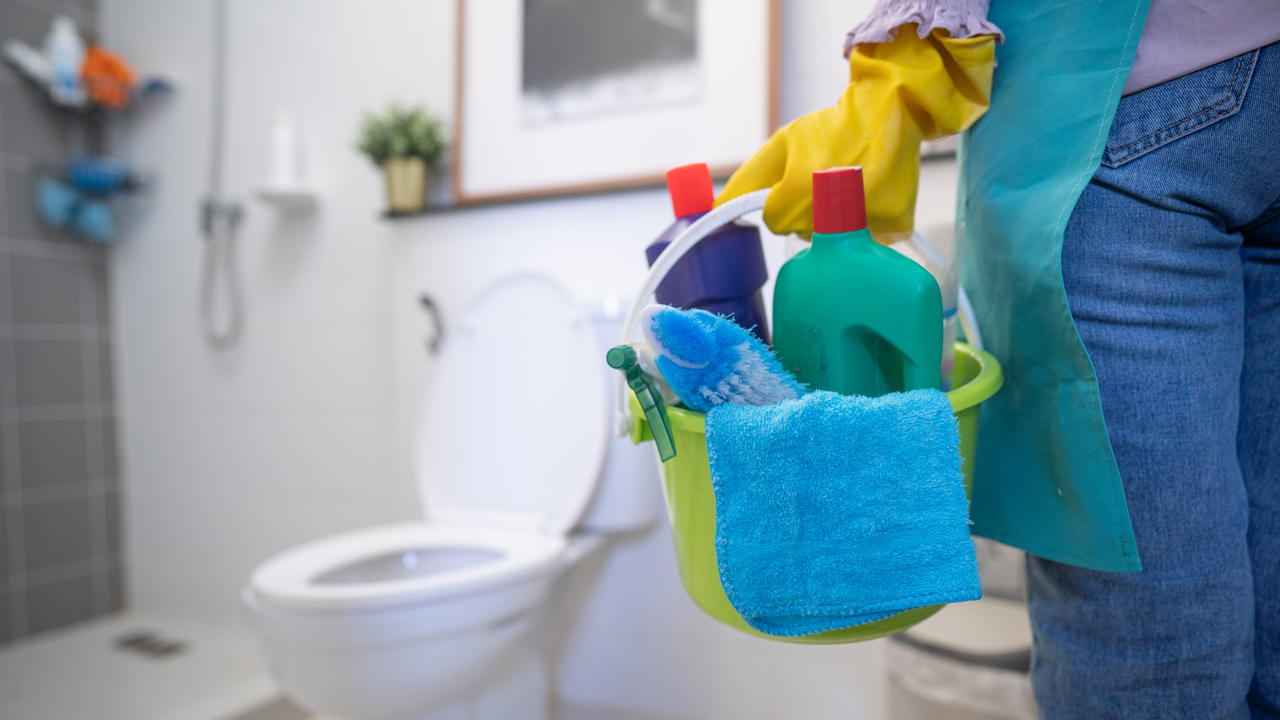
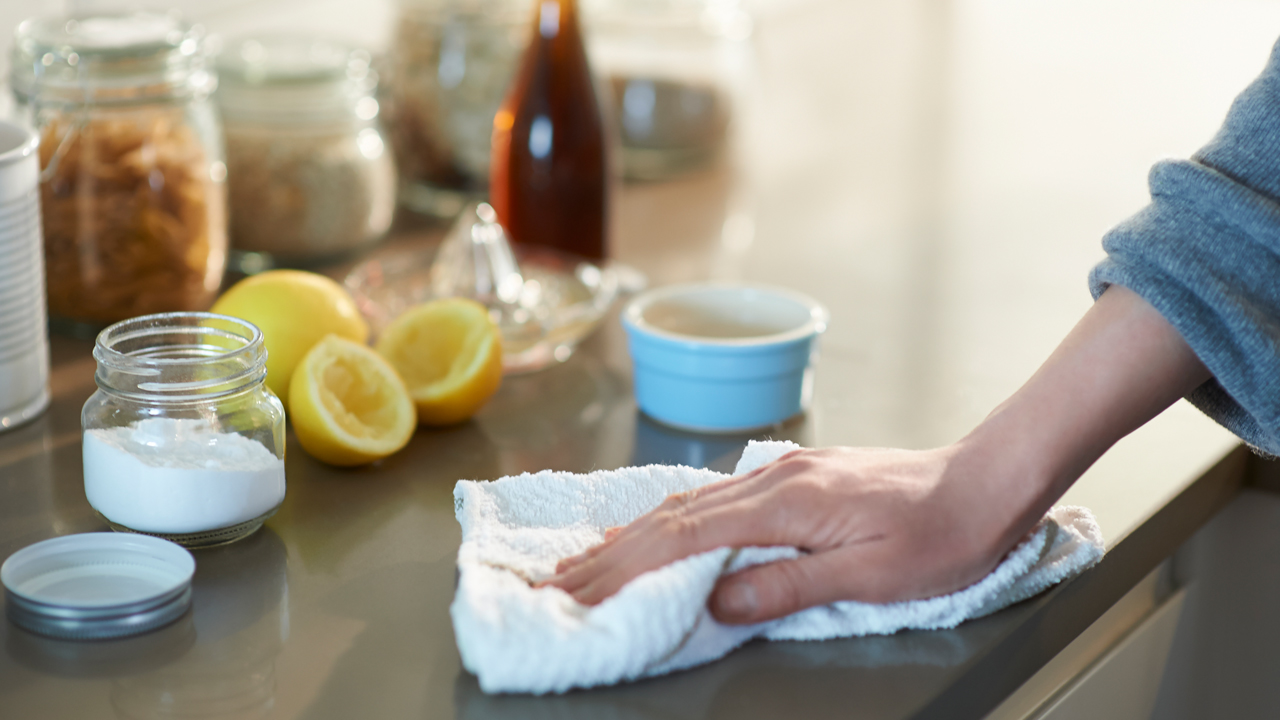
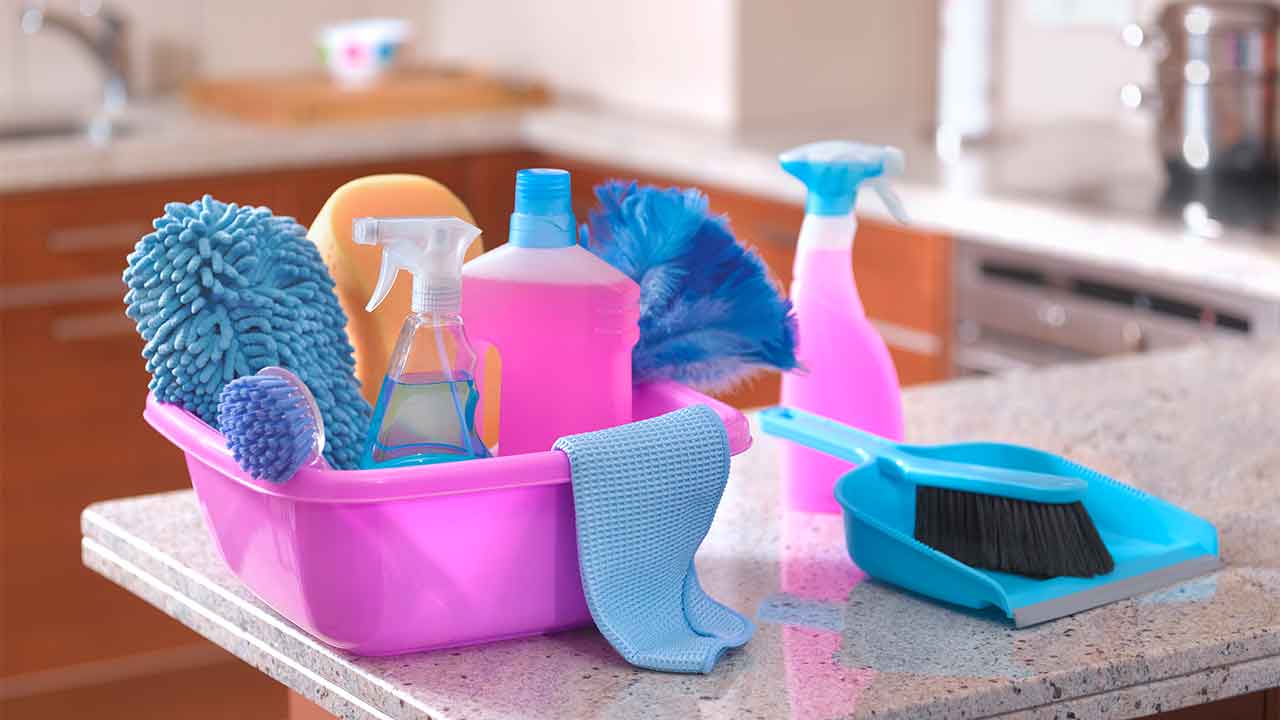
<p>Aside from feverishly burning incense or lighting scented candles every time guests pop by, how can you exorcise those doggy and kitty odour-demons? For a start, stock up on natural cleaning supplies to scrub and tidy your house thoroughly and frequently.</p> <p>“Use a combination of bicarb soda and white vinegar, and enzyme-based sprays help to neutralise odours and take stains away,” advises Morrison. “This way pets aren’t at risk of absorbing chemicals through their paws.”</p> 
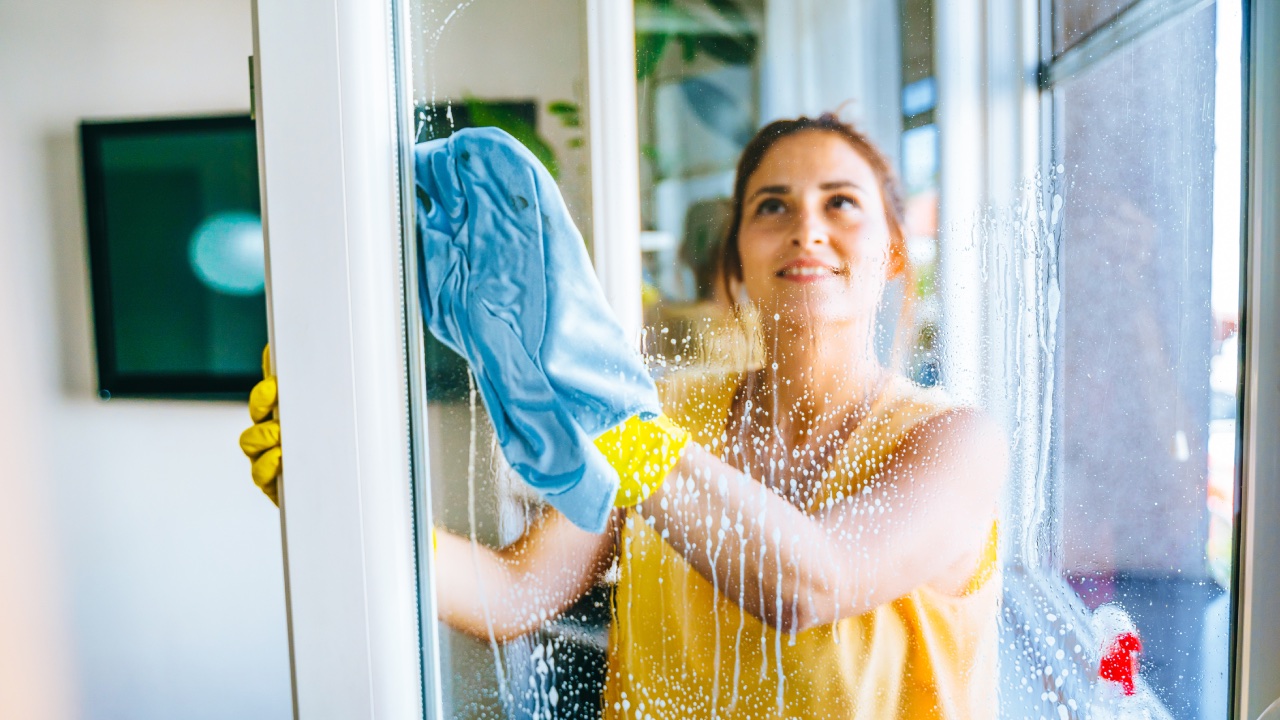
<p>Opening windows regularly will also help blow unpleasant smells away.</p> 
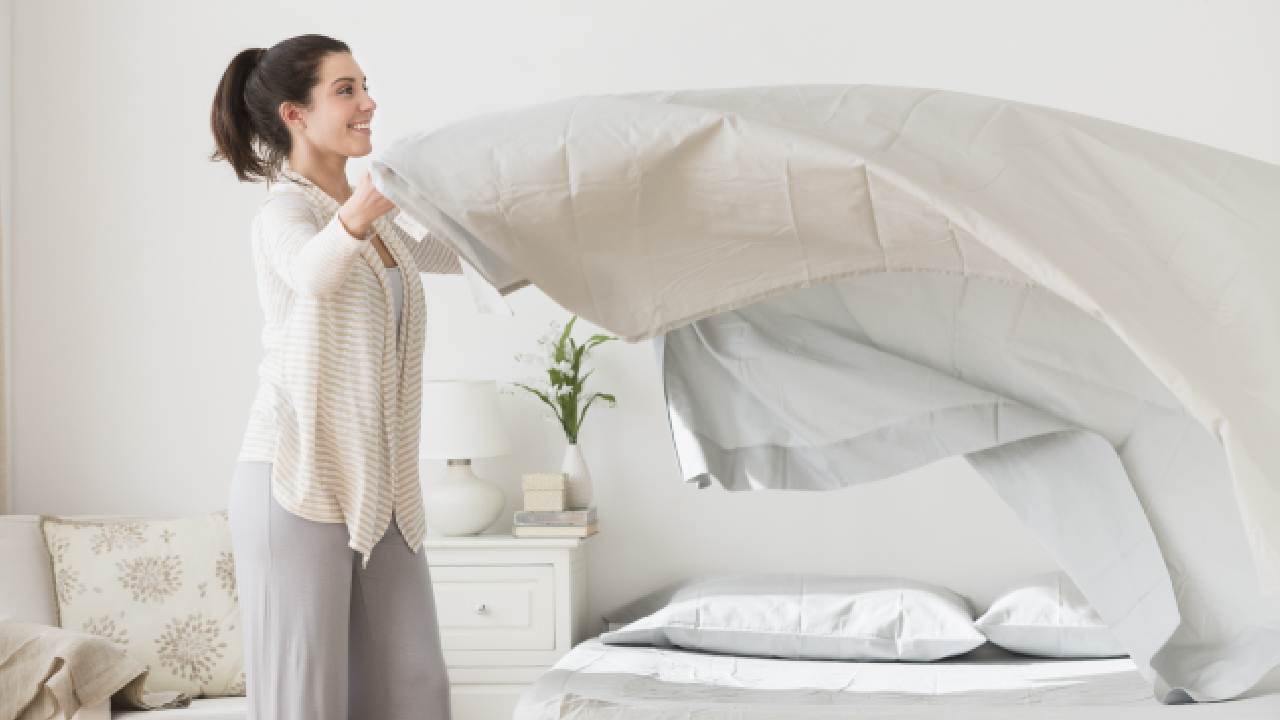
<p>When it comes to tackling the source of the smell, it pays to keep pets clean, but don’t wash them too much.</p> <p>“In order to ensure a dog’s coat and skin maintains their natural oils, we recommend only washing them once a month with flea control shampoo and just rinsing off their paws after walks,” explains Morrison. “Washing their bedding once a month will also discourage fleas.”</p> <p><a href="https://www.petbarn.com.au/services/diy-dog-wash" target="_blank" rel="noopener">Pe</a>tbarn DIY dog wash units can help you keep your pet healthy and happy. If you’d prefer to outsource to the experts, Petbarn also has a variety of grooming services on offer, from deluxe baths to coat conditioning treatments and bad breath fixes.</p> <p>Cat owners will need at least one kitty litter tray. These be should be placed somewhere private and out of the way, such as a laundry, but away from the cat’s food and water. Avoid moving them, as this will confuse and stress the cat.</p> <p>Sonia Trichter, president of rehoming centre Friends of the Pound, says cleaning litter trays consistently is crucial.</p> <p>“They should be scooped every time they’re used, and we use a double tray system so we scoop the bottom as well. Then if they’re too used, you empty the whole thing out, clean it, and start with fresh litter.”</p> <p><em>Written by Erin Munro. Republished with permission of <a href="https://www.domain.com.au" target="_blank" rel="noopener"><strong><span style="text-decoration: underline;">Domain.com.au.</span></strong></a></em></p> <p><em>Images: Getty</em></p>

Home & Garden

Placeholder Content Image

How to clean jewellery at home: 14 household items that work miracles

<h2>How to make your jewellery shine</h2> <p>If you want to clean your bling but don’t want to shell out lots of money for a professional, fear not – there are lots of easy methods for how to clean jewellery right at home. You don’t have to save it for your most valuable cocktail rings or necklaces, either. Even the best affordable jewellery needs a cleaning every now and then, especially those delicate earrings that you never take off, even after they turn your skin green.</p> <h2>What is the best home remedy to clean jewellery?</h2> <p>These trusted everyday items are just as good as (if not better than) jewellery cleaner, and you probably already have most of them in the house.</p> <h2>Alka-Seltzer</h2> <p>Drop your dull-looking jewellery in a glass of fizzing Alka-Seltzer for a couple of minutes. It will sparkle and shine when you pull it out.</p> <h2>Aluminium foil</h2> <p>Here’s how to clean jewellery with aluminium foil: simply line a small bowl with it. Fill the bowl with hot water and mix in one tablespoon of bleach-free powdered laundry detergent. Put the jewellery in the solution and let it soak for one minute. Rinse well and air-dry. This procedure makes use of the chemical process known as ion exchange, which can also be used to clean silverware.</p> <h2>Ammonia</h2> <p>Brighten up your gold and silver trinkets by soaking them for ten minutes in a solution of 1/2 cup clear ammonia mixed with 1 cup warm water. Gently wipe clean with a soft cloth and let dry. Note: do not do this with jewellery containing pearls, because it could dull or damage their delicate surface.</p> <h2>Baking soda</h2> <p>To remove built-up tarnish from your silver, make a thick paste with 1/4 cup baking soda and 2 tablespoons water. Apply with a damp sponge and gently rub, rinse, and buff dry. To polish gold jewellery, cover with a light coating of baking soda, pour a bit of vinegar over it, and rinse clean. Note: do not use this technique with jewellery containing pearls or gemstones, as it could damage their finish or loosen any glue.</p> <h2>Light-coloured beer</h2> <p>Get the shine back in your solid gold rings (read: bands without any gemstones) and other jewellery by pouring a bit of light-coloured beer (not dark ale!) onto a soft cloth and rubbing it gently over the piece. Use a clean second cloth or towel to dry.</p> <h2>Soda water</h2> <p>Soak your diamonds, rubies, sapphires, and emeralds in club soda to give them a bright sheen. Simply place them in a glass full of soda water and let them soak overnight.</p> <h2>Denture tablets</h2> <p>Has your diamond ring lost its sparkle? Here’s how to clean jewellery using denture tablets: drop the tablet into a glass along with 1 cup water. Follow that with your ring or diamond earrings. Let it sit for a few minutes. Remove your jewellery and rinse to reveal the old sparkle and shine.</p> <h2>Ketchup</h2> <p>Let ketchup do the work of shining tarnished silver. If your ring, bracelet, or earring has a smooth surface, dunk it in a small bowl of ketchup for a few minutes. If it has a tooled or detailed surface, use an old toothbrush to work ketchup into the crevices. To avoid damaging the silver, don’t leave the ketchup on any longer than necessary. Rinse your jewellery clean, dry it, and it’s ready to wear.</p> <h2>Toothpaste</h2> <p>Put a little toothpaste on an old toothbrush and use it to make your diamond ring sparkle instead of your teeth. Clean off the residue with a damp cloth.</p> <h2>Vinegar</h2> <p>Is vinegar good for cleaning jewellery? Yes! Here’s how to clean jewellery with it: soak your pure silver bracelets, rings, and other jewellery in a mixture of 1/2 cup white vinegar and 2 tablespoons baking soda for two to three hours. Rinse them under cold water and dry thoroughly with a soft cloth.</p> <p> </p> <div> </div> <p> </p> <h2>Vodka</h2> <p>In a pinch, a few drops of vodka will clean any kind of glass or jewellery with crystalline gemstones. So although people might give you strange looks, you could dip a napkin into your vodka on the rocks to wipe away the grime on your eyeglasses or dunk your diamond ring for a few minutes to get it sparkling again. But don’t try this with contact lenses! Also, avoid getting alcohol on any gemstone that’s not a crystal. Only diamonds, emeralds and the like will benefit from a vodka bath.</p> <h2>Window cleaner</h2> <p>Use window cleaner to spruce up jewellery that is all metal or has crystalline gemstones such as diamonds or rubies. Spray on the cleaner, then use an old toothbrush for cleaning. But don’t do this if the piece has opaque stones such as opal or turquoise, or organic gems such as coral or pearl. The ammonia and detergents in the cleaner can discolour these porous lovelies.</p> <h2>Dish soap</h2> <p>Dish soap can do a whole lot more than just clean your kitchen! It’s great for regular jewellery cleaning. All you need to do is mix a few drops of dish soap with warm water and let the jewellery soak in the solution for a few minutes. You can use this method for silver jewellery too, but you’re better off using a toothbrush or cloth to wipe down that jewellery rather than fully submerging it. Don’t forget to rinse!</p> <h2>Shampoo</h2> <p>A bit of mild shampoo – think baby shampoo – is a great way to polish your pearls. Stones like turquoise and opals will benefit from this treatment as well. To use this method most effectively, mix a little bit of shampoo with warm water and use a soft, clean brush like a makeup brush to polish each pearl with the mixture. You don’t want to risk damaging pearls by soaking them.</p> <p><em>Image credit: Shutterstock</em></p> <p><em>This article originally appeared on <a href="https://www.readersdigest.co.nz/food-home-garden/diy-tips/how-to-clean-jewellery-at-home-14-household-items-that-work-miracles?pages=2" target="_blank" rel="noopener">Reader's Digest</a>.</em></p>

Home Hints & Tips

Placeholder Content Image

7 ways to clean your kitchen with simple household items

<p>The folks at <a href="http://food52.com/blog/14173-7-kitchen-cleaning-tricks-that-really-work" target="_blank" rel="noopener"><span><strong>Food52</strong></span></a> have exhibited some inspired thinking and shown how we can solve various household problems with simple household items. Some of these are way too clever.</p> <p><strong>1. Get rid of fruit flies in your kitchen</strong></p> <p>Before you flood your kitchen with Mortein, consider this method. Simply halve a lemon, put both sides in your oven and leave the door propped open overnight. In the morning close the door and turn the grill on for a few minutes. Turn it off, let the oven cool, throw away the lemons, clean the bottom of your oven and voila, no more fruit flies! It sounds strange but it really works.</p> <p><strong>2. Remove hard water deposits using just vinegar</strong></p> <p>Forget toxic chemicals, you can brings your dingy sinks back to their glory by simply applying vinegar. It’s not just good for fish and chips – it’s pretty much a ready-made, powerful household cleaner.</p> <p><strong>3. Clean kitchen cabinets with baking soda</strong></p> <p>The perfect cleaner for your gunky kitchen cabinets is actually already sitting in your kitchen! Make a solution that’s one part vegetable oil, two parts baking soda and you can clean those gunky kitchen cabinets in no time at all. All you need is a sponge, toothbrush or even just your fingers.</p> <p><strong>4. Cleaning white sinks with lemons</strong></p> <p>When life gives you lemons, you actually have the perfect tool for cleaning your sink. White sinks can look dodgy with the smallest bits of mess, so combine baking soda with a lemon half to kill germs and bring back shine. Sprinkle the soda in the sink and use your lemon wedge as a scrubber.</p> <p><strong>5. Toothpicks for mixers and machinery</strong></p> <p>Electric mixers and other devices can open up a world of possibilities in the kitchen, but they get dirty fast. A good way to get around this is by using a toothpick to get into any cracks and crevices that may have opened up. Then simply wipe off the residue with a damp cloth.</p> <p><strong>6. Get rid of grout with baking soda and vinegar</strong></p> <p>These two common household items combing to make a gentle solution that's very effective at getting rid of stains. Simple make a paste, apply it to the grout and let it sit for a little while. Before too long spray it with vinegar. It will fizz a little, then scrub with a toothbrush and voila – clean!</p> <p><strong>7. Clean the air in odd smelling kitchens</strong></p> <p>Sometimes no matter how hard we try we just can’t get our kitchens to smell clean. But before you go all gung-ho with the bleach, try this solution. Simmer some vinegar on the stove. This will help you clean the air and restore it to a more neutral smell for cooking and cleaning.</p> <p><em>Images: Getty</em></p>

Home Hints & Tips

Placeholder Content Image

10 amazing home cleaning tips everyone should know

<p>Do you ever find that you can’t get certain items in your home quite as shiny-clean as you would like them? Try some of our tips below and then sit back and admire your handiwork.</p> <p>1. Clean your oven racks in the laundry tub or bath. Add a cup of NapiSan while you fill the tub with hot water. Leave the racks to soak for two hours and the grease should wipe off easily.</p> <p>2. Remove sticky labels from jars, windows or mirrors by pouring eucalyptus oil onto a cloth and wiping gently over the area.</p> <p>3. Cleaning your dishwasher is quick and easy. After unloading the dishwasher, place a mug of white vinegar upright in the top rack and another one in the bottom rack. Run on a hot wash. It should then be easy to remove any grease or grime with a clean cloth.</p> <p>4. Instead of having to clean the tops of your cupboards in the kitchen, place some newspaper on the top. Once a month, change the paper and give the top of the cupboards a quick wipe down.</p> <p>5. If you’ve got a big area to vacuum, plug it into an extension lead. It saves time plugging in and re-plugging.</p> <p>6. For a super shiny sink, boil a full kettle and then spray the entire sink with white vinegar in a spray bottle. Sprinkle over some baking soda and leave for ten minutes. Give the sink a good scrub (get an old toothbrush out if you need to get into tricky spots) and then pour over the boiled water. Spray with more vinegar and get any last bits of grime off. Dry off the sink with an old tea towel and then buff the sink with some olive oil on a rag.</p> <p>7. If you break a glass, use Blu Tack to pick up the tiny shards. Simply throw away the Blu Tack when finished.</p> <p>8. After using your blender, rinse it out and pour in a capful of washing up liquid and a cup of warm water. Place the lid back on (very important!) and turn on for around 15 seconds. Rinse well under warm water and the majority of the mess will be gone.</p> <p>9. To clean your microwave, soak a sponge in warm water and place in the microwave for one minute. The steam will make it easy to wipe the inside of the microwave clean.</p> <p>10. If your iron needs a bit of a clean, pop some toothpaste on an old toothbrush and give it a scrub before wiping clean with a damp cloth.</p> <p><em>Image credits: Getty Images</em></p>

Home & Garden

Placeholder Content Image

How to clean your glasses the right way

<p dir="ltr">Is there anything worse than dirty glasses? We already can’t see properly without them! Many people believe glass cleaner is the best way to clean your eyeglasses, but we’re here to tell you it’s not.</p> <p dir="ltr"><strong>Clean your eyeglasses with soap:</strong></p> <p dir="ltr">Cleaning glasses with soap is scratch-free, cheap and easy. You need to wash them gently, but it’s a method that will not harm your eyewear.</p> <ol> <li dir="ltr" role="presentation">Rinse your glasses in warm water</li> <li dir="ltr" role="presentation">Add a drop of gentle dish soap to the lenses</li> <li dir="ltr" role="presentation">Smear the soap on both sides, including the earpieces</li> <li dir="ltr" role="presentation">Rinse off the soap</li> <li dir="ltr" role="presentation">Dry them with a lint-free or microfibre cloth</li> </ol> <p dir="ltr" role="presentation"><strong>Things to avoid:</strong></p> <ol> <li dir="ltr" role="presentation">Paper towels</li> <li dir="ltr" role="presentation">Tissues</li> <li dir="ltr" role="presentation">Shirttails</li> <li dir="ltr" role="presentation">Acetone</li> <li dir="ltr" role="presentation">Windex</li> </ol> <p dir="ltr">Although Windex and other glass cleaners may seem like the best way, the chemicals in these formulas have the potential to remove coatings you’ve paid to put on your lenses. The safest, best way to give your glasses that brand-spanking-new shine is to use basic dish soap!</p> <p dir="ltr"><em>Image credit: Shutterstock</em></p>

Home Hints & Tips

Placeholder Content Image

How many of these dirty spots in the home are you guilty of NOT cleaning?

<p>Just when you think you’ve got the house spick and span, along comes a list like this to keep you on your toes.</p> <p><strong>Ceiling fans</strong></p> <p>The tops of these can get dusty and grimy quickly, especially if they are anywhere near the kitchen. Get up there with a hot soapy cloth and give them a good wipe down.</p> <p><strong>TV remote</strong></p> <p>Dirty fingers can leave sticky marks on your remote, which should be cleaned with a slightly damp cloth. If you ever eat in front of the TV you can just imagine how dirty the remote must be.</p> <p><strong>Dustpan and brush</strong></p> <p>The products that clean up the mess need a wash now and then too. A soak in a bucket of hot water and bleach is a great way to clean these. Then allow to dry in the sun.</p> <p><strong>Yoga mat</strong></p> <p>All that Zen-sweat can be a breeding ground for bacteria. Give your yoga mat a clean regularly by taking it in the shower with you and rubbing it with soap or shower gel, then dry on the line. While you’re in the mood, pop your gym bag in the wash too.</p> <p><strong>Cloth bags</strong></p> <p>If you’re toting around your groceries in a cloth bag, little bits of food can start to accumulate in the bottom. Throw them in the washing machine regularly to keep them in good condition.</p> <p><strong>Tops of doors and picture rails</strong></p> <p>What you don’t see can easily be forgotten but the tops of doors and rails can quickly accumulate dust and grime. Get up there with a hot soapy cloth, followed by a buff with a dry clean cloth.</p> <p><strong>Bathroom door handle</strong></p> <p>We don’t need to go into too much detail as to why you need to clean this, but it is important that you do it.</p> <p><strong>Fridge seals and handle</strong></p> <p>The grime that gets in your seals can be easily removed with a hot soapy cloth. Remember to clean the handle regularly too – just think how many times you open the fridge when preparing food (with potentially sticky fingers).</p> <p><strong>Hairbrush</strong></p> <p>All that hair and dead skin accumulates quickly in a brush. Remove any hair and then use hot soapy water to soak your brushes. Allow them to dry in the sun.  </p> <p><strong>Sponges</strong></p> <p>It’s scary to think that the item you use to clean your whole kitchen could be harbouring some serious bacteria. You need to regularly clean your sponges and cloths by soaking them in the sink with a big glug of bleach in hot water.</p> <p><em>Image: Getty Images</em></p>

Home Hints & Tips

Placeholder Content Image

13 clever house-cleaning hacks from professional cleaners

<p><strong>Don't forget the doormat</strong></p> <p>Doormats are your best friend when it comes to trapping dirt, so make sure you have two – one outside the house and one inside.</p> <p>This tip is especially helpful when there’s a lot of rain and you have wet, muddy shoes going in and out of the house.</p> <p>Just be sure to clean the mats regularly as dirty mats contribute to the mess.</p> <p><strong>Combine tasks</strong></p> <p>Kill two birds with one stone by doing similar cleaning tasks at the same time.</p> <p>“Clean your baseboards when you are vacuuming or washing floors, clean blinds when you are cleaning windows, etc,” suggests Becky Rapinchuk, owner of <a href="https://www.cleanmama.net/" target="_blank" rel="noopener noreferrer">CleanMama.net.</a></p> <p><strong>Skip the bucket</strong></p> <p>Sometimes moving around the mop bucket only makes more of a mess thanks to the dirty water splashing around.</p> <p>Leslie Reichert, founder of The Green Cleaning Coach and author of <em>The Joy Of Green Cleaning</em>, has a bucket-less mopping technique that works wonders: a spray bottle filled with diluted cleaning solution and a microfibre mop. Or choose a mop that allows you to fill the base with water and a little floor cleaner and spray from the handle as you go.</p> <p><strong>Stock up on products</strong></p> <p>No, a bathroom tile cleaner shouldn’t be used to wipe down your mirrors.</p> <p>“The right products that actually clean go a long way to getting the job done more effectively and efficiently for you,” says McGee.</p> <p><strong>Buy a soap dispenser dish brush</strong></p> <p>According to Dana White, founder of <a href="https://www.aslobcomesclean.com/" target="_blank" rel="noopener">A Slob Comes Clean</a>, you can use a soap dispenser dish brush in your shower.</p> <p>“Mark it for the bathroom only with a permanent marker, and fill it with your favorite dish soap,” she says.</p> <p>“Hang it in the shower, and you can scrub the shower while you’re in it anyway. Dish soap does a great job cleaning the bathroom!”</p> <p><strong>Vacuum the right way</strong></p> <p>Rapinchuk recommends first vacuuming a room horizontally and then vertically to get all of the trapped dirt.</p> <p>Most cleaning experts agree that vacuuming slowly is also very important to ensure that vacuum picks up all the dirt particles.</p> <p><strong>Define "clean"</strong></p> <p>Everyone has a different idea of what “clean” actually means.</p> <p>Some think a sparkling floor is clean, while others are happy with just doing a load of laundry.</p> <p>Beth McGee, author of <em>Get Your House Clean Now: The Home Cleaning Method Anyone Can Master</em>, suggests asking yourself questions like how much stuff do I have and what type of home do I have to determine what clean and organised really means to you.</p> <p><strong>A pillowcase can be a cleaner</strong></p> <p>Obviously, you don’t want to use the pillowcase you sleep on every night, but using a pillowcase to clean your ceiling fans is a hack that you need to try ASAP.</p> <p>“The pillowcase holds the dust so it doesn’t fall on a table or bed,” says Reichert.</p> <p>“A very clean way to dust a fan.”</p> <p><strong>Create a cleaning plan</strong></p> <p>We all have those random cleaning bursts, but having a plan beforehand will make your cleaning process smoother.</p> <p>“Cleaning is really like a dance. You start high, work down and around, and carefully observe anything that needs attention,” says McGee.</p> <p>“As you move around, wipe light switches, door frames, baseboards, walls, working in a circle around a room and not back and forth from one thing across the room to another. Don’t get distracted, keep a smooth motion around your home.”</p> <p><strong>Use your dishwasher</strong></p> <p>Dishwashers are for so much more than just washing dishes.</p> <p>Reichert recommends using yours to dust off knickknacks like jars, toys and glass candle globes.</p> <p>Pretty much anything glass or ceramic should be fine going in the dishwasher, but you do want to stay away from putting meltable plastics.</p> <p><strong>DIY cleaning solutions</strong></p> <p>Want to know the secret to streak-free mirrors and windows? Well, it’s an easy at-home solution you can make yourself. According to Rapinchuk, all you need is:</p> <ul> <li>1 1/2 cups water</li> <li>1 1/2 tablespoons white vinegar</li> <li>1 1/2 tablespoons rubbing alcohol</li> <li>3 drops peppermint essential oil</li> </ul> <p>Place in a spray bottle, and away you go.</p> <p><strong>Clean the toilet daily</strong></p> <p>If you swish your toilet every day with your cleaning brush, you’ll keep it relatively clean without a ton of hard labour.</p> <p>Use the water already in the toilet to swish the entire toilet bowl.</p> <p>Your bathroom probably gets dirtiest the fastest and is the hardest to clean.</p> <p><strong>Skip the polish</strong></p> <p>Of course, you need to polish your wooden furniture and hardwood floors every once in a while (once or twice a year, or when they begin to look foggy), but all you really need to keep them shiny is a dry microfibre cloth.</p> <p>“Your furniture will actually get less dusty without using furniture polish,” says Reichert.</p> <p><strong>Prioritise</strong></p> <p>“[Start] with scrubbing areas such as kitchens and baths, then moving on to de-cluttering, dusting, bedding, and finally floors,” McGee advises.</p> <p>“Look at your home carefully to determine what needs most attention to bring it to your idea of clean.”</p> <p><strong>Speed clean</strong></p> <p>Maybe you just found out your in-laws are coming over and you need to quickly tidy up the place – knowing how to speed clean will be your saviour.</p> <p>Make sure you hit the places that are most visible first like kitchen countertops and the bathroom.</p> <p>You can skimp on things like the top of the fridge and behind the coffee maker.</p> <p><strong>Purchase a paintbrush</strong></p> <p>Reichert uses a stiff paintbrush around her furniture to pull the dirt out without having to move all the furniture around.</p> <p>“You are brushing it out away from the furniture so the vacuum can suck it up,” she says.</p> <p><em>Image credits: Getty Images</em></p> <p><em>This article originally appeared on <a href="https://www.readersdigest.co.nz/home-tips/clever-house-cleaning-hacks-professionals-swear?pages=1" target="_blank" rel="noopener">Reader's Digest</a>. </em></p>

Home & Garden

Placeholder Content Image

10 things aeroplanes aren’t cleaning as they should

<h2>Illness breeding ground</h2> <p>Sitting amongst strangers in a confined space for any amount of time just feels like a breeding ground for illness. But how well are these aircrafts being cleaned? The answer may make you pack your own sanitising wipes ahead of your next flight.</p> <h2>Seatbelt buckles</h2> <p>Unless you ask the person sitting next to you to buckle your seatbelt (which we don’t recommend), you’re going to touch that piece of metal at least twice during a flight, once before takeoff, and once when you land. Unfortunately, these oft-used items aren’t getting the spick and span treatment you’d like. According to Travelmath, the average aeroplane seatbelt buckle tested for 230 colony-forming units (CFU) per square inch. </p> <h2>Seatback pockets</h2> <p>That slim seatback pocket looks innocent enough at first glance. After all, it holds your passenger safety information and inflight magazine. But the cloth that covers it isn’t getting much attention from cabin cleaners. According to a study conducted at Auburn University, the pocket is pretty darn disgusting. Seeing as passengers often stuff trash in that pocket (think used tissues and dirty diapers), it sees its fair share of bacteria. In fact, their study showed that the germs found in this location survived the longest out of any surface on an aeroplane at around seven days. </p> <h2>Tray tables</h2> <p>Cabin cleaners only do a speedy wipe down of aeroplanes in between flights because they simply aren’t given enough time to do more during these quick turnovers. Believe it or not, tray tables aren’t typically among the surfaces that get cleaned between domestic flights, according to the Wall Street Journal. They typically are only addressed during overnight cleanings. </p> <h2>Headrest</h2> <p>A different study of airline hygiene conducted by Marketplace and analysed in a laboratory at the University of Guelph cited a different surface as being the most bacteria-laden – the headrest. According to their study, the “highest total aerobic count, hemolytic bacteria, and E.coli” were found here. The headrest is nearly impossible to avoid unless you bring something to slip over it, which makes sense that it would come into contact with the most germs.</p> <h2>Blankets</h2> <p>Complimentary blankets are pretty much a thing of the past among airlines these days, particularly in economy class, and that might just be a good thing. Back in 2008, the Wall Street Journal revealed that these once common aeroplane items were only washed every five to 30 days. When flying, BYOB (Bring Your Own Blanket). </p> <h2>The floor</h2> <p>A quick vacuum job in between flights does not a clean carpet make, especially when you have hundreds of pairs of shoes traipsing up and down the aisles of an aeroplane day-in and day-out. According to an article in USA Today, cleanliness isn’t regulated by the FAA. It’s standard that a plane goes through a deep clean about once a month and perhaps then that carpeting will get extra attention. Even so, it’s best to steer clear of placing your belongings on the floor if you can help it. Once you’ve reached your destination, here’s how to have a healthy and clean hotel stay.</p> <h2>Bathroom surfaces</h2> <p>Yes, cabin cleaners do a wipe down of lavatories after an aircraft’s passengers have deplaned, but think about how many people use the facilities during the flight and how many hours go by before that cleaning happens. In an interview with TIME, University of Arizona microbiologist Dr Charles Gerba said, “It’s hard to beat the restroom because the water shuts off so people can’t complete hand washing. The sinks are so small that people with large hands can’t even fit them fully underneath the faucets.”</p> <h2>Menus/safety information pamphlets</h2> <p>We’ve already addressed the icky stuff that often contaminates seatback pockets, but consider the material that’s actually supposed to be in this area. With barely ten to 15 minutes to tidy a cabin, according to the New York Times, cleaners don’t have time to wipe down every menu and safety pamphlet in those pockets. When you consider how often they are touched by human hands (and the garbage that gets tossed into the pockets), this literature is a breeding ground for gross.</p> <h2>Overhead air vent</h2> <p>Adjusting that overhead air vent is something most passengers do to personalise their limited space for comfort, but who is cleaning that surface? Likely no one. It’s one of the dirtiest spots on an aeroplane according to Travelmath.</p> <p><strong>This article originally appeared on <a href="https://www.readersdigest.co.nz/travel/flights/10-things-aeroplanes-arent-cleaning-they-should" target="_blank" rel="noopener">Reader's Digest</a>.</strong></p> <p><em>Image: Shutterstock</em></p>

Travel Trouble

Placeholder Content Image

Cleaning tips that DON’T work

<p>Nobody wants to spend more time than necessary cleaning. If you see any of the following “genius” cleaning tips, steer clear. You’ll be spending twice the time cleaning, because the following advice just doesn’t work.</p> <p><strong>Tip 1: Combining bicarb soda and vinegar creates an all-purpose cleaning solution.</strong></p> <p>Although bicarb soda and vinegar are both great (not to mention cheap) cleaners on their own, unfortunately combining them doesn’t create some super cleaner. Vinegar is acidic and bicarb soda is basic, so combining the two chemically cancels each other out.</p> <p><strong>Tip 2: Spray hairspray on an ink stain to remove it from fabric.</strong></p> <p>In the past this may have worked because hairspray contained alcohol in it. But most hairspray no longer contain that essential ingredient.</p> <p><strong>Tip 3: Use mouthwash to clean a washing machine.</strong></p> <p>Mouthwash is great for getting rid of germs from your mouth, but not so much for your washing machine. Firstly, your washing machine needs much more water to clean it then your mouth. Secondly, to clean an appliance like a washing machine you need some type of bleach in the disinfectant. Finally, it just doesn’t’ make sense because as we first mentioned your mouth is different to your washing machine.</p> <p><strong>Tip 4: A can of coke can clean the toilet.</strong></p> <p>Although the citric acid in coca cola may help clean your toilet, a can of soft drink is just not formulated to clean the multitude of stains and bacteria found on your toilet bowl. It’s also a more expensive cleaner than buying a cheap toilet cleaner.</p> <p>Do you have any more tips that don’t work to add to the list? Share in the comments below.</p> <p><strong>Related links:</strong></p> <p><a href="http://www.oversixty.co.nz/lifestyle/home-garden/2016/09/how-to-remove-mildew-smell-from-towels/"><span style="text-decoration: underline;"><em><strong>How to remove mildew smell from towels</strong></em></span></a></p> <p><a href="http://www.oversixty.co.nz/lifestyle/home-garden/2016/07/natural-ways-to-make-your-home-smell-better/"><span style="text-decoration: underline;"><em><strong>7 natural ways to make your home smell better</strong></em></span></a></p> <p><a href="http://www.oversixty.co.nz/lifestyle/home-garden/2016/06/can-your-house-be-too-clean/"><span style="text-decoration: underline;"><em><strong>Is it possible for your house to be too clean?</strong></em></span></a></p>

Home Hints & Tips

Placeholder Content Image

How often you should clean these household items according to science

<p>Everyone knows the importance of keeping on top of the household chores but sometimes they can get buried in the busyness of life.</p> <p>To help you know how long you have until you need to do a clean an item, here is scientific advice about when you should clean these household items.</p> <p><strong>1. Bed linen</strong></p> <p>When: Every 1-2 weeks</p> <p>Although this timeframe needs to be altered if you shower at night or sleep naked, head of the Allergen and Upper Airways Group at the Woolcock Institute of Medical research, Euan Tovey, says that our bed linen is cleaner than we think. “We’ve done research that showed you don’t get as much exposure to dust mites in bed as we once thought.”</p> <p><strong>2. Pillowcases</strong></p> <p>When: Every 3 days</p> <p>It is a good idea to have a clean pile of pillowcases on hand so that you can swap your old one every two or three nights. This will stop old hair and skin residue from coming back onto you.</p> <p><strong>3. Mattress protector</strong></p> <p>When: Every two months</p> <p>Although this item can be forgotten, it is important to wash your mattress protector every two months. While you are cleaning your protector, it is also beneficial to clean your mattress with baking soda. If you sprinkle the mattress with baking soda for 30 minutes and then vacuum it up, you will remove any odours.</p> <p><strong>4. Microwave</strong></p> <p>When: Weekly</p> <p>A microwave contains all sorts of food splatter, so it is important to do a thorough clean weekly. My Domaine recommends wiping it down and putting a dish filled with half a cup of water and half a cup of white vinegar inside. Then put the microwave on high until the window steams up. Finish by wiping the inside of the microwave with a sponge.</p> <p><strong>5. Sponges</strong></p> <p>When: After every use</p> <p>Unfortunately, microwaving sponges does not rid them of bacteria. Instead, clean them after every use with hot water and dish soap. Reader’s Digest recommends washing them on the hottest washing machine cycle every few days.</p> <p><strong>6. Light switches</strong></p> <p>When: Once a week</p> <p>Light switches should be wiped once a week due to the number of dirty fingers that touch them regularly.</p> <p><strong>7. Bathtub</strong></p> <p>When: Once a week</p> <p>Simmons College found that skin infection causing bacteria was in 26 per cent of baths. So make sure your bath doesn’t get overlooked when you clean the toilet weekly.</p> <p><strong>8. Carpets professionally cleaned</strong></p> <p>When: Every 6-12 months</p> <p>Getting your carpets cleaned professionally every six to 12 months can improve air quality inside your home, according to Robin Wilson. </p> <p><em>Image: Getty</em></p>

Home Hints & Tips

Placeholder Content Image

10 cleaning mistakes that are making your home dirtier

<p>You probably feel good after you complete a household cleaning task; it’s not much fun, but needs to be done and is definitely beneficial. Or is it? Frustratingly, there is a right and a wrong way to clean. Find out if you’re making any of these mistakes that could actually be sabotaging your home’s cleanliness.</p> <p><strong>Mistake: using the same rag around the house</strong></p> <p>Why it’s dirty: Despite spritzing it with a cleaning solution, when you use the same rag in multiple spots around the house, the rag hangs on to the grime from the previous surface and spreads it to whichever surface it touches next. That means bathroom germs get wiped onto kitchen counters, the living room coffee table, and anywhere else that cloth is used, definitely making this one of the ways you’re cleaning your kitchen all wrong.</p> <p>How to fix it: Use a new wad of paper towel for each surface cleaned, or have a microfibre cleaning cloth designated for each area of your home. Microfibre cleaning cloths can be tossed in the laundry or thoroughly washed after each use to remove gunk or grime.</p> <p><strong>Mistake: using a feather duster</strong></p> <p>Why it’s dirty: No matter how much the advertisements for these dusters say the feathers “trap and lock dust,” they don’t. Feather dusters are notorious for spreading dust around a surface or pushing it off to fall to the ground, rather than removing it.</p> <p>How to fix it: Use a microfibre cleaning cloth or a disposable paper towel with an appropriate cleaning solution, depending on the surface being dusted.</p> <p><strong>Mistake: not cleaning the vacuum</strong></p> <p>Why it’s dirty: When a vacuum filter hasn’t been changed or cleaned in a while, not only is the vacuum unable to pick up as much dirt and dust as it should, due to decreased suction, but dirt also is blown back into the air and carpet by the dusty vent.</p> <p>How to fix it: Change or empty vacuum bags or canisters immediately after they become full. Wipe vacuum attachments, the hose, and the vent with either a damp microfibre cleaning cloth or a moist paper towel, double-checking that the vacuum is unplugged first.</p> <p><strong>Mistake: placing a toilet brush back into its holder immediately </strong></p> <p>Why it’s dirty: If a toilet brush is put right back into its holder right after use, the moisture and germs from the toilet get trapped in the container and the brush, where they breed and multiply. These germs are then rubbed back into your toilet the next time the brush is used.</p> <p>How to fix it: After scrubbing, allow the toilet brush to dry completely before returning it to its holder.</p> <p><strong>Mistake: skipping the sink</strong></p> <p>Why it’s dirty: Sinks rapidly grow germs and bacteria due to being a moist environment where food particles tend to get stuck. This issue is compounded when food or standing water is left in the sink, the drain or the garbage disposal.</p> <p>How to fix it: Wipe down the sink after each use.</p> <p><strong>Mistake: cleaning from the ground up</strong></p> <p>Why it’s dirty: When sweeping, mopping or vacuuming the floor before cleaning the furniture, dust, and crumbs fall from tables, counters, and shelves, requiring you to re-clean the floor.</p> <p>How to fix it: Clean a room from the top down. Start with windows, working down to tables and counters, chairs and couches, side and coffee tables, ending with the floor.</p> <p><strong>Mistake: spraying cleaner directly on a surface </strong></p> <p>Why it’s dirty: Spraying a cleaner directly onto furniture, countertops or glass can cause a buildup of the solution, leading to greasy furniture and surfaces, and streaky windows. This also could cause dirt and dust to stick to them more firmly.</p> <p>How to fix it: Spray cleaning solution on a microfibre cleaning cloth or disposable paper towel, then wipe down surfaces.</p> <p><strong>Mistake: not cleaning the washing machine</strong></p> <p>Why it’s dirty: The skin cells, dust mites and stains from clothes can linger in a washing machine drum as well as on the lid or door and detergent dispenser. This leads to washing clothes in dirty water, and eventually, they’ll turn stinky.</p> <p>How to fix it: For a top-loading washer, start it on its longest and hottest wash setting. When the drum is nearly full of water, pour in 1 litre of vinegar and 1 cup of baking soda, leaving the lid open and allowing the mixture to sit in the paused cycle for at least an hour. While the cycle is paused, clean the lid and any other visible nooks and crannies. Close the lid, allowing the wash cycle to run. Repeat vinegar and baking soda wash, if needed, then wipe down the inside of the washer and leave the lid open to allow the washer to dry completely.</p> <p>For a front-loading washer, pour a solution of 1/4 cup each baking soda and water into the detergent compartment and pour 2 cups of vinegar into the drum. Set your machine to the hottest temperature and let it do its thing. When the cycle is over, wipe the drum clean, along with the door, detergent compartment and exterior. Pay extra attention to the gasket. Remember to leave the door ajar between loads for the best air circulation.</p> <p><strong>Mistake: washing a cutting board with dish soap</strong></p> <p>Why it’s dirty: While dish soap and hot water remove visible food residue from a cutting board, the cuts in wood and plastic cutting boards trap microscopic food particles. These breed bacteria that transfer to any foods you prepare on that cutting board.</p> <p>How to fix it: Don’t put it in the dishwasher! A wooden cutting board can warp and crack, while a plastic cutting board can melt in the hot water and steamy environment of a dishwasher. Instead, soak your cutting boards in hydrogen peroxide or a bleach solution (2 tablespoons of bleach and 4 litres of water), rinse with water and dry completely.</p> <p><em>Image credits: Getty Images</em></p> <p><em>This article originally appeared on <a href="https://www.readersdigest.co.nz/food-home-garden/home-tips/10-cleaning-mistakes-that-are-making-your-home-dirtier" target="_blank" rel="noopener">Reader's Digest</a>.</em></p>

Home & Garden